Thinking about Windows Explorer may make you yawn, but you spend a lot of time in it every day. It’s your hub for everything on your system, and it has a lot of cool stuff built-in you probably haven’t noticed. Here are a few tips and tricks for getting more out of it.
View and Sort Your Files However You Want

Windows Explorer has quite a few view options under the hood, and more sorting options than you probably realised were there. You can switch between two basic view modes — “Details” and “Large Icons” — in the bottom right-hand corner, but if you click the View tab, you’ll see even more options. If you want to set an option as the default, head to View > Options > Change Folder and Search Options, click on the View tab, and choose “Apply to Folders”. Your current view mode will become the default for all folders.
If you need to sort a long list of files, open the Details view mode and look at the column headers along the top. You can click on one to sort by that column (for example, click on Size to sort files by size), right-click to add more columns, or click the arrow under a column for some seriously advanced sorting options.
Use Windows 8’s Contextual Tabs
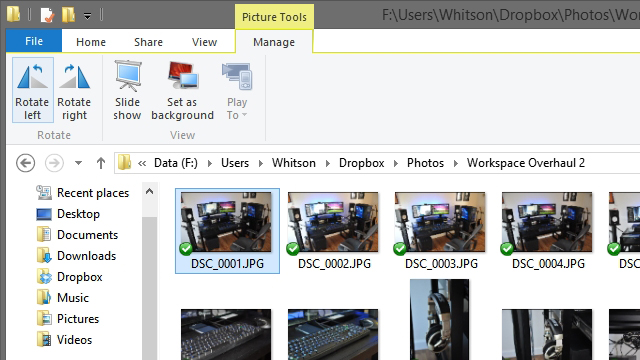
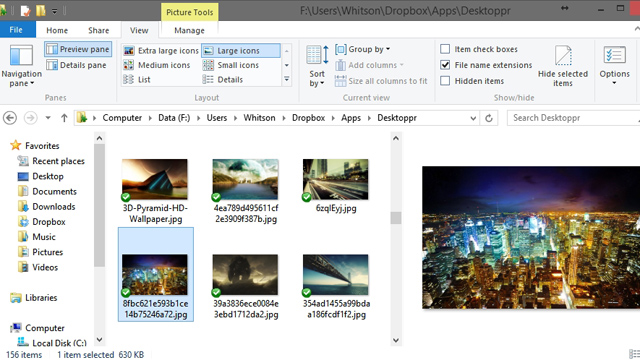
Windows 8 brought Microsoft Office’s familiar “Ribbon” interface to Windows Explorer, and it actually makes Explorer a lot more useful. One of its cooler features is contextual tabs, which give you shortcuts to certain actions based on what kind of files are in the folder. For example, if you go to your My Pictures folder, you’ll see a tab called “Picture Tools” which lets you rotate items with one click, set them as your wallpaper, and more. It works for images, videos, documents, and it’s particularly great for searches.
What’s really cool is that you can optimise specific folders for whatever you want. So, if you keep all your videos on a separate hard drive, you can right-click on that folder, head to Properties > Customise, and choose “Optimise this Folder For Videos” to give yourself the Video Tools tab.
Select Files with Checkboxes
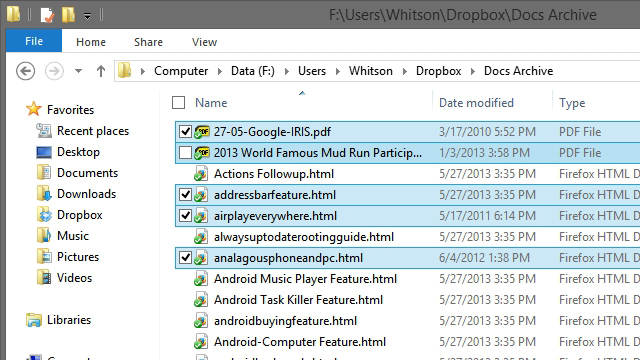
If you’re sick of Ctrl+Clicking a lot of files to select a group, you may want to enable checkboxes in Windows Explorer. It’s a slightly lesser-known feature that’s been around forever, but it can be very useful. Just head to the View tab and on the right-hand side, check the “Item Checkboxes” box. Now, when you hover over a folder or file, you’ll see a little checkbox that you can toggle to select multiple files. It works in any view mode, but seems best suited to the Details mode.
Quickly Toggle Extensions and Hidden Items
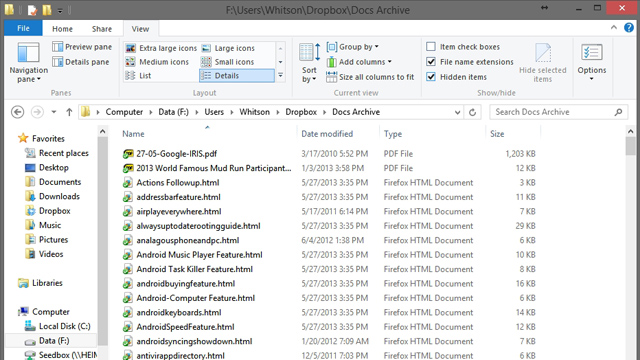
Remember in the old days of Windows, where you had to go digging through Folder Options just to show hidden files or file extensions? Windows 8 has made that a lot easier: just head to the View tab and check the “Hidden Items” or “File Name Extension” boxes on the right-hand side, and uncheck them when you’re done. If you’re still on Windows 7 (or if you’re just more of a keyboard junkie), you can do this with an AutoHotkey shortcut instead.
Make Use of Keyboard Shortcuts
Windows Explorer actually has some pretty useful shortcuts built-in, and not just the ones listed on Microsoft’s web site. MakeUseOf has a pretty solid list of both common and lesser-known shortcuts, including:
- Windows+E: Launch Windows Explorer
- Alt+Left and Alt+Right: Go back and forward
- Alt+D and Ctrl+L: Select Address Bar
- Alt+P: Show or hide the preview pane
- Alt+Enter or Alt+Double Click: Show the properties of the selected file
…and more. Chances are, if you’re doing something in Windows Explorer that takes too many clicks, there’s probably a keyboard shortcut. You just need to find it. And if there isn’t, you can always make one with AutoHotkey.
Make the Search Bar More Useful
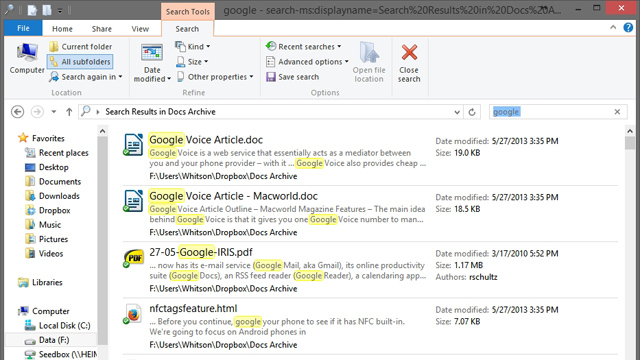
Windows’ search leaves a bit to be desired, especially with the default settings in Windows 7 (Windows 8, in my experience, is a little better). No matter which version of Windows you’re running, though, there are a few things you can do to make it better. With a few settings tweaks, you can make Windows search the contents of your files, choose which file extensions are indexed, and use advanced filters in your searches. Check out our full guide to Windows Search for more info — it’ll make your searches a lot better.
Change Windows Explorer’s Starting Location
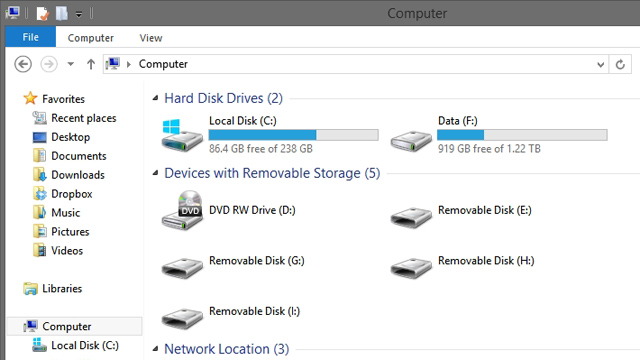
By default, when you start Windows Explorer, it opens up either the Libraries folder (Windows 7) or This PC (Windows 8). If you’d like your starting folder to be something else, it’s possible to do. In Windows 7, you can just change the target of your Windows Explorer shortcut, but in Windows 8.1 and up, it’s a bit more complicated:
- Right-click on the desktop and head to New > Shortcut.
-
When prompted for a location for your shortcut, type the following:
explorer.exe /root,C:UsersWhitsonReplace
C:UsersWhitsonwith the path to your folder of choice. - Click Next, give your shortcut a name, and click Finish.
You should now have a custom Windows Explorer shortcut on your desktop that leads to your desired folder. Add that to the taskbar, and it will take you where you want to go from now on.
Customise the Navigation Sidebar
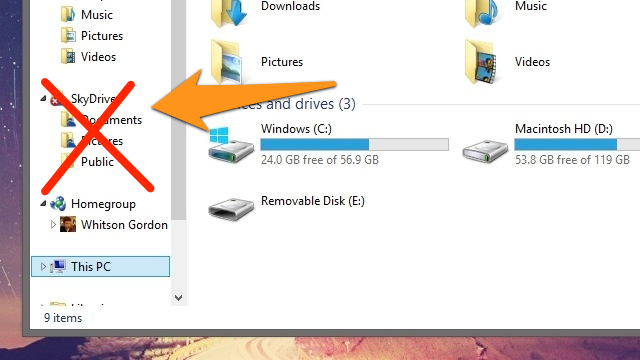
Windows Explorer’s sidebar is a great place to house shortcuts to your favourite folders and other tools, but out of the box, it doesn’t come perfectly organised. You can easily drag oft-used folders to the “Favorites” section, but if you want to get rid of certain things — like Libraries, Homegroup or SkyDrive — you’ll probably have to do some deeper tweaks. Check out how to remove items from the Explorer sidebar, as well as how to remove SkyDrive in Windows 8.1 (and bring back Libraries). If you de-clutter it to include just the shortcuts you actually use, the sidebar can be really helpful.
If All Else Fails: Switch to a New Explorer
I really like Windows Explorer for its balance between simplicity and configurability. But if Windows Explorer just doesn’t do it for you, it may be time to try something a little more advanced, like Xplorer2, Total Commander, Directory Opus or one of the other great file explorers out there. You may find that all you needed was the right tool all along.
Comments
4 responses to “Navigate Files Like A Pro With These Windows Explorer Tips And Tricks”
the Most Viewed box is in the way of the article once you scroll down to View and Sort Your Files However You Want and it stays in the way hindering the reader from seeing any of the text on the left hand half of the screen
Apologies, some broken HTML there. Should be fixed now.
For free Advanced File Manager that is easy for a beginner to use, have a look at Multi Commander from
http://www.snapfiles.com/get/multicommander.html
(I have been happily using Xplorer2 for years but it is not free.)
Tabbed folders is enough for me. I find the advanced explorer apps too busy to be useful for my workflow, though this is probably just familiarity.
For tabbed folders I use qttabbar (link below). You have to step through the settings carefully to get things the way you want them, but once I got that sorted it has been great.
http://qttabbar.wikidot.com/