
Beds are a problem for the nomad: too big to move, too expensive to leave behind. By default, many of us end up with a box spring on the floor, down in the dust bunnies and lost crumbs. Putting the mattress on the ground also eats up a lot of square footage in a cramped apartment, taking away an opportunity for storage underneath.
I moved halfway across the country recently, leaving my old 2×8 Bed behind, and was looking to buy a modern storage bed to replace it. Looking at IKEA’s offerings online, I came across the Brimnes bed and realized hey, I could make that! While this version lacks drawers, it’s still a sleek, low-slung modern bed with four sizable storage compartments, hidden behind sliding geometric screens.
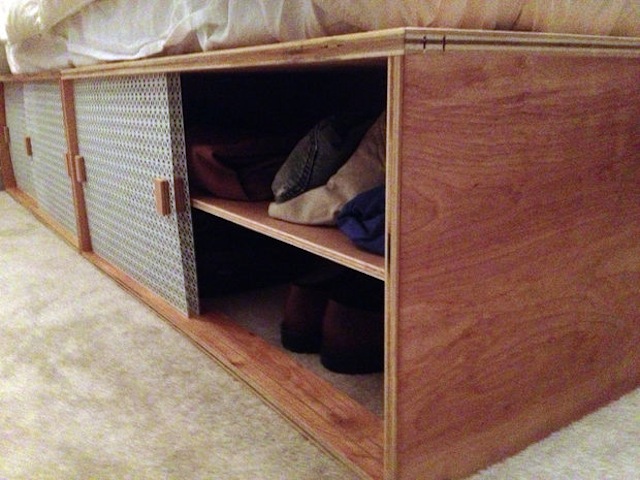
The box bed breaks down into four identical plywood units, each small enough to throw in the backseat. Each unit is stiffened with an internal rib, fitted with a shelf, and has two sliding doors made from old radiator covers. The platform nature of the bed gives good, even support and eliminates the need for a box spring (saving money!).
I made mine from high-grade plywood, running up the cost. Very little of the plywood is actually exposed, so you could substitute cheaper grades to save cash. I used 13mm stock instead of 19mm where possible in an effort to reduce weight and expense. I also made this whole project with just a circular saw; it would go faster and be more accurate if you had access to a table saw.
Materials and Tools
- 2 4×8 sheets 19mm plywood
- 2 4×8 sheets 13mm plywood
- Wood glue
- #6 x 25mm-38mm slip-fit wood or drywall screws (I used Spax hardwood screws, which are superb for preventing splitting in plywood)
- 10mm dowels for shelf pins and screw plugs
- Pencil
- Tape measure
- Speed square
- 4-6 300mm bar clamps
- Circular saw
- Drill/driver
- Relevant safety equipment
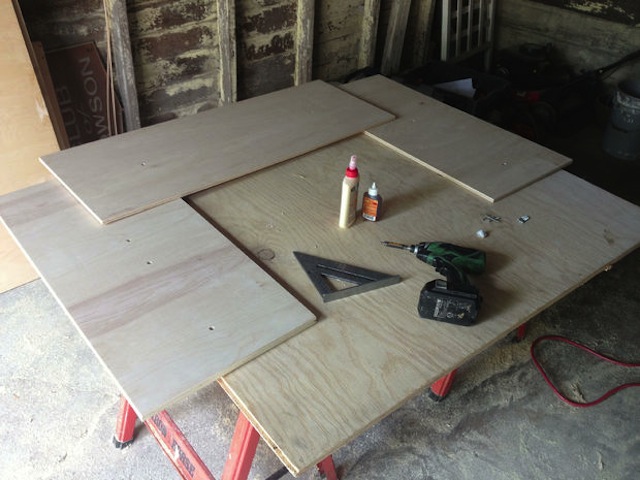
Step 1: Cuts
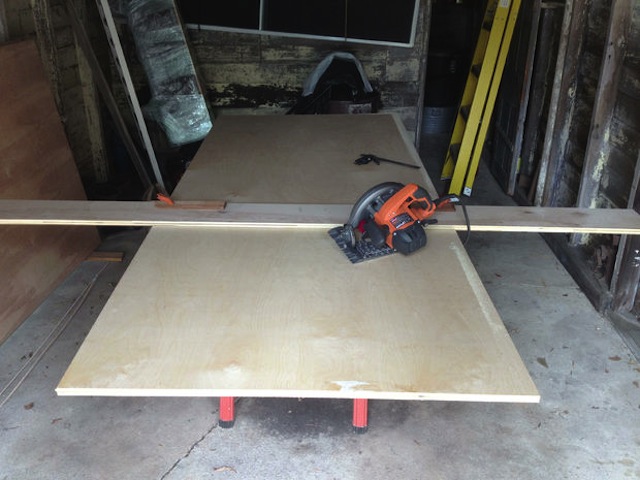
Cut one panel of 19mm plywood at 81.3cm x 106.7cm (the top); one 19mm panel at 81.3cm x 35cm (side one); one 13mm panel at 81.3cm x 35cm (side two); one 13mm panel at 103.5cm x 35cm (the stiffening rib); one 19mm panel at 103.5cm x 76mm (the door track); and one 13mm panel at 103.5cm x 45.7cm (the shelf).
To cut square pieces out of sheet goods with just a circular saw, clamp down a straight edge, forming a temporary fence. Measure your circular saw from the edge of the baseplate to the face of the blade, and offset the straight edge from your desired cut line by that same amount. When cutting, push the straight side of the base plate of the saw against the straight edge, guiding your cut. For clean cuts in sheet goods, use a 60-tooth finishing blade with carbide teeth, which will cut smoothly with minimum chip-out. For cross cuts, clamp down a speed square, registered against the long edge of the work piece, as your saw guide.
All the measuring and clamping and re-arranging is kind of tedious, but important for accuracy. Take the time to make precise cuts, and later joinery will be painless.
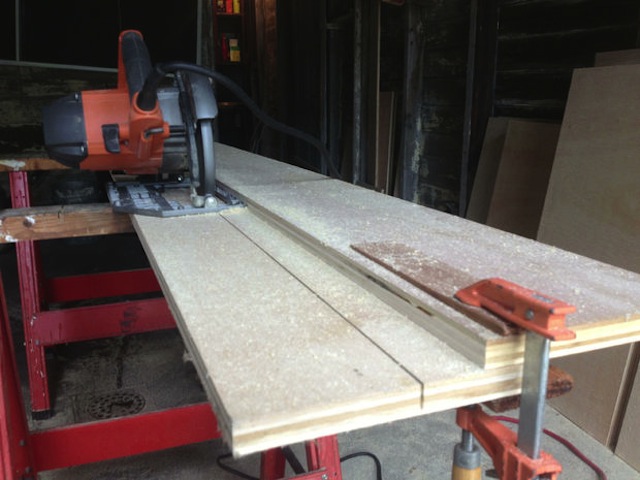
Step 2: Dadoes
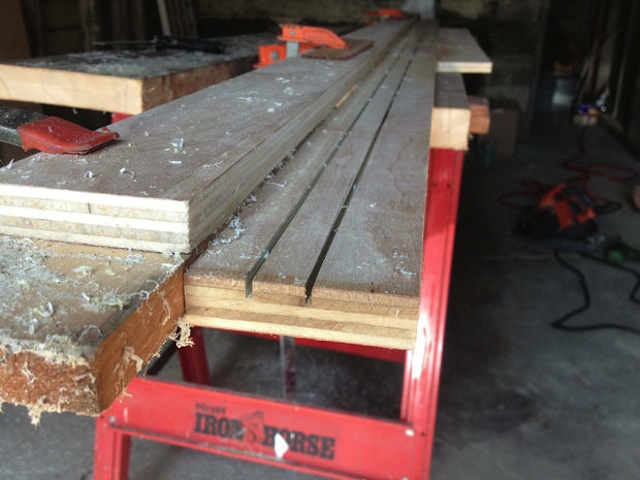
A dado is a groove made in a piece of wood by running a blade through it at a shallow depth. Dadoes are much easier to make on a table saw, so if you have access to one, by all means use it.
Set the blade depth on the circular saw to 9.5mm. Test cut on a piece of scrap to ensure the blade depth is accurate. Run two cuts on the underside of the top (the side that is more flawed), parallel to the long side, at 25.4mm in from the edge and 44mm in from the edge.
Set the blade depth to 3mm. Repeat the above cuts, mirroring them in the 76mm strip of wood that will be the bottom track for the doors.

It is important that these cuts be super accurate, so take care in setting up the straight edge. The depths are also important, as they allow enough play in the doors to make them removable if need be. So again, take care in registering the saw and make some test cuts to confirm accuracy.
Step 3: Assembly
On each 81.3cm x 35.6cm side panel, mark a line 31cm in from 35.6cm edge. Mark out three screw holes. On the opposite side of each panel, mark a line at 304.8mm from the same side, which will serve as a straight line to register the internal rib. I plugged the screw holes for looks, though this is not strictly necessary; if you want, counter-bore each screw hole with a 9.5mm bit, a 6.35mm deep.
Coat one end of the rib with a thin, even layer of wood glue. Tilt up and align one side of the 19mm rib panel with the 304.8mm mark on the side panel. Pre-drill and screw together, using a square to check that everything is flush. Attach the door track parallel to the rib, flush with the front of the 19mm side.
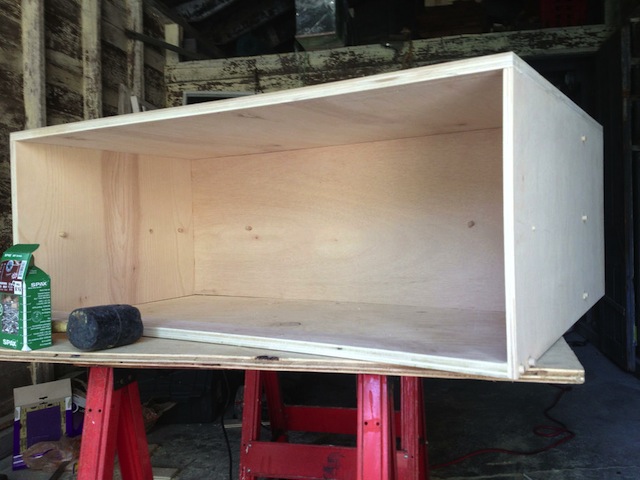
Repeat for the matching 12.7mm side panel, forming an asymmetrical “H”-shaped arrangement when viewed from above. Coat the top edges of the “H” with a thin, even layer of wood glue and lay on the top, making sure all corners are flush (tweaking the underlying structure as necessary), screw the top to the sides and ribs. Lay out your screw holes evenly for a neat appearance.
Halfway up the inside, drill out six 9.5mm diameter holes 9.5mm deep — two on each side and two on the stiffening rib — and glue in 19mm chunks of dowel to serve as shelf pins. Keep in mind as you assemble the boxes that you must make two sets of two boxes, mirroring the arrangement of the 19mm and 12.7mm sides.
Step Four: Doors
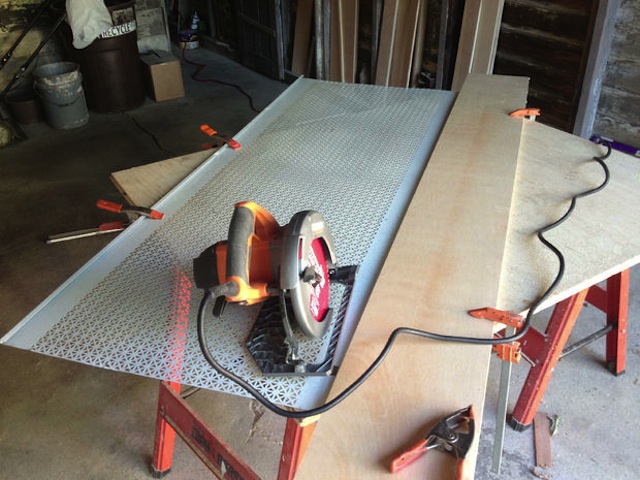
I made the sliding doors out of old sheet-metal radiator covers, salvaged from a house where the radiators were being ripped out. Any number of materials could work, though the dadoes might need to be widened. Use Masonite, frosted acrylic, sheet metal, or even heavy-duty chipboard.
Set the material on a scrap piece of plywood. Clamp a straightedge down. Set the blade depth on the saw to about 3mm. A carbide finishing blade (60-tooth) will cut sheet metal fairly handily (it’s what I used). You can also buy specialty sheet metal blades, or use a regular framing blade with the blade rotating backwards. Wear safety glasses, tight-fitting gloves, ear muffs, and long sleeves. This process is really loud and kicks up a lot of crap.
Cut eight panels, each at 330mm x 559mm. If using a radiator screen with a geometric cut-out pattern, strive to make the cut lines fall on solid seams. Smooth down all the burrs, rough edges, and corners with a flat file and sanding block. Spray paint with metal enamel. Mount a handle at each end of each door with sheet-metal screws, made out of a scrap of 12.7mm plywood.
Step Five: Finishing
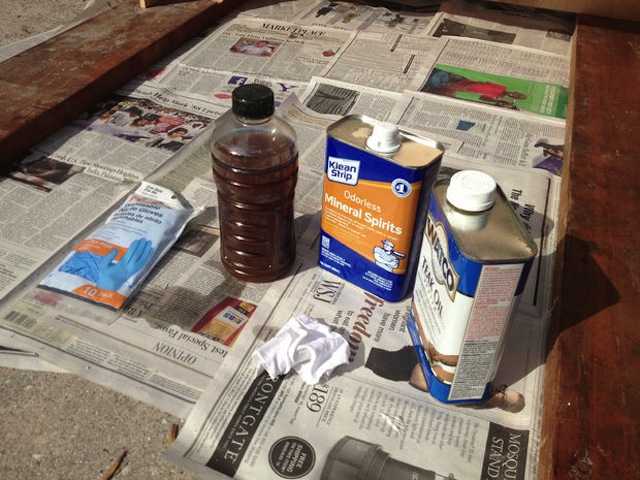
Sand all surfaces with 120 and then 150 grit sandpaper on an orbital sander. Make sure to get the plugs flush and take care not to grind through the veneer.
Plywood tends to be rather dense and un-accepting of finishes. The high glue content and thin veneers keep it from being very absorptive. In an effort to darken the wood a bit and bring out the grain, I used a mixture of 80 per cent teak oil and 20 per cent paint thinner for the undercoat. The thinner helps get into the denser grain. Rub the oil into the wood with a clean, lint-free rag, let sit for fifteen minutes, then buff off any excess with another rag.
Once (thoroughly!) dry, buff down with some high (220+) sandpaper, then top coat with an oil-base poly. I used a water-base poly, which is fine as long as the undercoat is 100 million per cent dry before the top coat is applied. Otherwise, the top coat can bubble and peel.
Once dry, buff down with 220 grit and wax. Assemble the four boxes in a grid so that the 19mm sides of each bed are all to the outside perimeter and the 12.7mm sides are to the interior. Insert shelves, then flex doors into place, sliding the top of each door up into the top dado first and then settling into the bottom dado. If doors don’t slide freely, sand down the edges and wax a little bit with paste or auto wax for smooth operation.
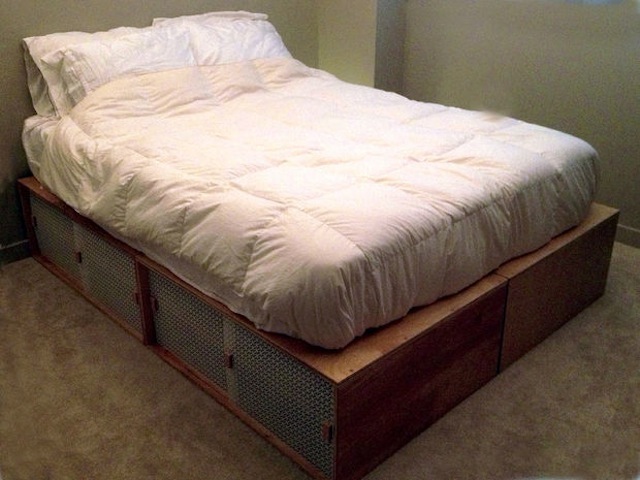
Throw your mattress on top and take a well-deserved rest!
Editor’s note: See complete step-by-step photos in the link below.
Box Bed [Instructables]
William Holman has worked as a designer, craftsman, carpenter, educator and author. Find more of his work at objectguerilla.com and vote for him in the Instructables “I Could Make That” Contest.
Comments
2 responses to “How To Build A Modern, Space-Saving Box Bed”
great article. wish you guys would post some more diy stuff like this.
thanks.
A nomad with a wood shop! Seems incongruous
I’ve seen similar builds made from ikea stuff, i wonder if they have problems with mildew on the underside of the mattress? You would be suprised at how much moisture they pick up, there is a reason you normally suspend a bed on slats
While the design looks like a simple box, the moving and sliding cupboards below gives it a really chic feel! Nice job!