If you like playing games on your phone, and you like binder clips (hey, who doesn’t?), this smart hack is for you. Lifehacker reader Rob Gillan shows us how to attach a PS3 gamepad to a phone for enjoyable mobile gaming.
I fell in love with binder clips the day that Lifehacker showed me how to make a (basically) free mobile mount for my car. Now, more than a year later, I found a way to stretch that original idea into something equally as cool – a clip for my phone that mounts to a PlayStation 3 controller!
Inspired by both the phone mount and Ryan French’s GameKlip, I decided to look online for some DIY tips that would show me how to cobble together a controller/phone mount. I wanted it to meet three criteria: 1) It should do a reasonably good job of holding my phone in place while gaming, 2) It should cost me next to nothing, 3) It should use items I could easily pillage from around my office.
After a few minutes of experimenting, I found a solution that works.

Step 1: Grab and Bend Your Binder Clips
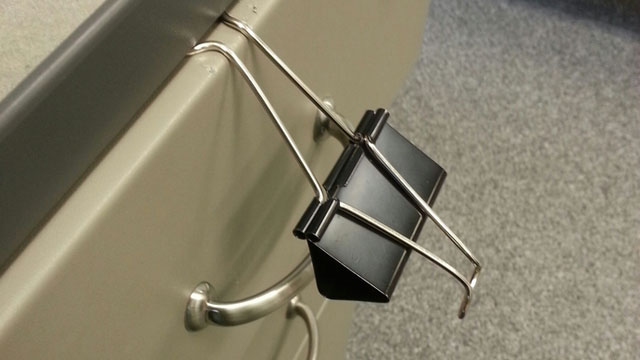
Take two binder clips. One large and one medium. I don’t know the exact size of my large, but it is slightly bigger than the 42mm clip I use as the secondary piece. Take the larger of the two and bend the tips of the handles so that, when folded back, they face inward toward each other. I accomplished this by wedging the end in when I closed my desk drawer and then pressing down firmly until I achieved an angle somewhere around 45 degrees. You may want to find a different way to achieve this if you have a wooden desk that you like the look of.

Step 2: Wrap Them Together
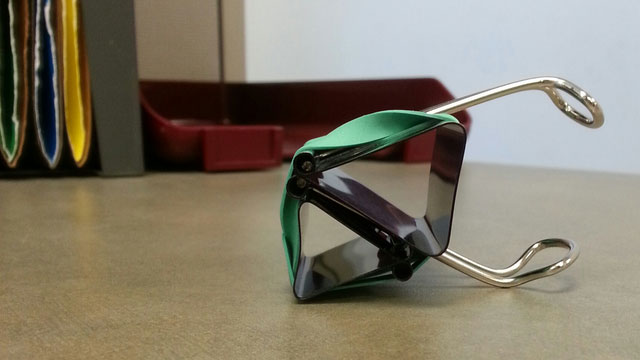
Remove the handles from the smaller of the two clips and put the large clip on top of the smaller clip so that they form a block-type shape. Using two rubber bands, I wrapped the left and right sides to keep them together.

Step 3: Attach the Controller
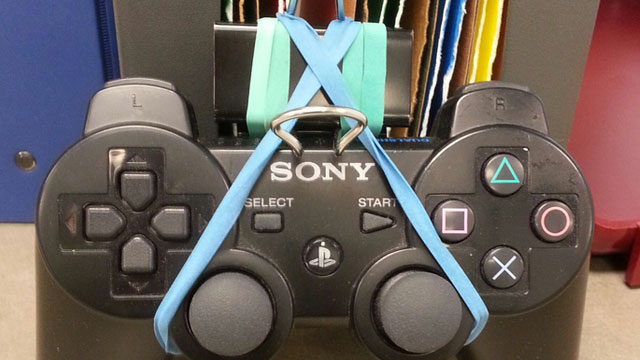
With the larger piece facing forward, set the clips on top of the PlayStation 3 controller and do a diagonal wrap in each direction using two rubber bands. The wrap should start over the top of one side of the binder clip then come down diagonally and wrap underneath the controller by the analogue stick. I double wrapped each rubber band in order to get a stronger pressure holding the clips on top of the controller. You will notice that the bands come very close to the analogue sticks and the face buttons, but in my experience it doesn’t affect their movement if you seat them properly.
Step 4: Mount Your Phone
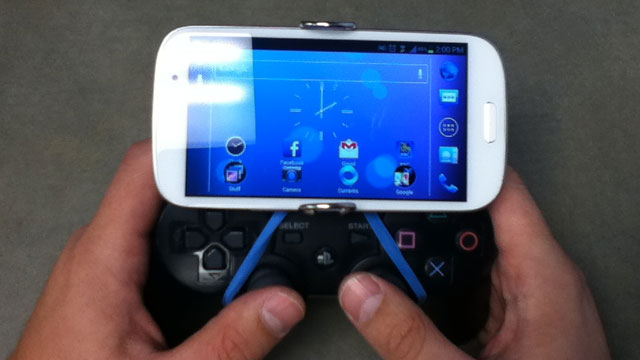
I found that the rubber bands I used to mount the clips to the gamepad seemed to provide enough resistance over the top handle of the binder clip, so I didn’t add more resistance to ensure it held the phone in place. Your mileage may vary. Simply wrap a rubber band two or three times around both of the handles in order to create a greater grip strength.
As far as which (if any) materials you use to cover the bare metal of the handles – use your imagination! This may not be the sturdiest project you’ve ever built, but with the right amount of tension (and assuming you aren’t the type of gamer who has to move the controller in whichever direction your character is moving) you should be able to fit most phones comfortably! My Samsung Galaxy S3 fits like a charm and I actually found it quite enjoyable to play Max Payne with the phone mounted in this manner.

Comments