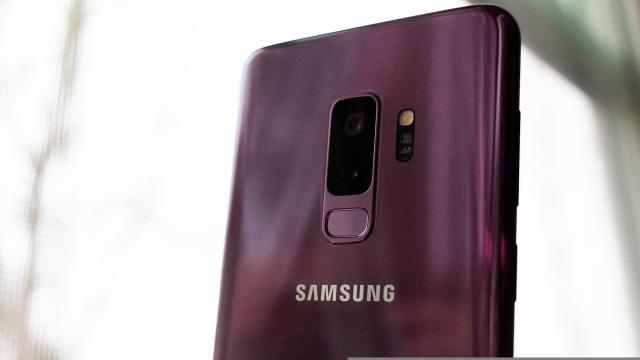
It’s that time of year again when you’re working your smartphone overtime attempting to keep up with all of the memories of holiday parties, family gatherings, and pets you’ve wrangled into festive attire. If you’re working with any of the latest Android phones, including the Google Pixel 3 or Samsung Note9, then one of the best cameras on the market is already in your pocket.
But regardless of the prowess of your high-end smartphone, merely pointing and shooting at the scene is not the way to capture lasting memories. The same rules apply to smartphone photography as they do studio photography: a little staging goes a long way. Take a beat before hitting the shutter button and employ one or more of the following tips to help make your smartphone-snapped photos look their best.
Hold still
You’ve heard this before, but it bears repeating because it makes an incredible difference: make sure the camera is still when you’re shooting a photo. I can’t tell you how many times I’ve snapped and walked to keep up with a group or something of the sort, only to be disappointed later on by blurry results. Your Android phone may be fast at starting up the camera app (double-press the power button on most to instantly fire it up), but it can’t make up the photo if you aren’t still while taking it. It’s always a good idea to get into the habit of checking on what you just snapped before moving on.
You don’t necessarily need a tripod in this day and age to take a still photo, though it certainly helps elicit the best results. My favourite is the dual-purpose Huawei Tripod Selfie Stick. There are also smartphone camera mounts for standard-sized tripods if you’re already tricked out in camera gear. Alternately, specialised products like the Joby GripTight One GP Stand are great for capturing group photos. Leaning the phone against a wall or an object is also another trick of the trade when you’re in a bind.
Don’t be afraid to use an app
Android apps are indeed powerful enough to handle processing RAW photo files produced by DSLRs, so many of them can surely handle editing a photo taken by a smartphone. Free apps like Snapseed, Polarr, and Adobe Lightroom will appeal to tinkerers and those who consider themselves the “family photographer.”
For those who prefer the look of filtered photos, apps like VSCO offer over 100 kinds of millennial-coloured flair, as well as A Colour Story, which has some of the best filters for presenting to an Instagram audience. Both apps are free to use, though they offer in-app purchases to unlock some of the more popular aesthetics.
If you’d rather not pay much to make your photos looked aged, KujiCam is unapologetically fun to use, and your digital photos will look like they were taken in another decade. If you do mess up a picture and the moment has passed, try using an app like TouchRetouch to go in a remove an errant finger in the top corner.
Don’t forget the editing features your phone does natively. Google Photos comes pre-loaded on nearly every flagship Android device and offers quick editing tools, including a handful of coloured photo filters, a crop option, and the ability to edit common elements like the colour hue and exposure. (Google Photos also offers automatic backup for your photos and videos, so be sure to take advantage of that, lest you lose all your precious memories the next time your smartphone drowns in a pool.)
Samsung and LG’s respective gallery apps also offer light editing options along the same lines. If you’re feeling cheeky, you might even like some of the digital “stickers” bundled on Samsung’s Galaxy and Note smartphones.
A little light goes a long way
I like a little sultry lighting. A dozen candles and a few dimmed bulbs are the perfect way to signal to your guests that your abode is a cosy one. This kind of lighting is awful for pictures, however, and even though your phone’s maker promised you some of the best low-light photos, lovely gatherings are not the place to test out this claim.
Don’t be afraid to incorporate a little bit of lighting when the scene calls for it. You don’t need to buy anything extra; merely take off the top on a nearby lamp or other equivalent and place it in front of your subjects, beside you if you’re the shooter. Also, avoid overhead lighting. As much as recessed lighting looks great in person, it’s unflattering on camera. (There’s a reason Mariah Carey wears sunglasses when she’s indoors, where there’s often overhead light.)
The same grab-a-lamp trick helps diffuse these sorts of lighting situations and makes everyone in the photo look glowing and alive. Your smartphone’s flash can do the same in a pinch, though avoid using it as your primary light source, as it can make your party look washed out. Alternatively, you can use a friend’s smartphone flashlight as a directional light of sorts by shining it at the angle you want people’s faces to be lit. It can contribute to some really neat lighting effects.
Use “night mode” if you have it
Are you one of the lucky ones to get the Pixel 3’s Night Sight update? Be sure you’re using it when the situation calls for it, like inside restaurants or faintly-lit historical buildings. The feature is coming soon to older Pixel devices and is available in the default Android camera app, from the same screen where you can switch between panorama mode and the like.
On Samsung and LG phones, a similar ability is buried in the “Pro” or “Manual” modes. In this case, you’ll have to do a bit of tweaking to the camera settings to get the kind of photo you want. You don’t have to be a camera pro to access this, as most manufacturers offer live previews so you can see what the result will look like after a bit of finagling. For best results, leave everything on Auto except for the shutter speed — that’s where you’ll see the real difference in how much light camera can take in. And of course, don’t forget to lean it up against something while the shutter is open or you’ll end up with a blurry photo.
Use Portrait mode like it’s the real deal
Portrait mode is one of those defacto standard features that now comes included with every flagship smartphone. It’s like panorama mode, except that you’re likely to use it more often because it gives pictures a bit of a high-tech look. You don’t have to use it to snap photos of people, either. It works just as well for animals, plants, or any other curious object.
My favourite thing to do with Portrait mode, whether I’m taking a selfie or snapping a photo with cousins I haven’t seen in over a decade, is to use it against a simple backdrop. A blank wall is perfect for headshots, while a patterned wall adds a bit of flair. I love the faux “studio look” of these sorts of photos, and you can get creative by using the lamp-light trick in a living room. If done right, the result of your Portrait mode could look as preened and polished as if taken on school picture day, and they could even be photos worthy enough to slap onto a bundle of holiday cards in the next year.
Keep it clean
Lastly—and indeed the most obvious piece of advice on the list here—don’t forget to wipe your camera lens before taking a photo. Your smartphone is perfectly capable at this stage in the game to take a high-resolution picture of the people you love, but it won’t matter if the glass is smudged up with face grease and other assorted debris. Even if you have a case on with a camera covering, wipe that part clean on the inside and out to ensure that your photos remain untainted.
If your smartphone is your only camera, you should always carry either a microfiber cloth or a pack of screen-cleaning wipes. Buy them in bulk and place them everywhere: in every bag you use and every car you ride in. Pictures are only worth a thousand words if they’re discernible, and if you spent upwards of this much on a new phone, then it should produce frame-worthy photos.
Comments