Can you remember the last time you wiped your MacBook and reinstalled everything? I’d guess somewhere around “never,” but there are plenty of reasons you might want to Exterminatus your system, ranging from the serious (a major error with macOS) to the so-so (your system feels sluggish after all the crap you’ve put on it over the last three years).
Whether you’re reinstalling from scratch or setting up a brand-new MacBook, there’s a lot to think about during your first few hours with your new (or refreshed) system. Just so you don’t miss any important steps — or quirky little settings that you never knew existed — here’s our guide to everything you need to know about setting up a new MacBook.
Step One: Starting Over
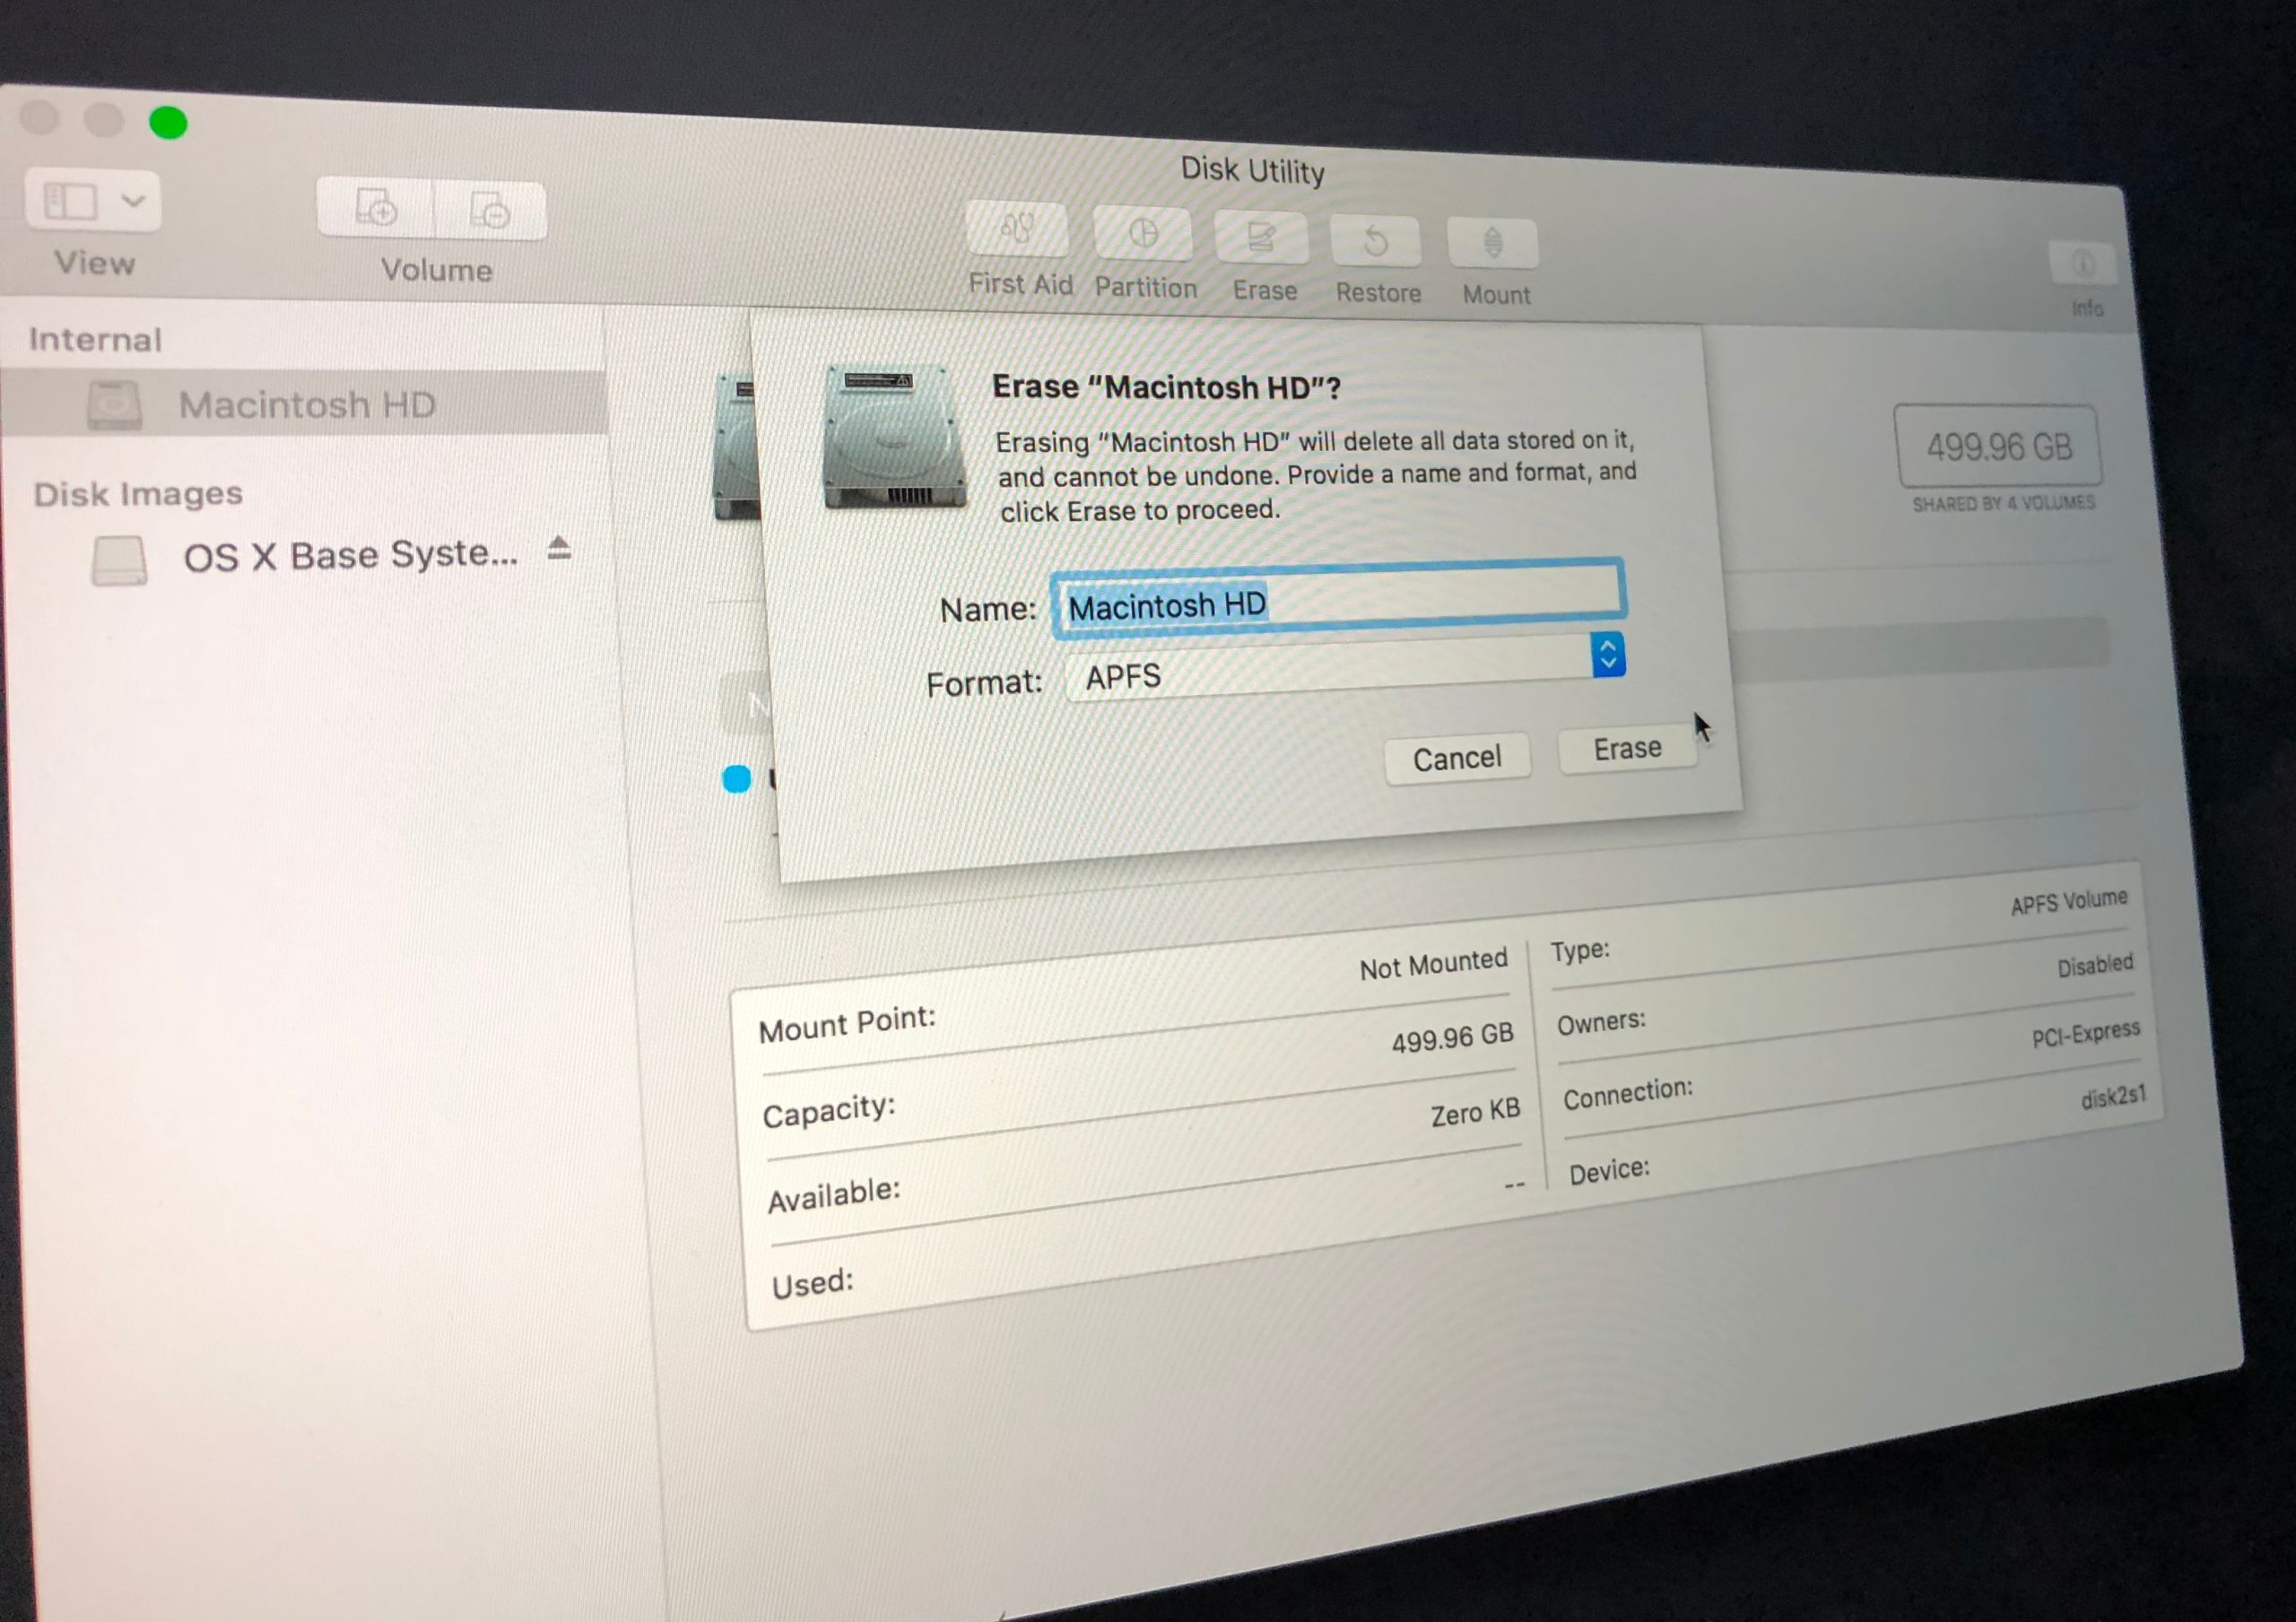
If you just purchased a brand-new macBook, power through this paragraph as you power on your new laptop. Otherwise, if you’re looking to wipe and restore your MacBook to a fresh version of the operating system, power up your laptop and hold down ⌘ + R until you boot into the macOS Utilities screen. Use Disk Utility to erase your system volume, and then head back to the primary macOS Utilities screen.
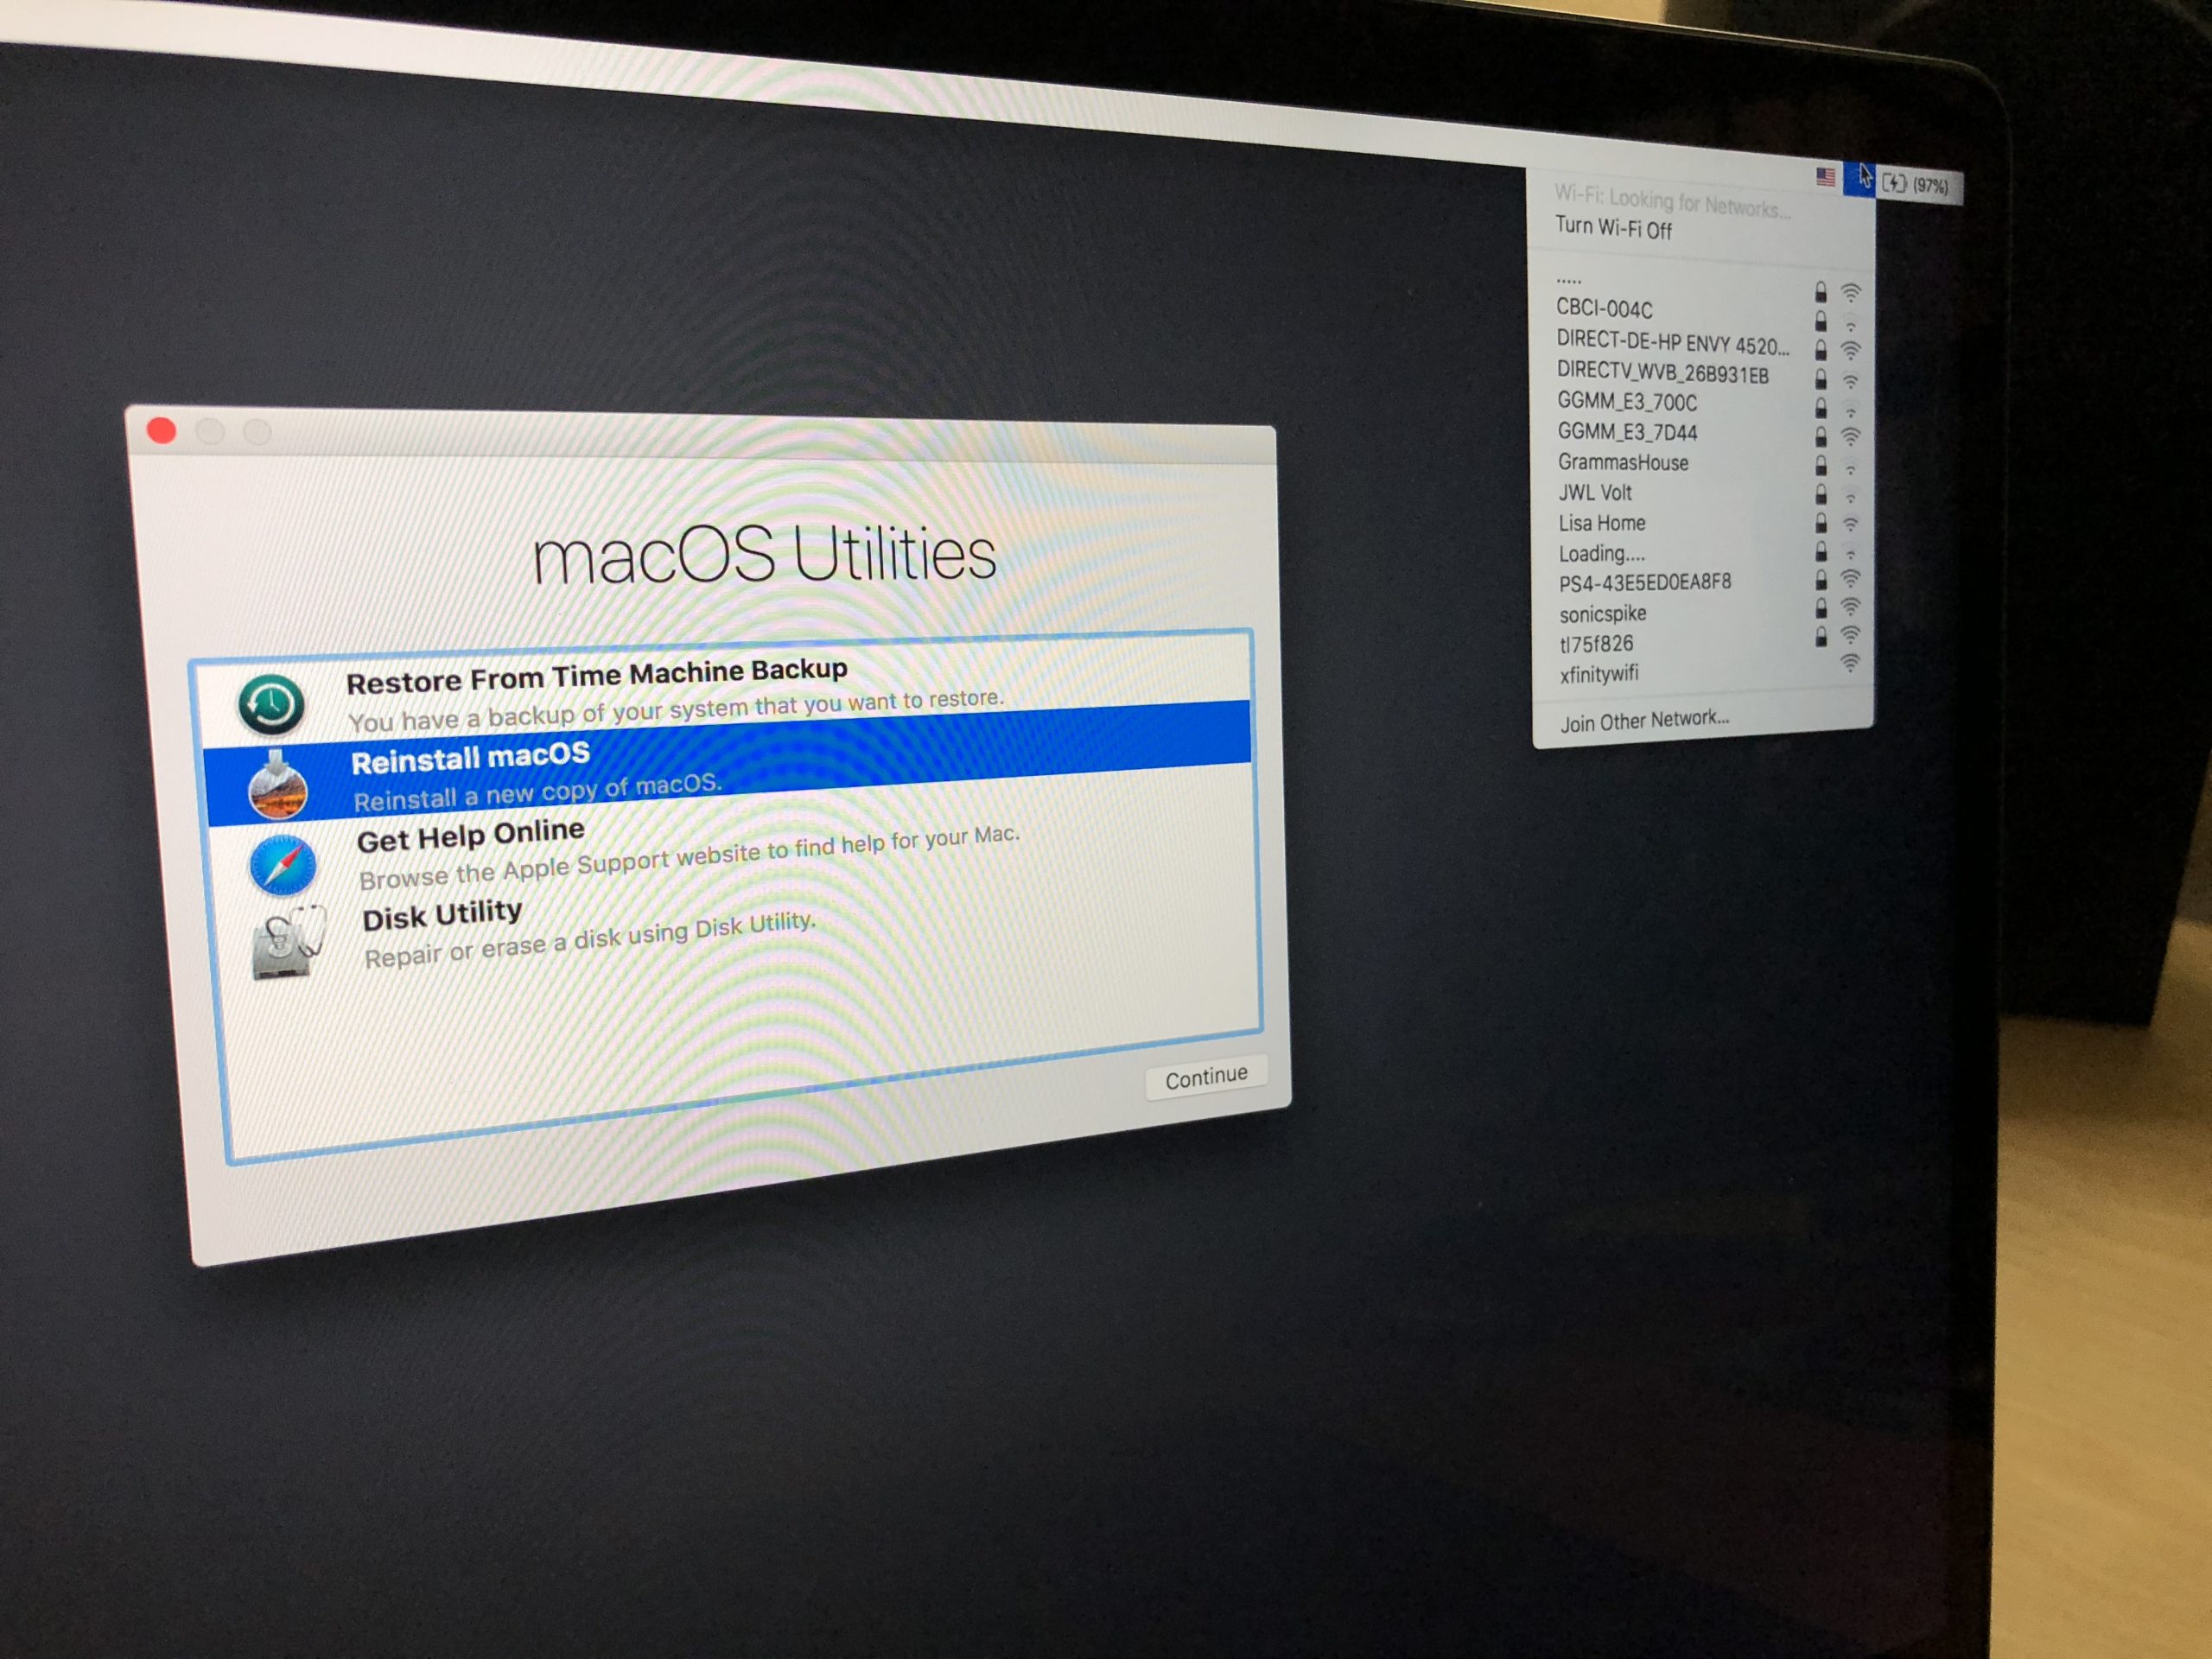
Click on the wifi icon in the upper-right corner and connect to your wireless network. Then click on “Reinstall macOS.” Get ready.
Apple will give you a few screens to jump through. The only one that matters is one that asks where you’d like to install macOS. Since you probably only have as single drive in your MacBook, this choice will be easy. After you pick your drive, the waiting game installation begins:
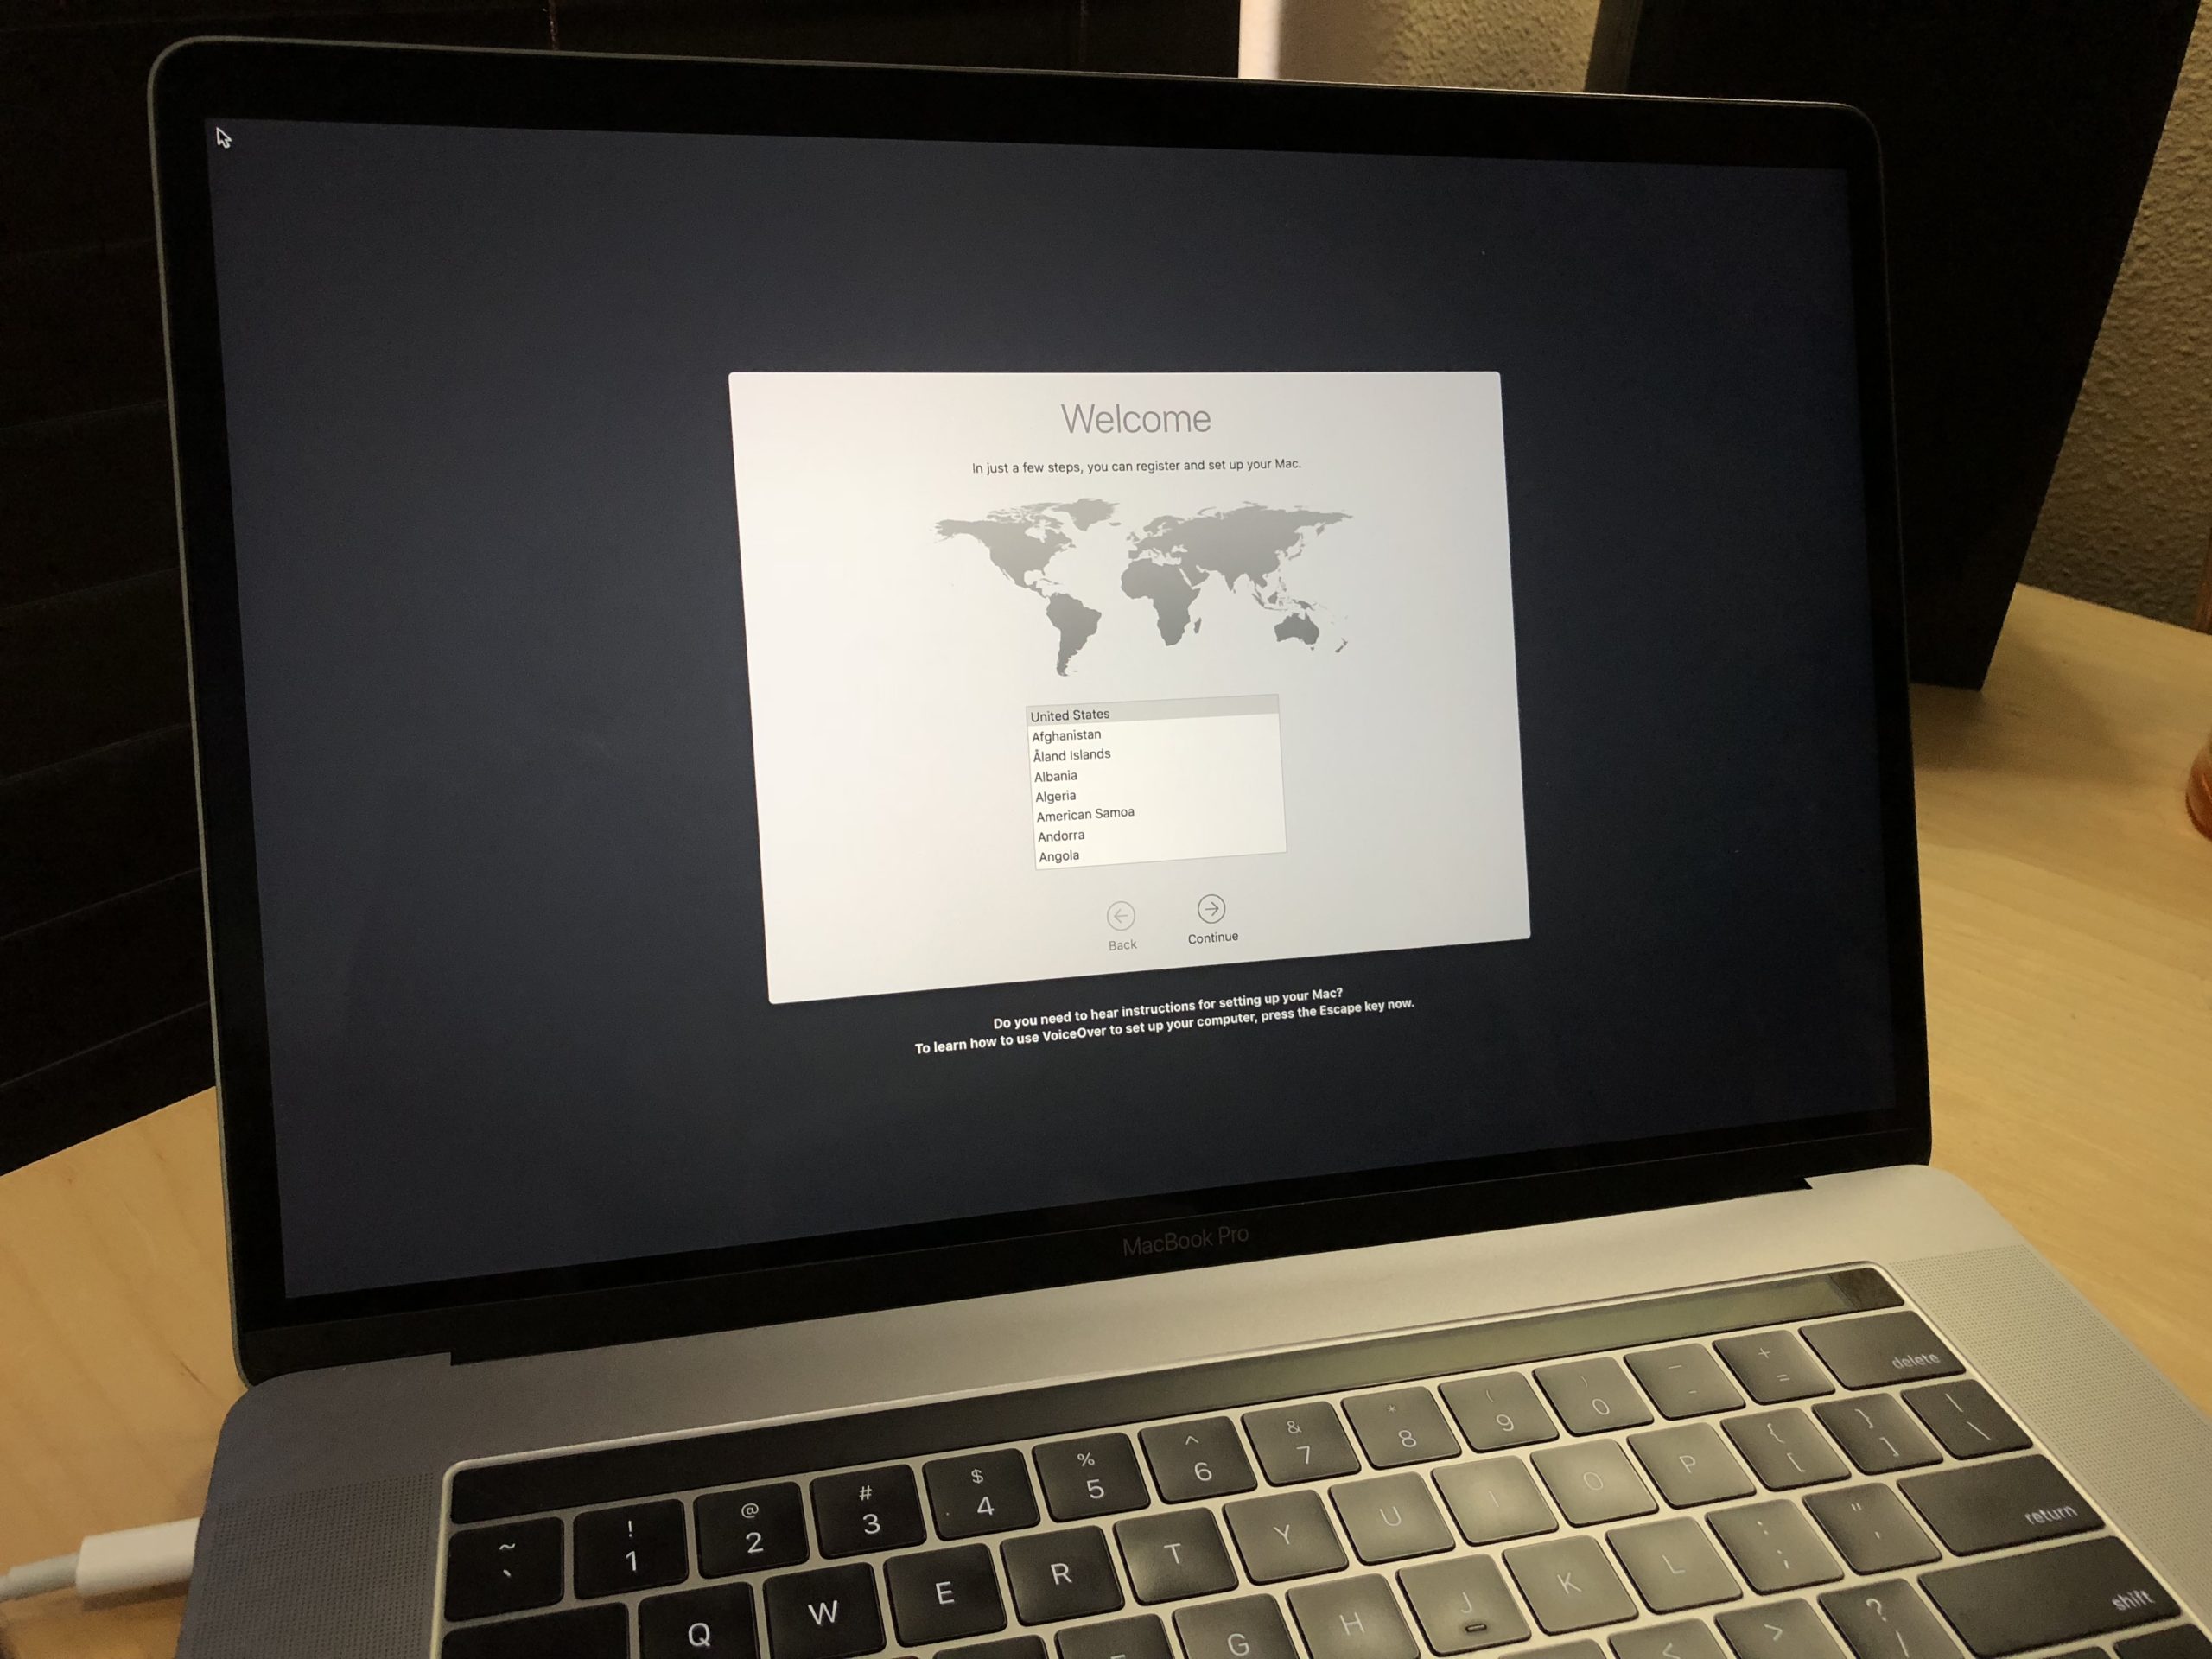
After a few restarts and quite a bit of time, the installation process will finish and you’ll finally see Apple’s welcome screen for macOS.
You’ll have a few more prompts to get through before you actually get to play around in macOS proper. The most important ones relate to how you want to transfer data to your MacBook — if you’re coming from another Mac or a Windows PC, for example. You also can restore your Mac using an old Time Machine backup. I generally find it best to start fresh: Don’t transfer any information from anything else. Go clean.
You’ll also want to sign in with your Apple ID (or create one, if you’re an Apple newbie) as soon as possible, which will save you a little time later. Your MacBook will then ask you to create an account in macOS — think of a clever user name and hard-to-guess password — and walk you through a few more prompts about iCloud file synchronisation, FileVault (encryption is your friend), and Touch ID (if applicable to your system). Definitely set up Touch ID, if possible, as that makes it ten times easier to log into your system (and make purchases: more on that in a bit).
Getting started in macOS (finally)
You made it! Now that macOS has finished installing, you should see the good ol’ macOS desktop — which I forgot to take a picture of, but I don’t think you’ll need any reminders about what this looks like. Let’s start setting up your system.
Check the App Store for updates
Since your system grabbed the latest version of macOS directly from Apple during the installation process, you shouldn’t have any system updates right now. Just in case, make the App Store your first stop. Pull it up, enter your Apple ID and password if prompted, and click on the Updates icon.
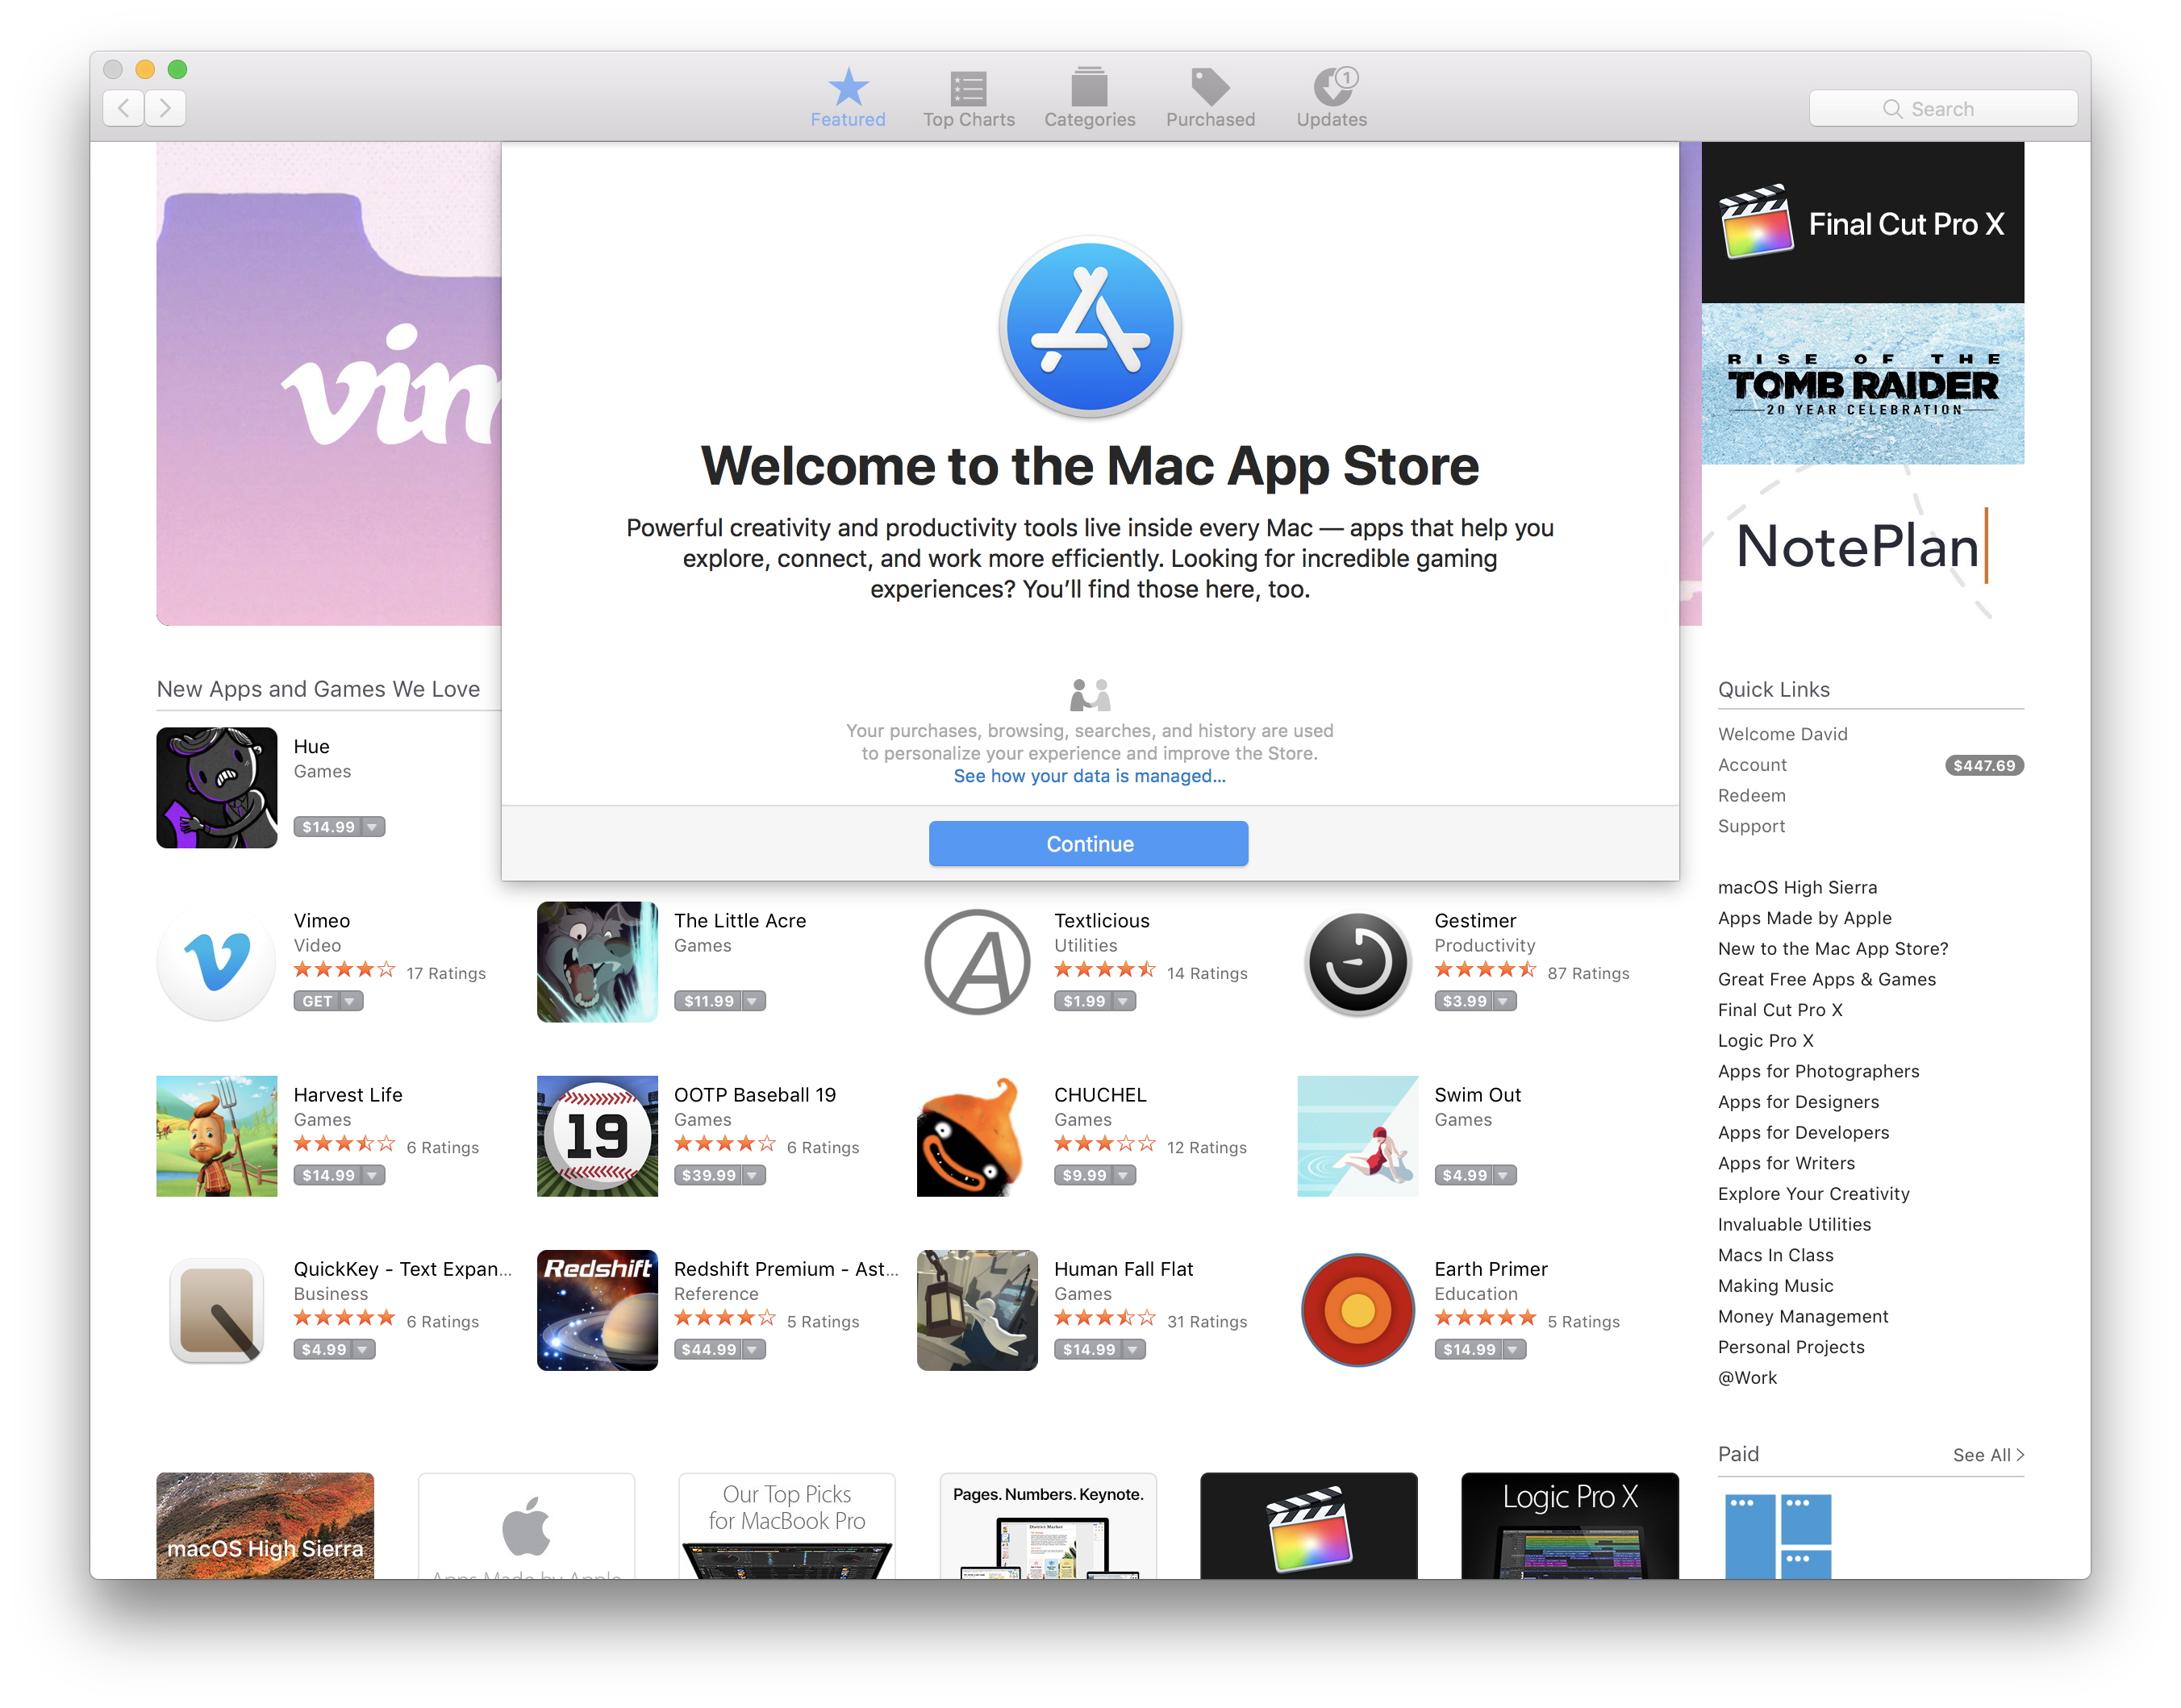
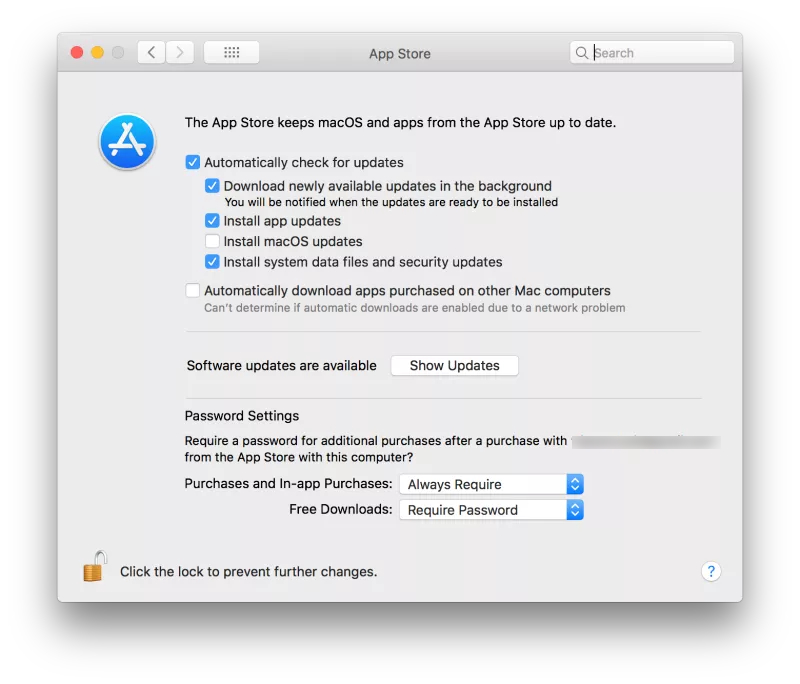
You probably don’t need to be told what to do next, but, just in case, install any updates Apple offers. And while they’re chugging along, click on the App Store menu, then Preferences, and ensure your system is set to automatically check for and install any new updates.
I’d recommend not checking to “Automatically download apps purchased on other Mac computers” unless you want all of your systems to sync up whenever you buy an app. That might be helpful in some instances; annoying in others.
Take a deep breath and start synchronizing your accounts
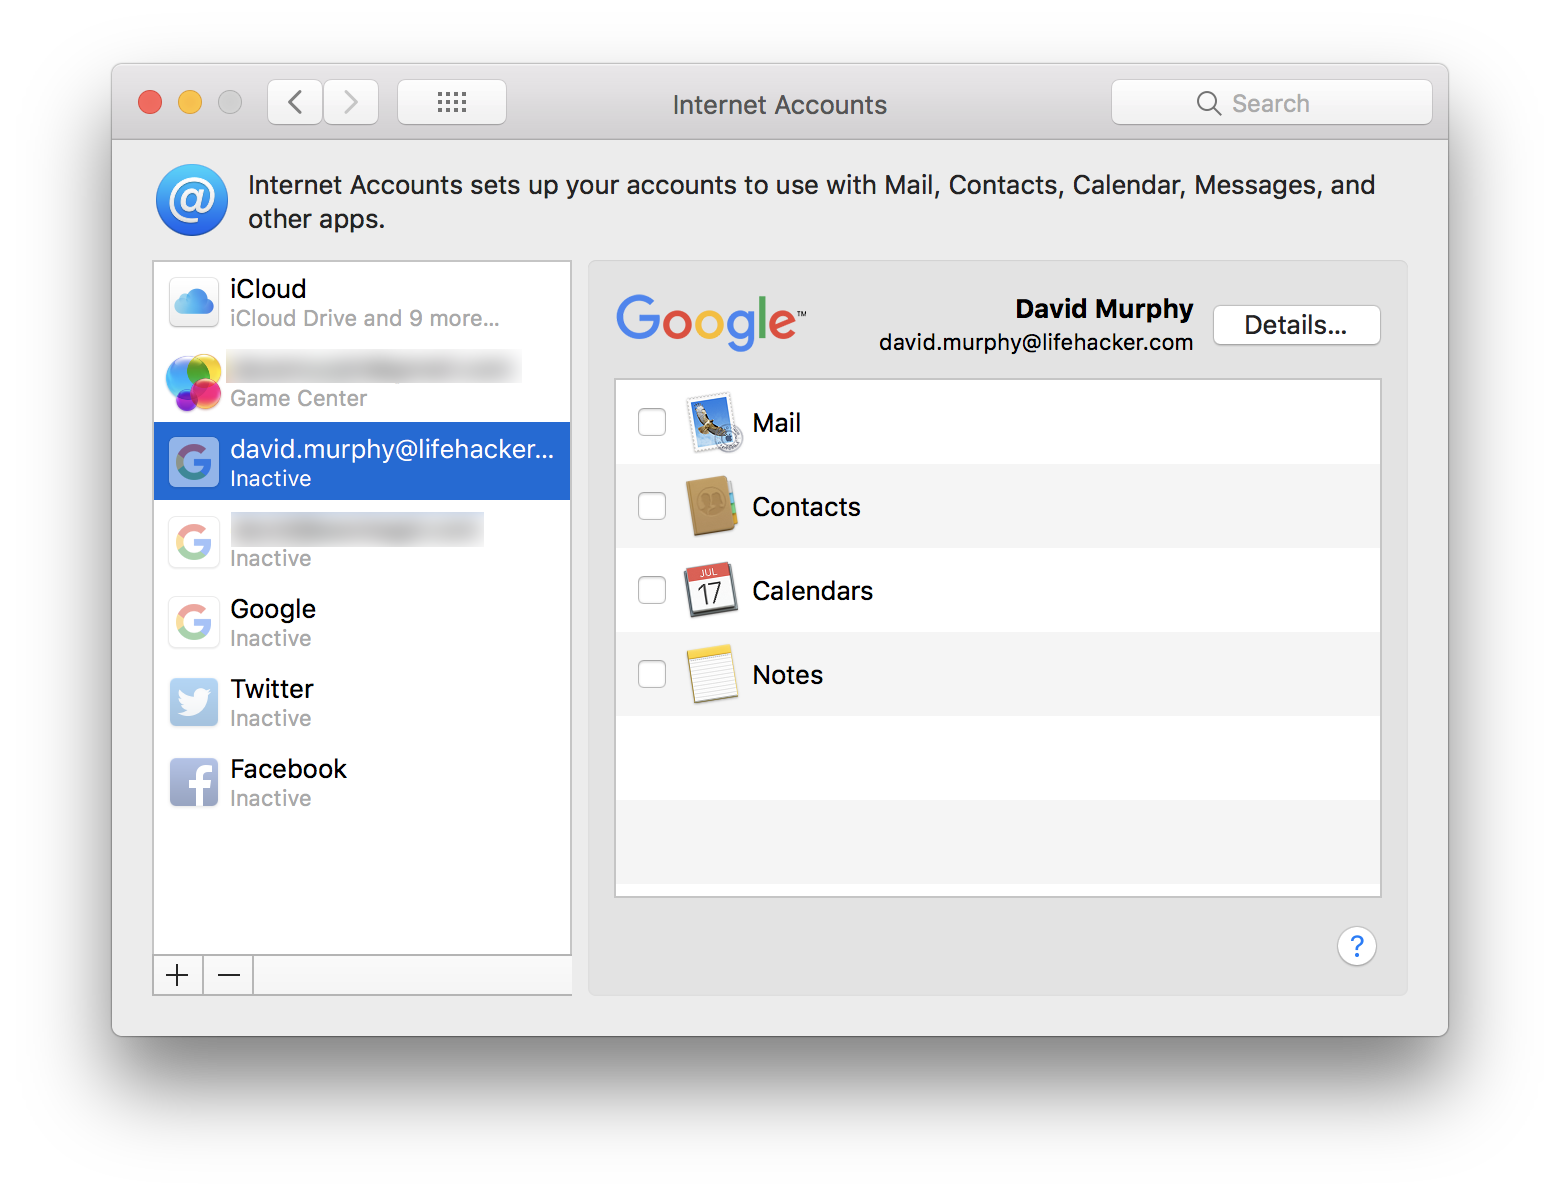
At this point, I like to start setting up all my third-party accounts in macOS. Click on the Apple icon, click System Preferences, and click on Internet Accounts.

You should already see your iCloud account all set up, since you entered that information earlier. Scan through iCloud’s options to make sure everything you want (or don’t want) synchronised with your iCloud account is active or disabled. There’s no reason to not have everything checked unless you really feel strongly about a particular Apple service. For example, I tend to leave “Back to My Mac” off, since I never access my laptop from another remote system.
To incorporate third-party services into macOS — like your Gmail account; an Exchange email account; or social networking services like Twitter, Facebook, or LinkedIn — just click on the plus icon in the lower-left corner.
Each service will allow you to synchronise different data with various macOS apps. For example, you can sync up your Gmail account with Apple’s Mail, Contacts, Calendars, and Notes apps. Facebook only allows you to sync your contacts and event calendars with macOS’ respective apps, but you can also elect to receive notifications about activity on the social network directly within macOS — useful, if you want a quick update about what’s happening on Facebook without pulling up your browser to check.
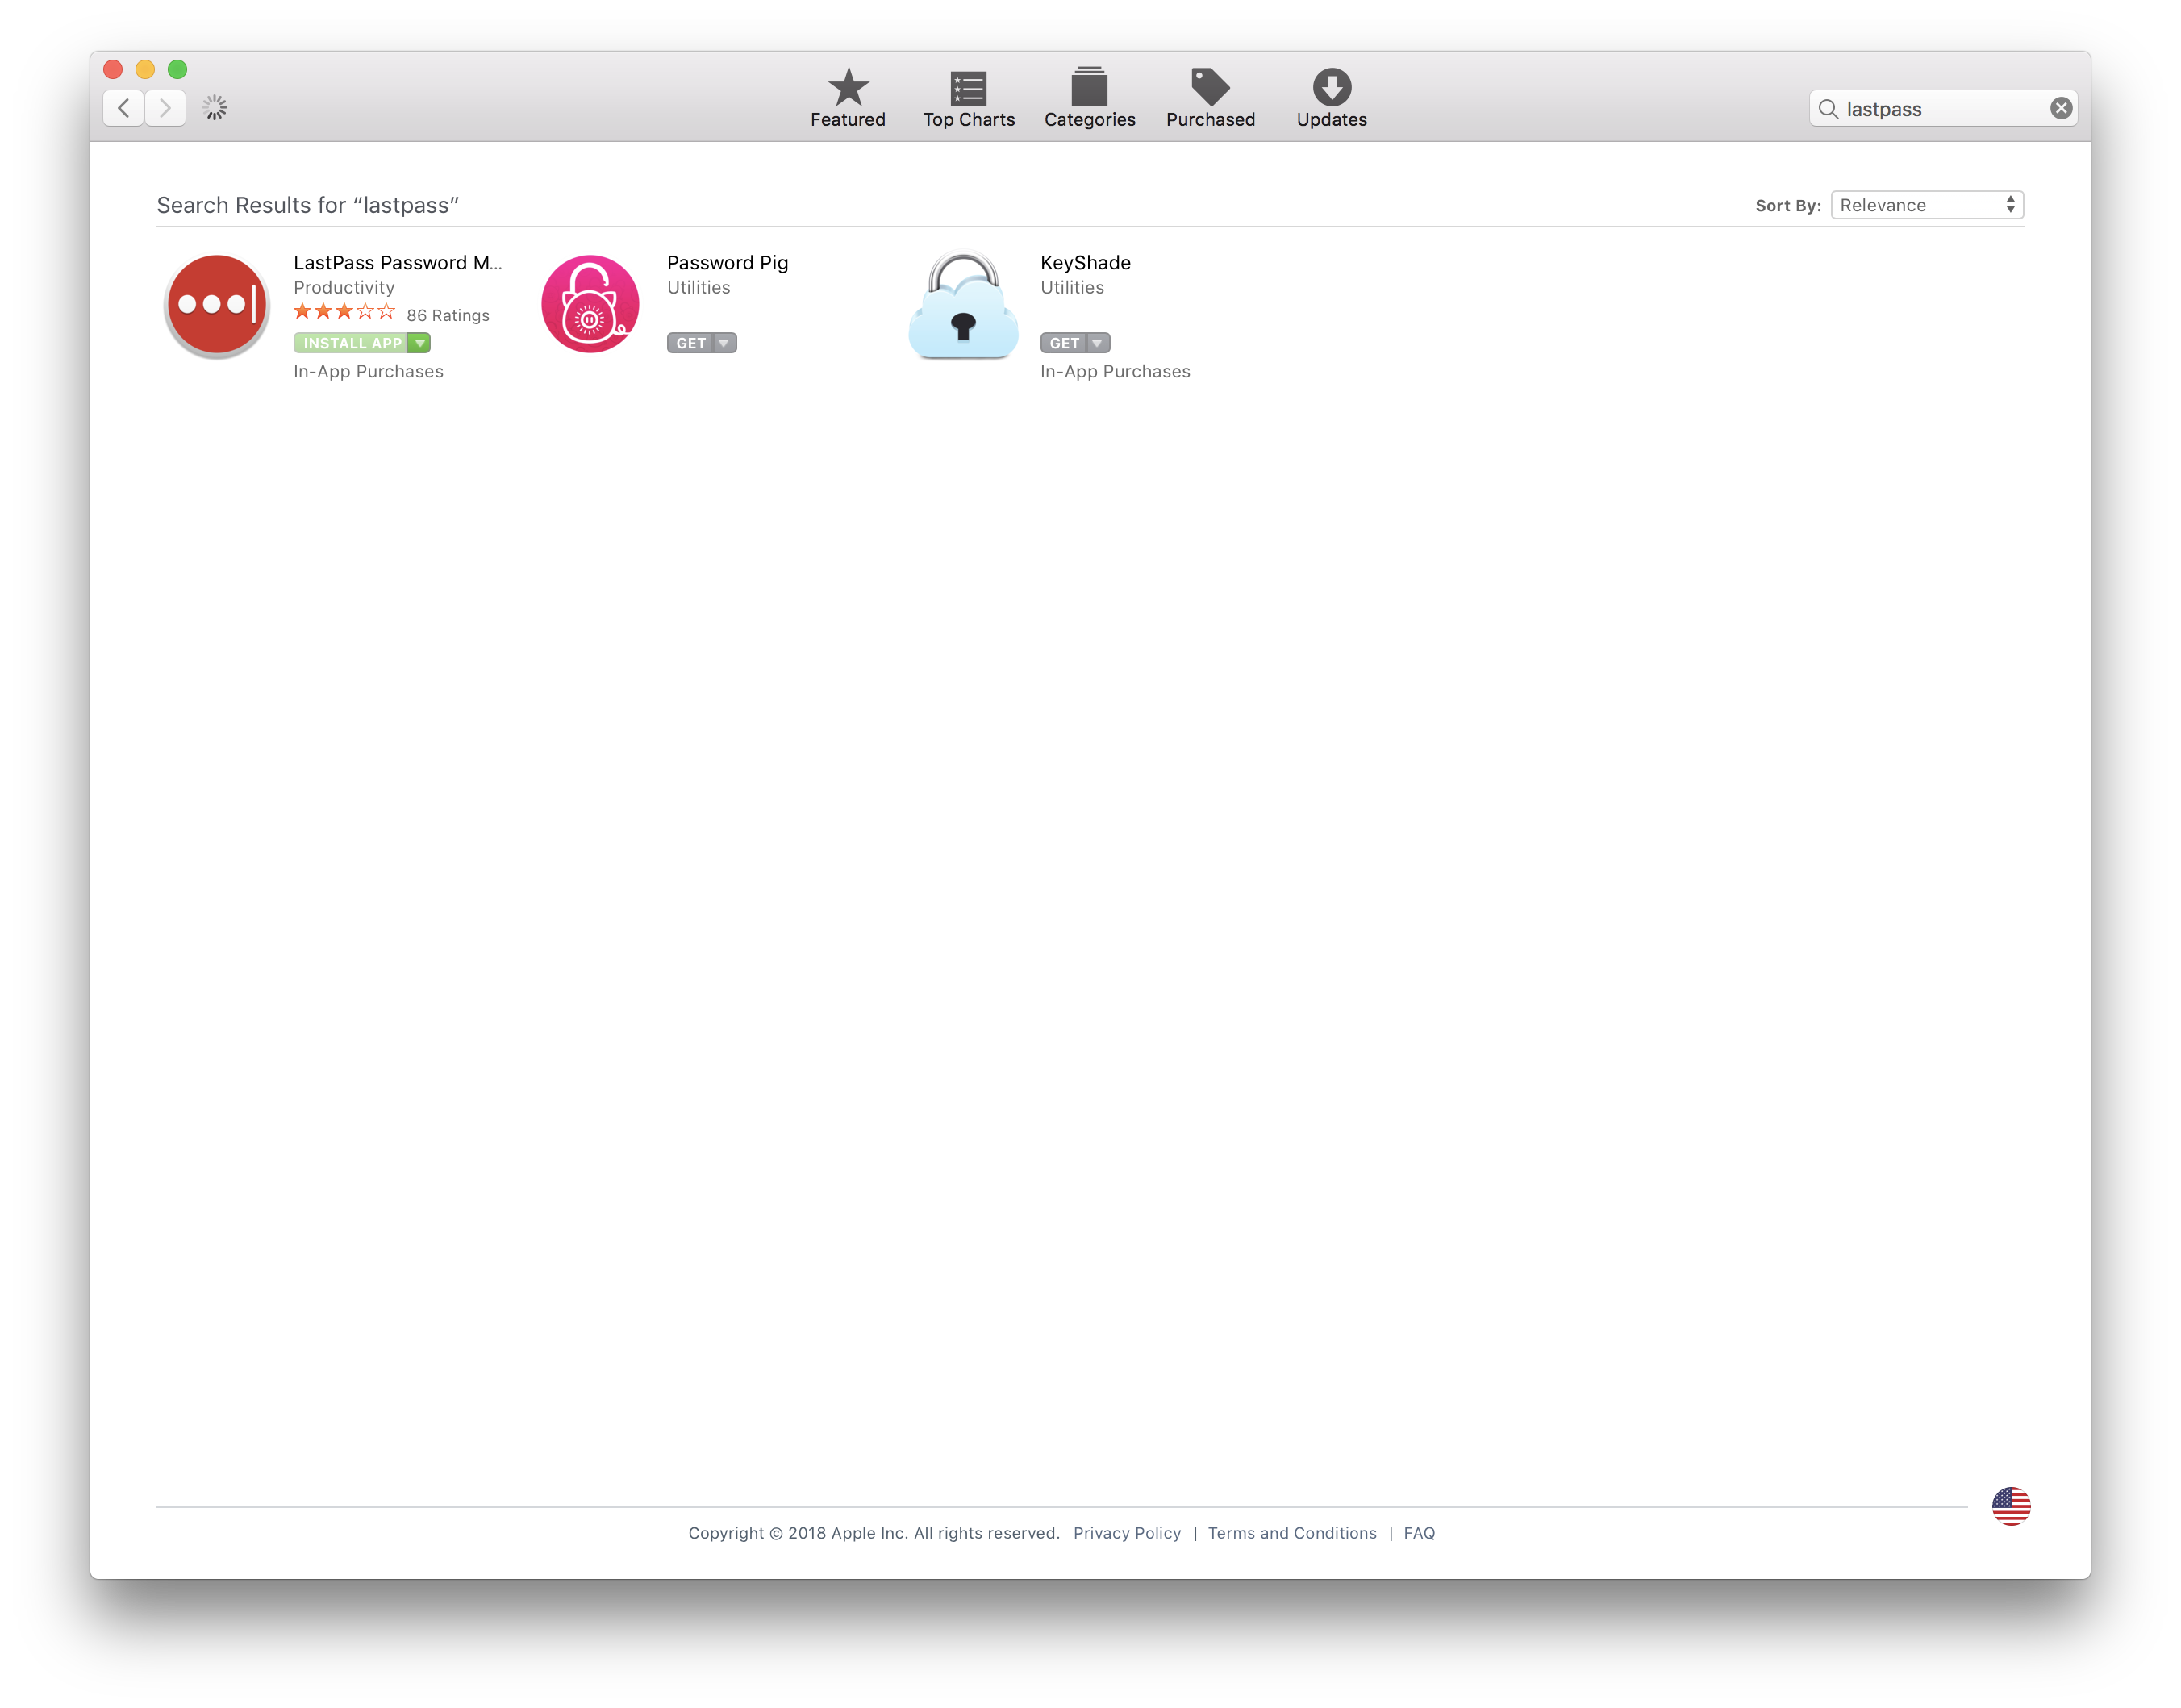
One quick tip about adding accounts: You’ll have to enter your logins and passwords, naturally. And since you’re awesome and you use huge passwords (or passphrases) to secure your accounts, your passwords are probably complicated and hard to remember. Great!
Before you start going crazy and adding every Gmail address you can access, first download your password management app of choice from the App Store (if an app exists). Set that up, and you’ll have an easier time copying and pasting your passwords when adding new accounts to macOS.
Pull up Mail and let it chug
Once you’ve figured out your accounts — and assuming you’re synchronizing them with Apple’s Mail app — now’s a great time to pull up Mail. Depending on how much email you get and how many accounts you’ve set up for Mail to access, you might have a ton of email that the app needs to sort through. This could take a while, so just let Mail run in the background while you work on the rest of your operating system.
Adjust your calendar(s)
Depending on which Internet Accounts you’re synchronizing with Apple’s Calendar app, your calendar might look like a complete mess when you first launch the app. Let’s fix that.
Click on the Calendars button in the Calendar app to pull up a sidebar of everything that macOS can stuff onto your busy schedule. Start removing items you don’t need to look at on a daily basis (holidays, birthdays, et cetera).
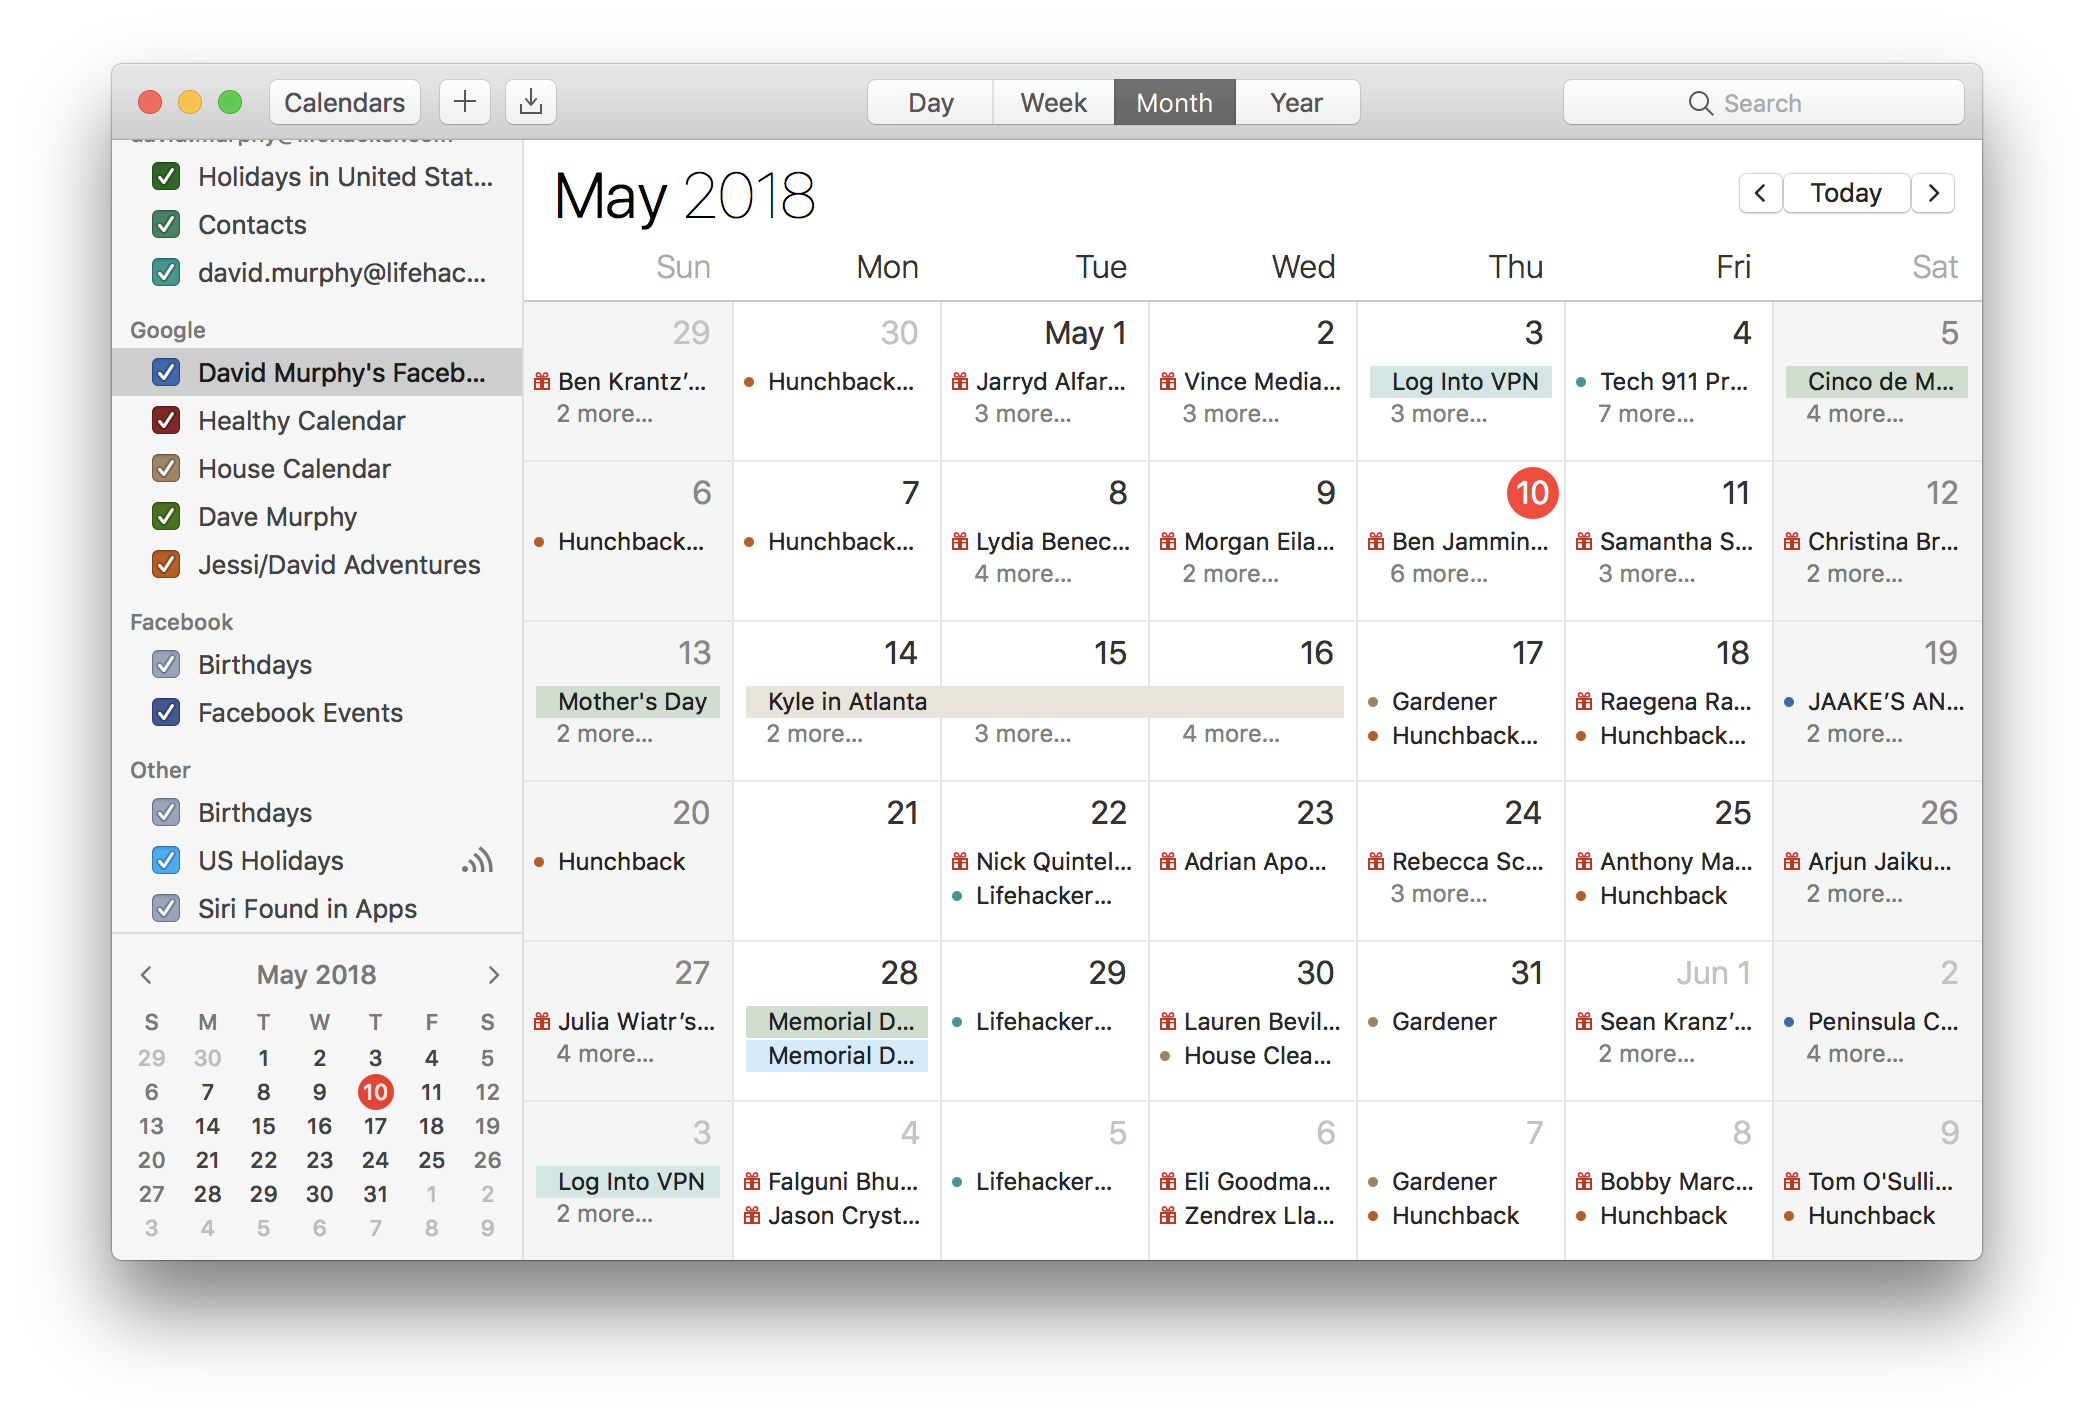
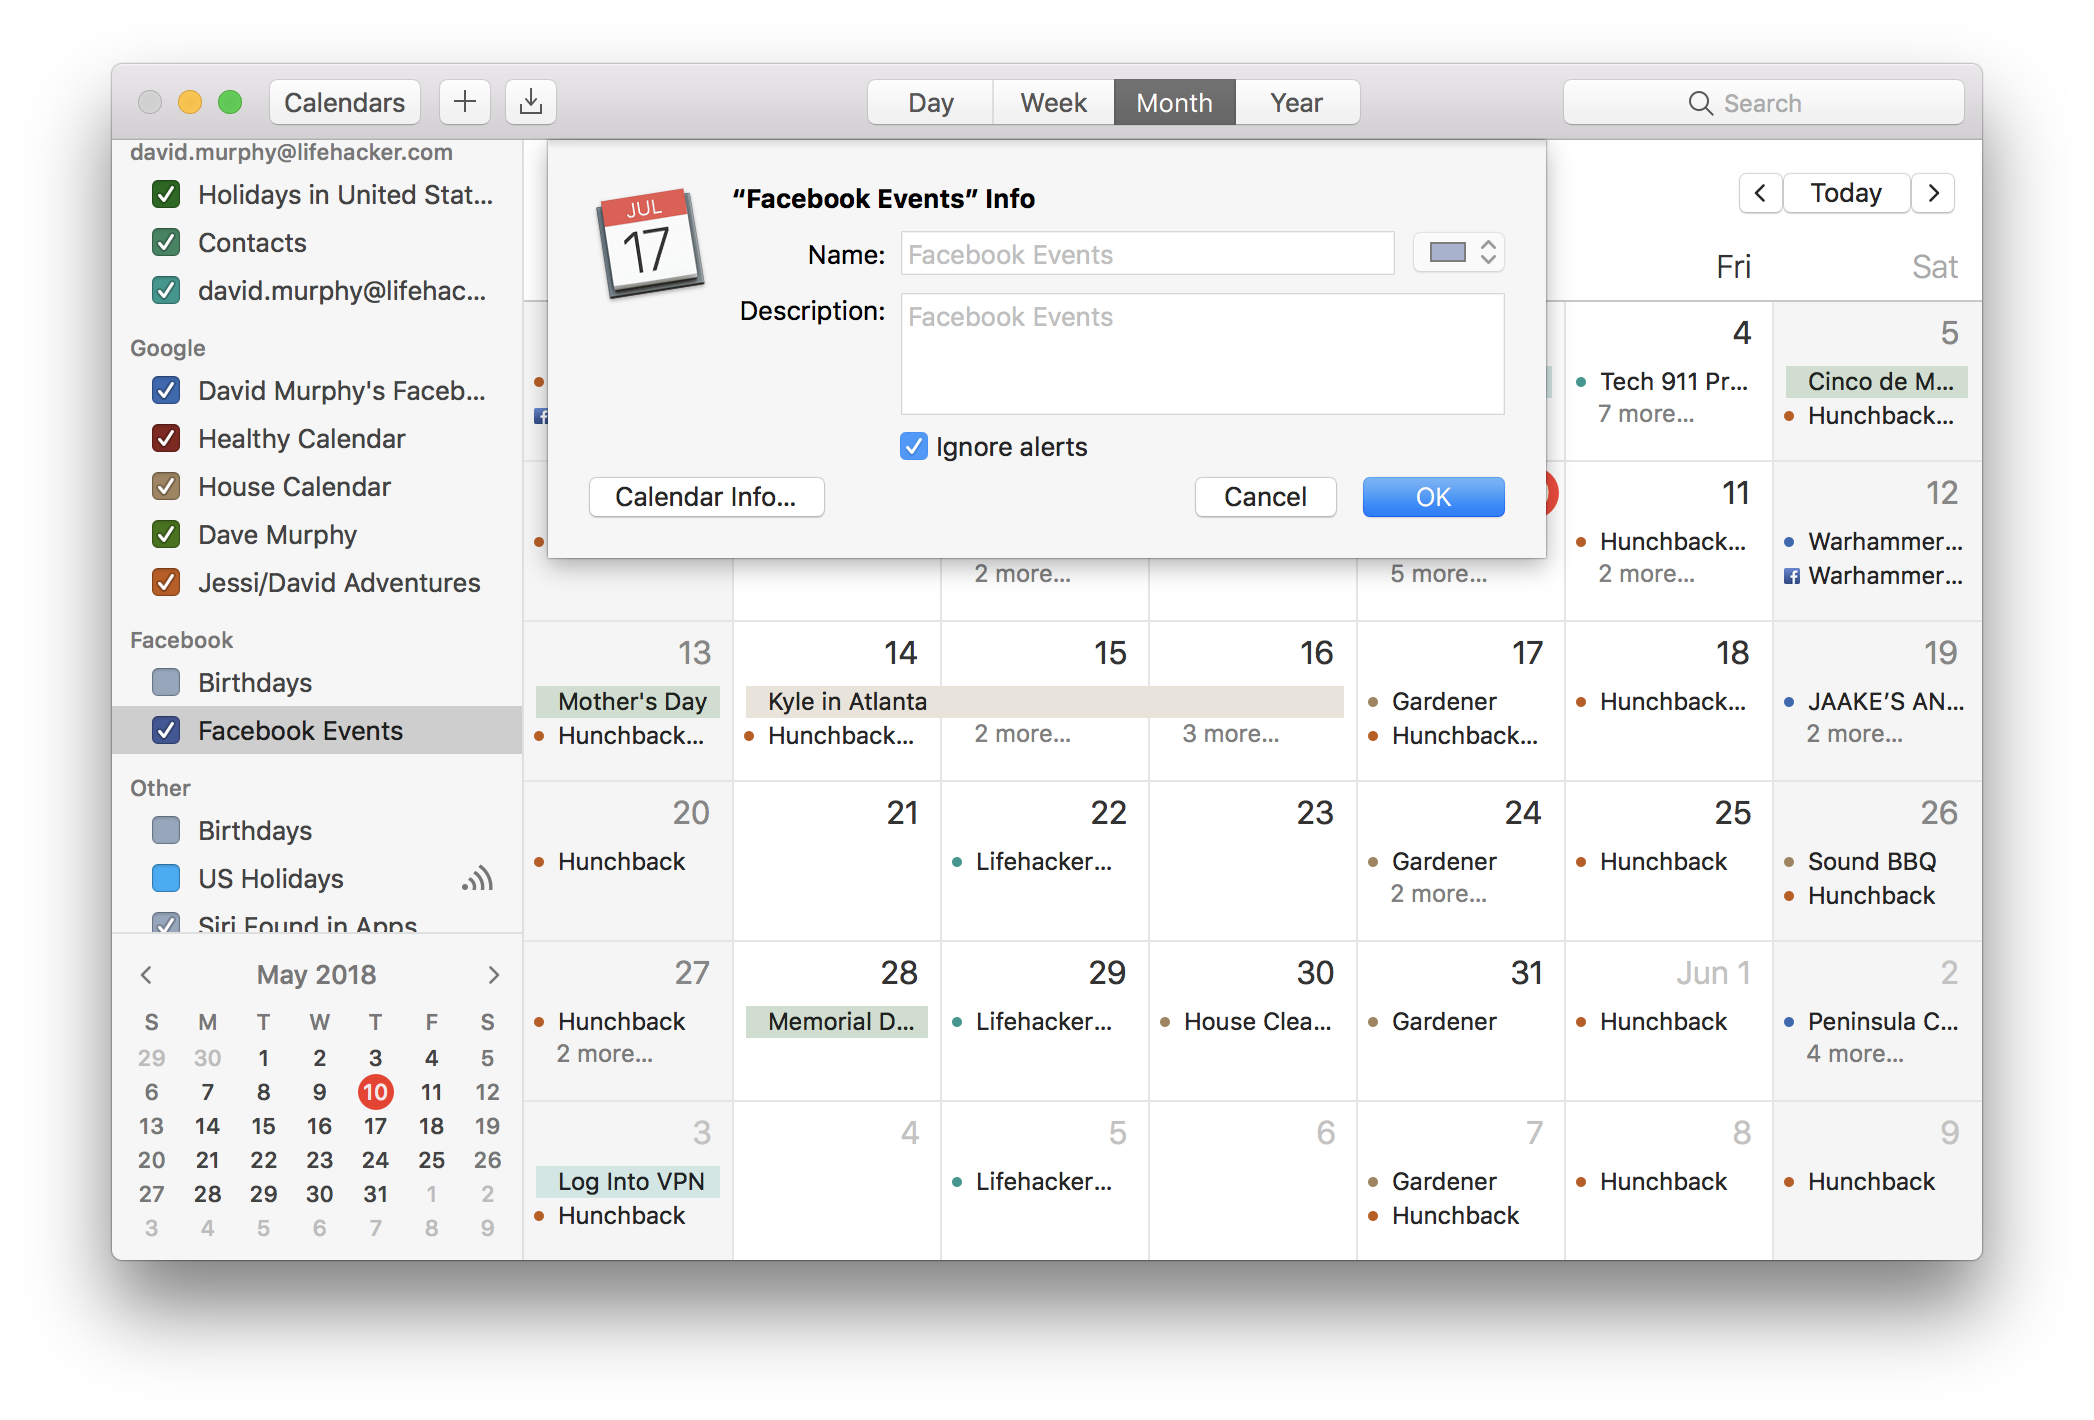
You can also be a little strategic with your selections. For example, if you like seeing upcoming Facebook events on your calendar, but don’t want macOS to send you a ton of annoying notifications about events you may or not attend, right-click on the “Facebook Events” calendar and select the option to “ignore alerts.” This is a great trick for any calendar that you might want to see, but not be bothered by, as you go about your daily life.
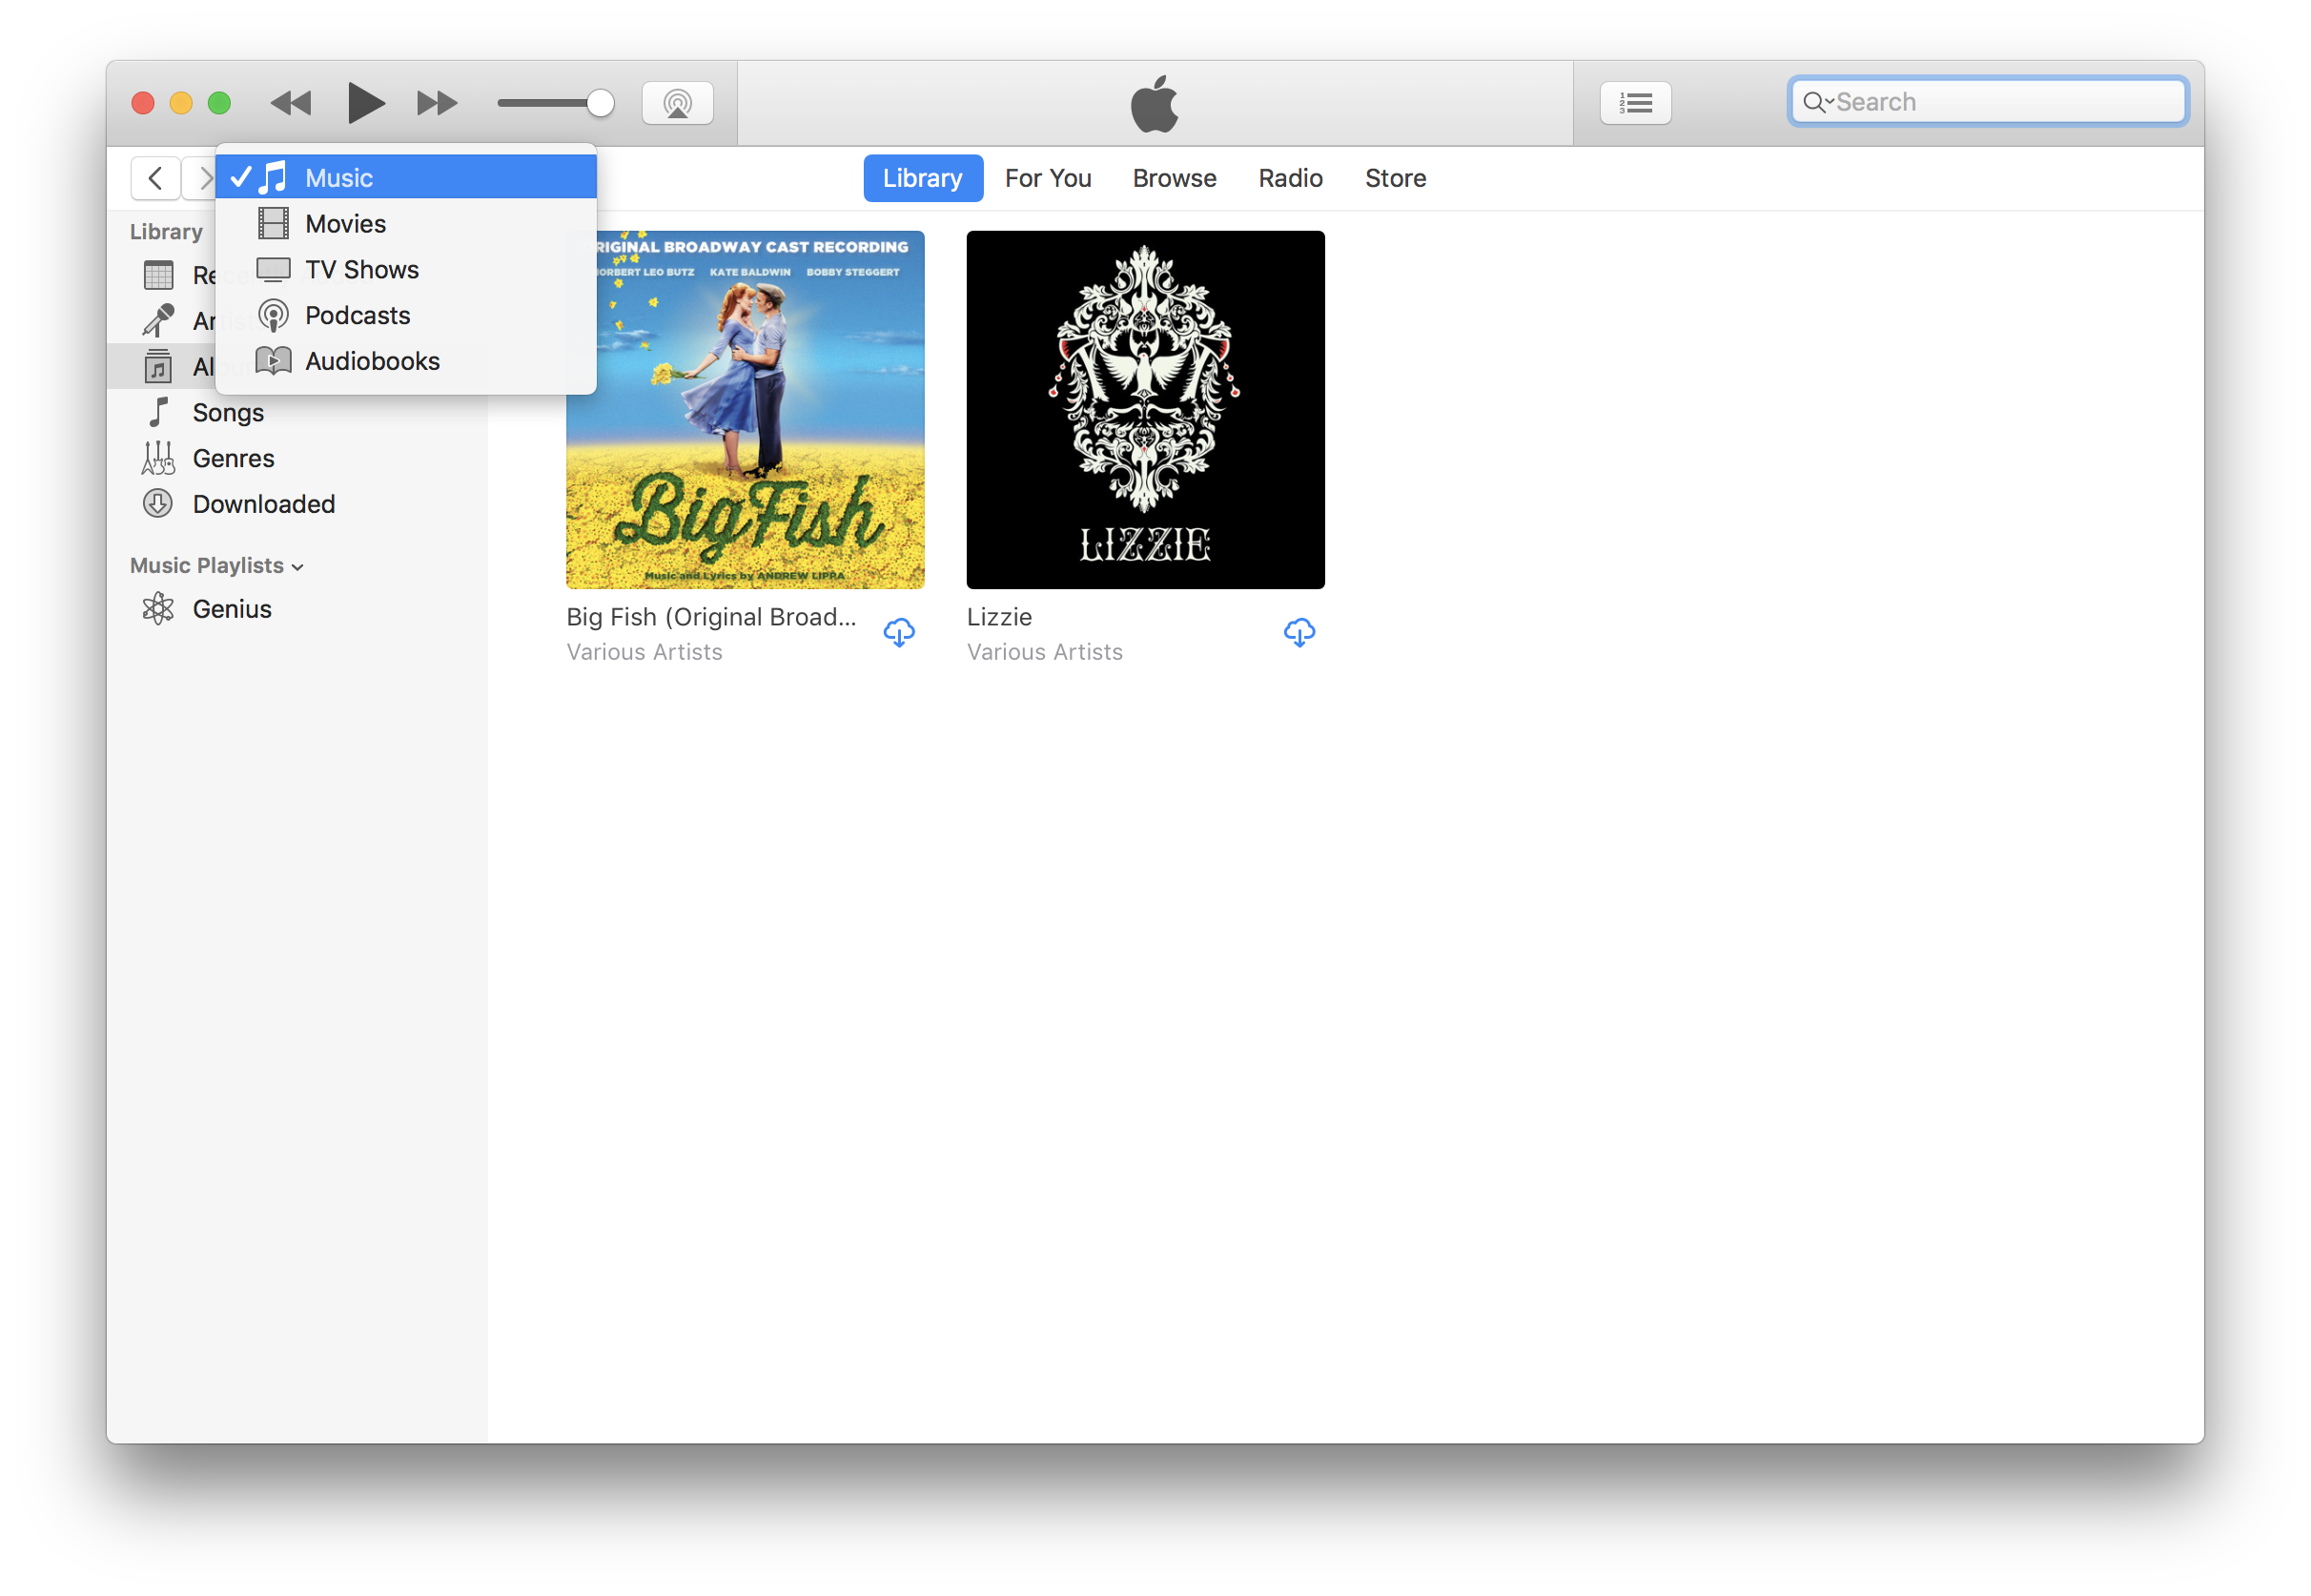
Start downloading your music, movies, and more
While your Mail continues to download (I’m assuming everyone else also has sprawling Gmail accounts), pull up iTunes and sign in using your Apple ID and password when prompted. You’ll then be able to download music, movies, TV shows, and audiobooks you previously purchased, in addition to any podcasts you’ve signed up for. You can access the different media types by clicking the drop-down menu above your Library.
Fix your Dock
At this point, you’ve opened up a few apps and have configured some settings. Now’s as good a time as any to tweak what appears in your Dock, the bar of apps at the bottom of your screen that’s full of stuff you might never use — or, at least, don’t need displayed quite so prominently.

Click and drag apps you don’t care about to the trash. You aren’t deleting them for good; just the handy little Dock shortcut that you’d otherwise use to access them. The apps themselves will still be available in Finder or a Spotlight search, don’t worry.

Once you’ve pruned your Dock a bit, pull up System Preferences (either using the icon you left in your Dock or by clicking on the Apple icon in the upper-left corner of your screen). Take a deep breath. I’m going to take you though most of the screens you should care about, but don’t let that stop you from exploring all the options macOS has to offer at a later point.
System Preferences: General
In this, and all subsequent tips, I’ll highlight a few options I like to tweak. Your preferences are likely going to be different than mine, but this should at least give you an idea of where to start (or some interesting little tidbits you might not have known about).
In the General window of macOS’ System Preferences, I like to throw back to my high school goth days by enabling the dark menu bar and dock — though I refuse to pay Apple extra for darker-themed Mac accessories. I also change the macOS highlight colour, because I like green more than blue.
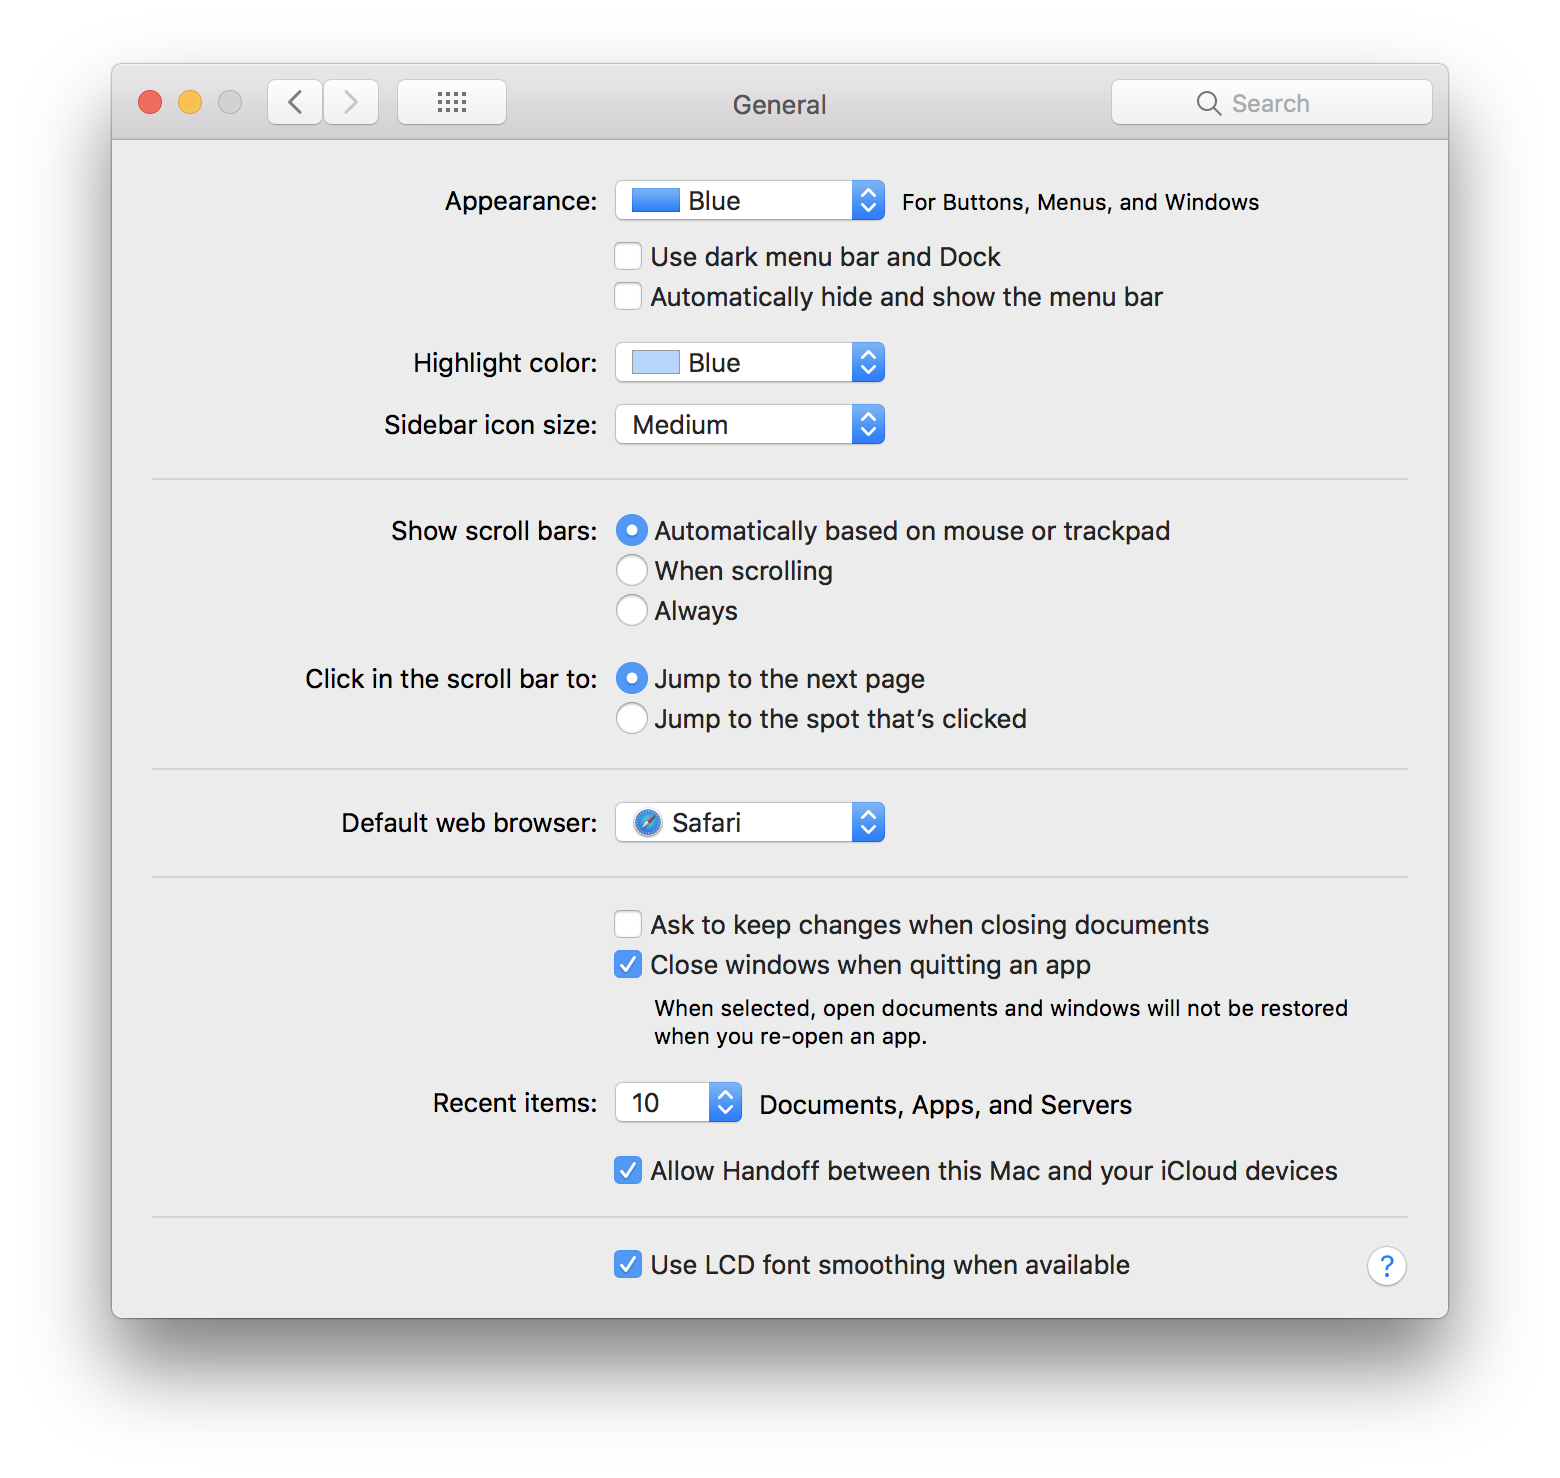
This is where you’ll go to change the default web browser in macOS if you forget to set that option when prompted by any non-Safari browser you install later. You can also expand or completely remove the macOS recent items list (normally found by clicking the Apple icon in the upper-left corner of your screen), just in case you need more options (or more privacy).
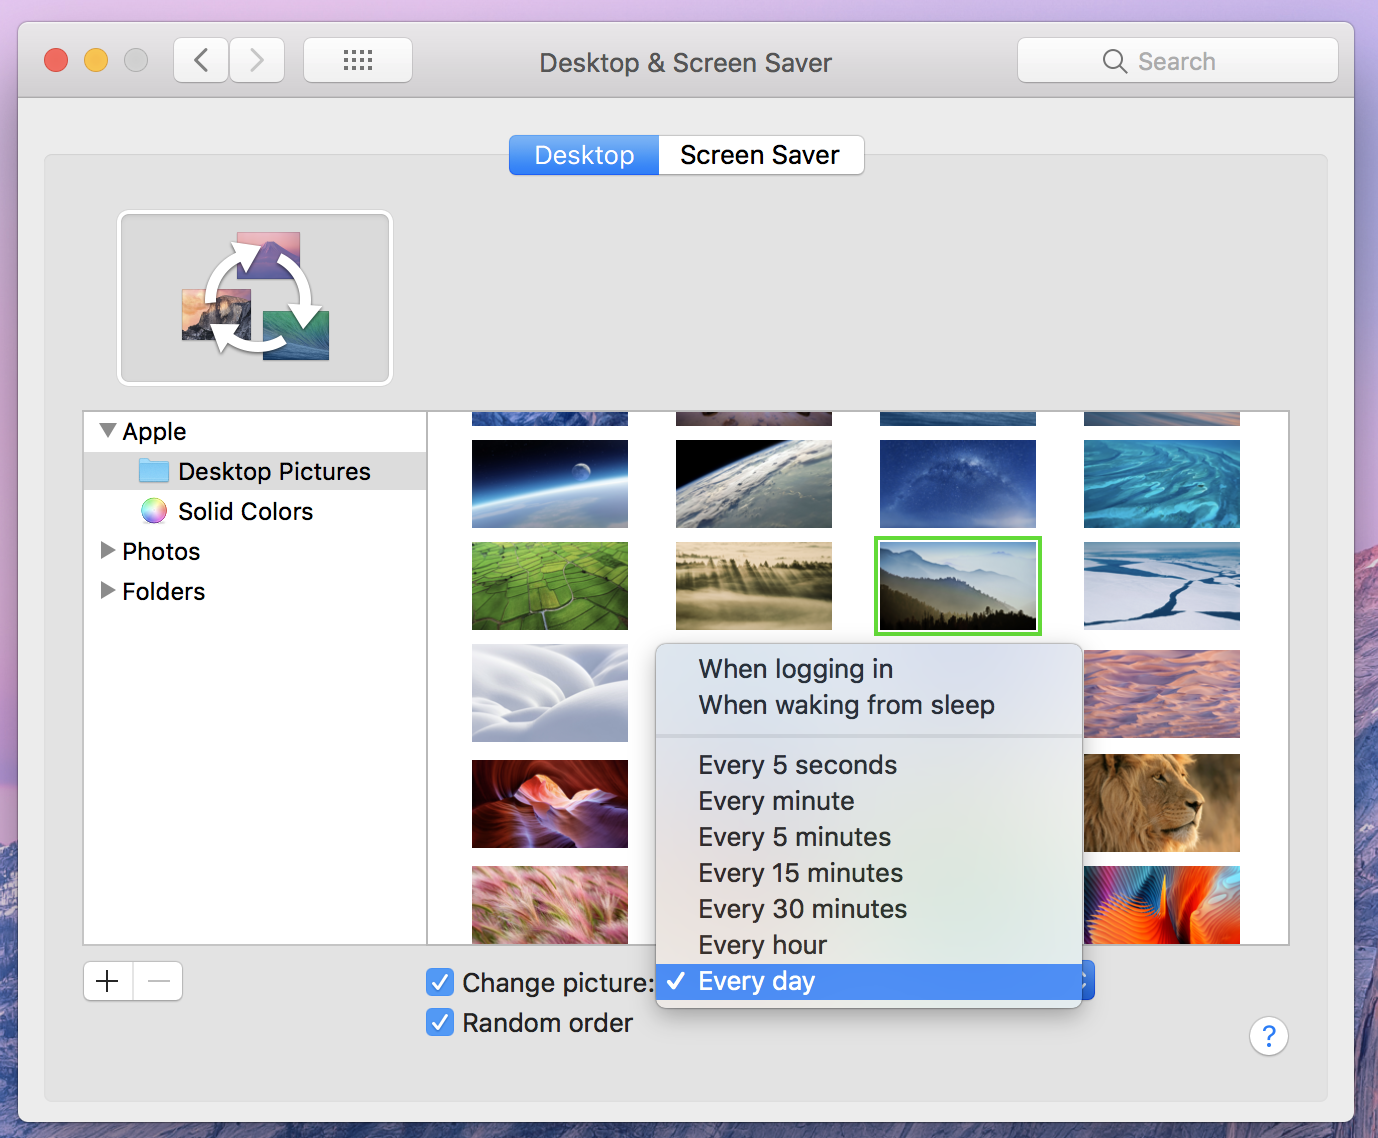
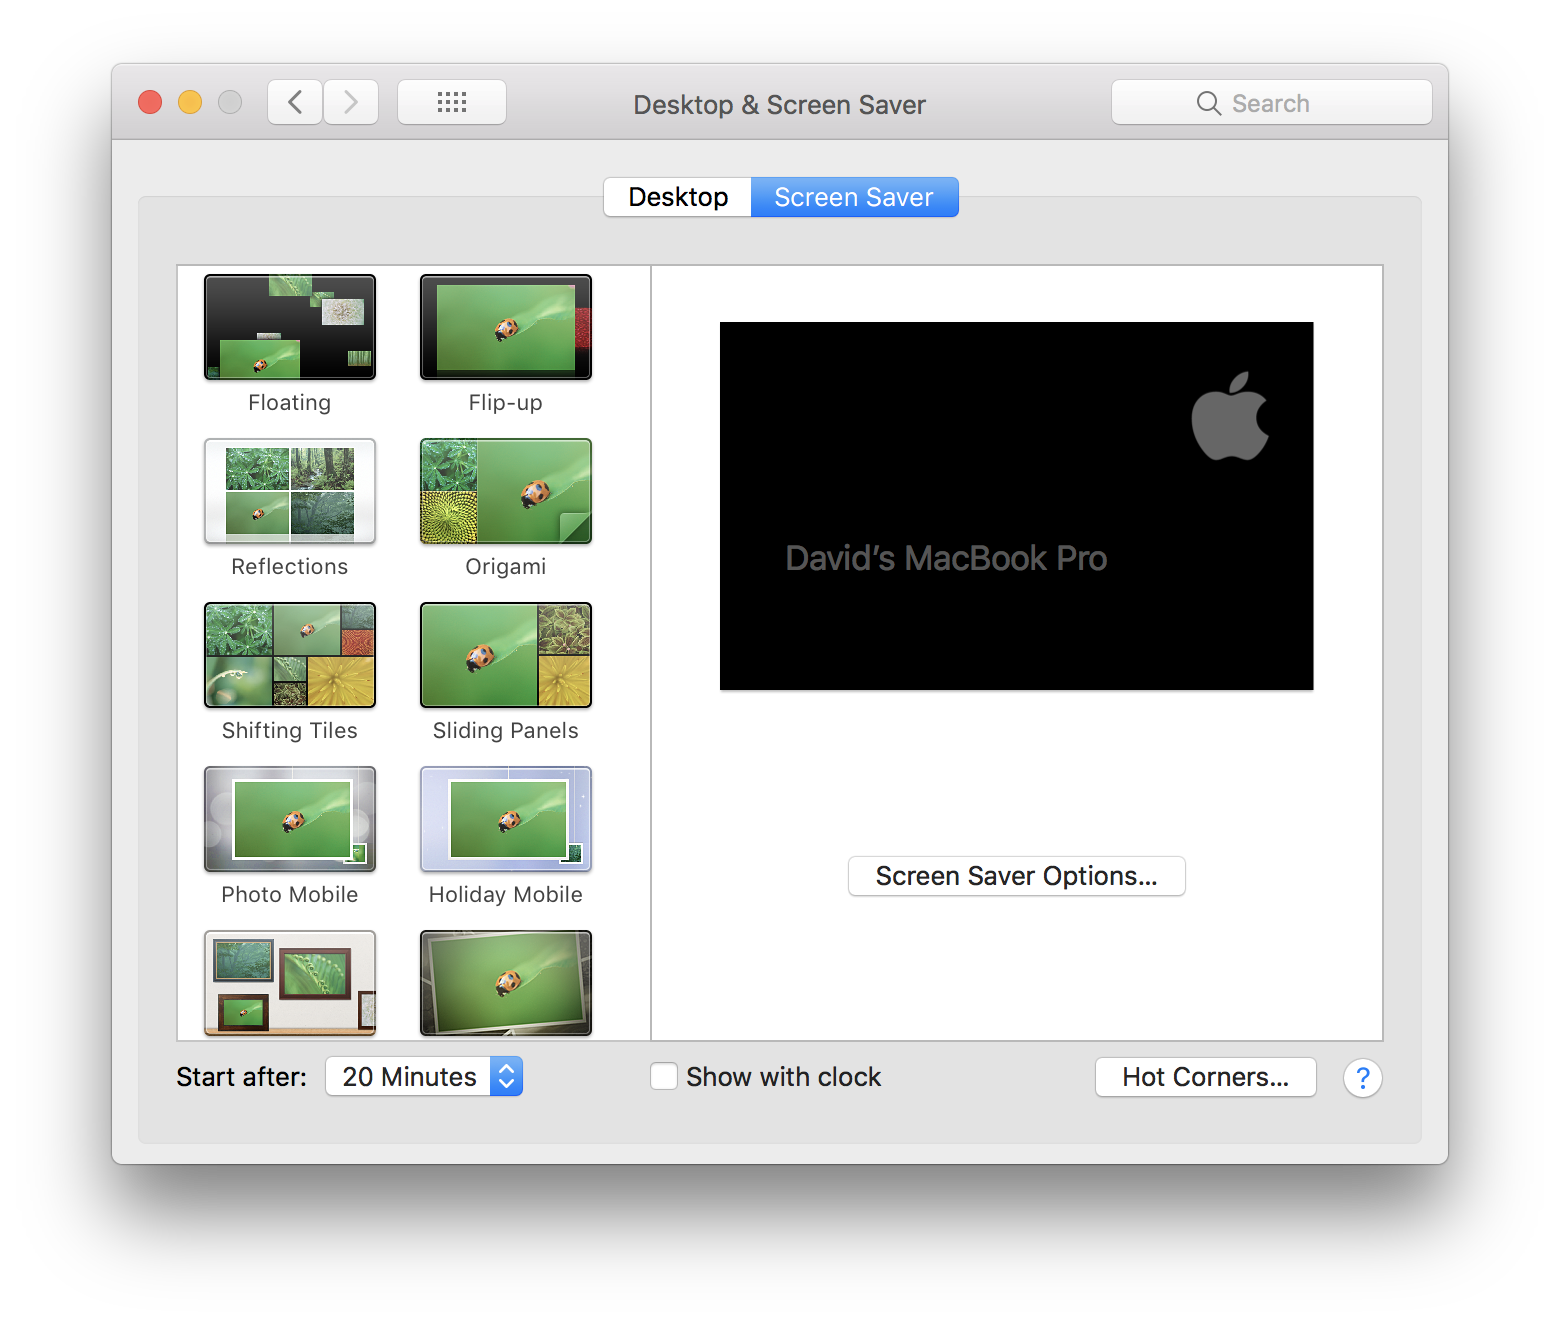
System Preferences: Desktop & Screen Saver
If you’re big into how your MacBook looks and feels, you’ll want to spend a little time in this section of macOS’ System Preferences. Obviously, this is where you can set your macOS desktop background and screen saver — nothing too complicated there.
If you find it difficult to pick a picture, you can always set the operating system to shuffle through a random order of pictures across a number of intervals: whenever you log in, whenever you wake up your system from sleep, every day, or every five seconds (if you’re feeling especially skittish).
For your screen saver, it might be tempting to go with the classic Flurry or Arabesque — really, anything is better than macOS’ default pick, “Message.” I like the Ken Burns screensaver myself, because macOS will then rotate through a series of images (Arial, Nature Patterns, National Geographic, or Cosmos) and enrich my wanderlust, rather than just blast me with computer-generated colours.
While you’re here, don’t forget to set how long you want macOS to just sit there, idling, before it kicks your screen saver on.
System Preferences: Dock
In this window, you can adjust the size of your Dock and tell macOS where you want it to appear: on the left, bottom, or right of your screen. You can enable the classic magnification affect, which enlarges Dock icons when you move your mouse over them. And, as always, you can have macOS automatically hide the dock if you want as clean of a desktop look as possible.
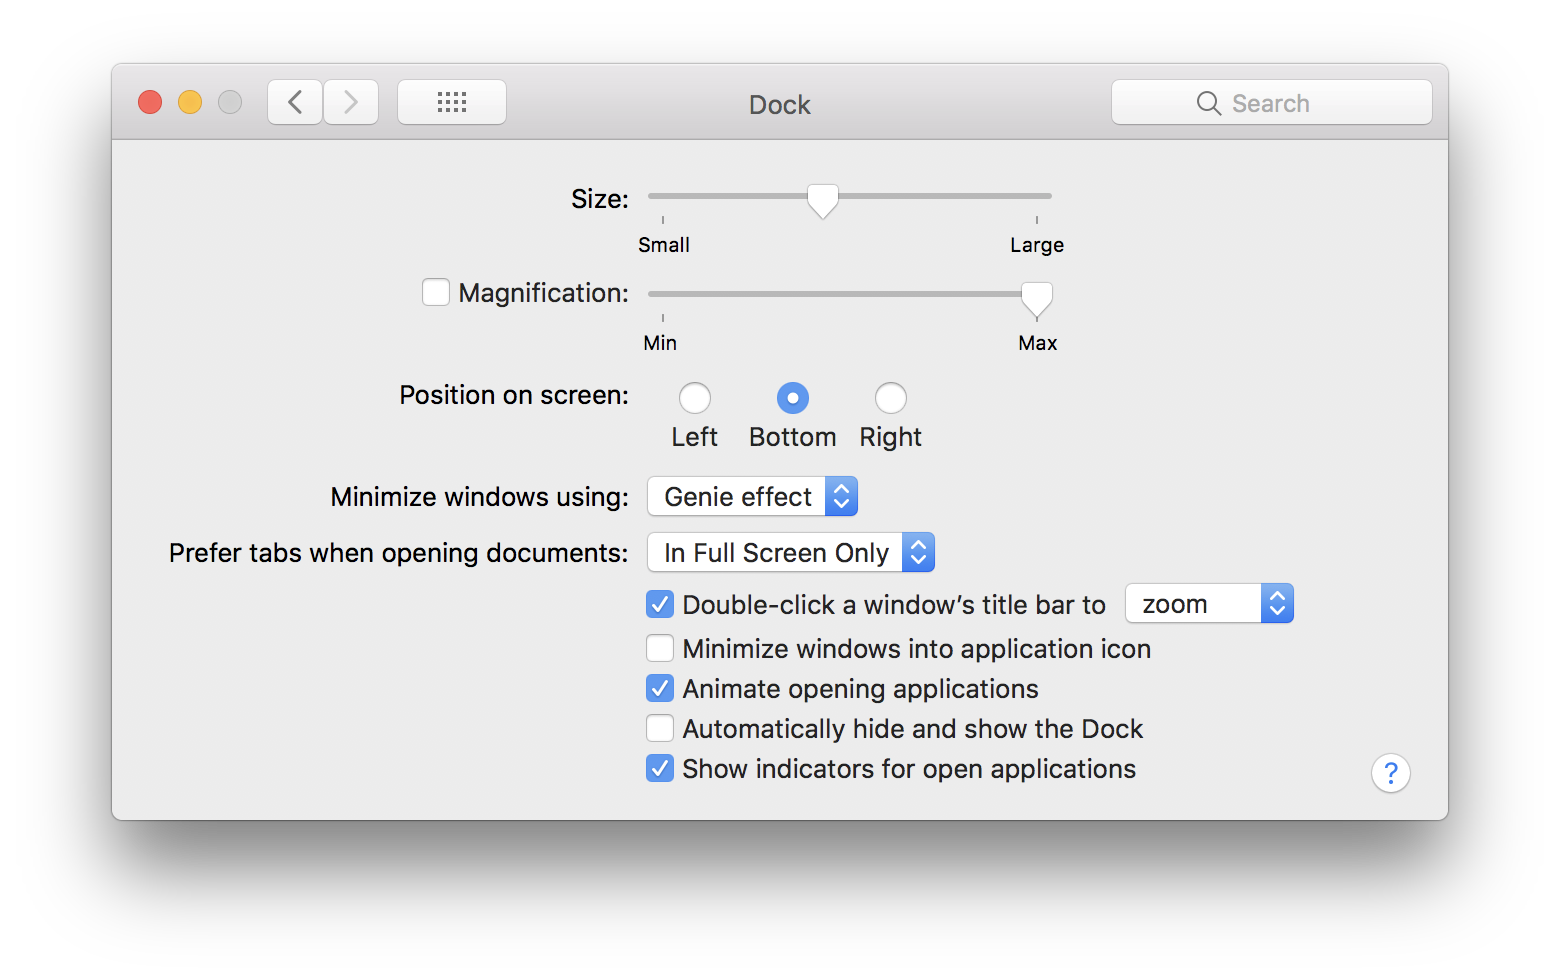
Even though it’s not really related to the Dock, this is where you can also tell your operating system to use tabs, rather than new windows, whenever you open up multiple windows in an app. I don’t mind having a lot of windows open, but if you prefer your desktop to feel a bit more like your web browser, this is the setting to play with.
System Preferences: Security and Privacy
The name sounds ominous, but Security and Privacy only has a few options you need to care about. On its General tab, you can set when your MacBook should require a password or Touch ID authentication.
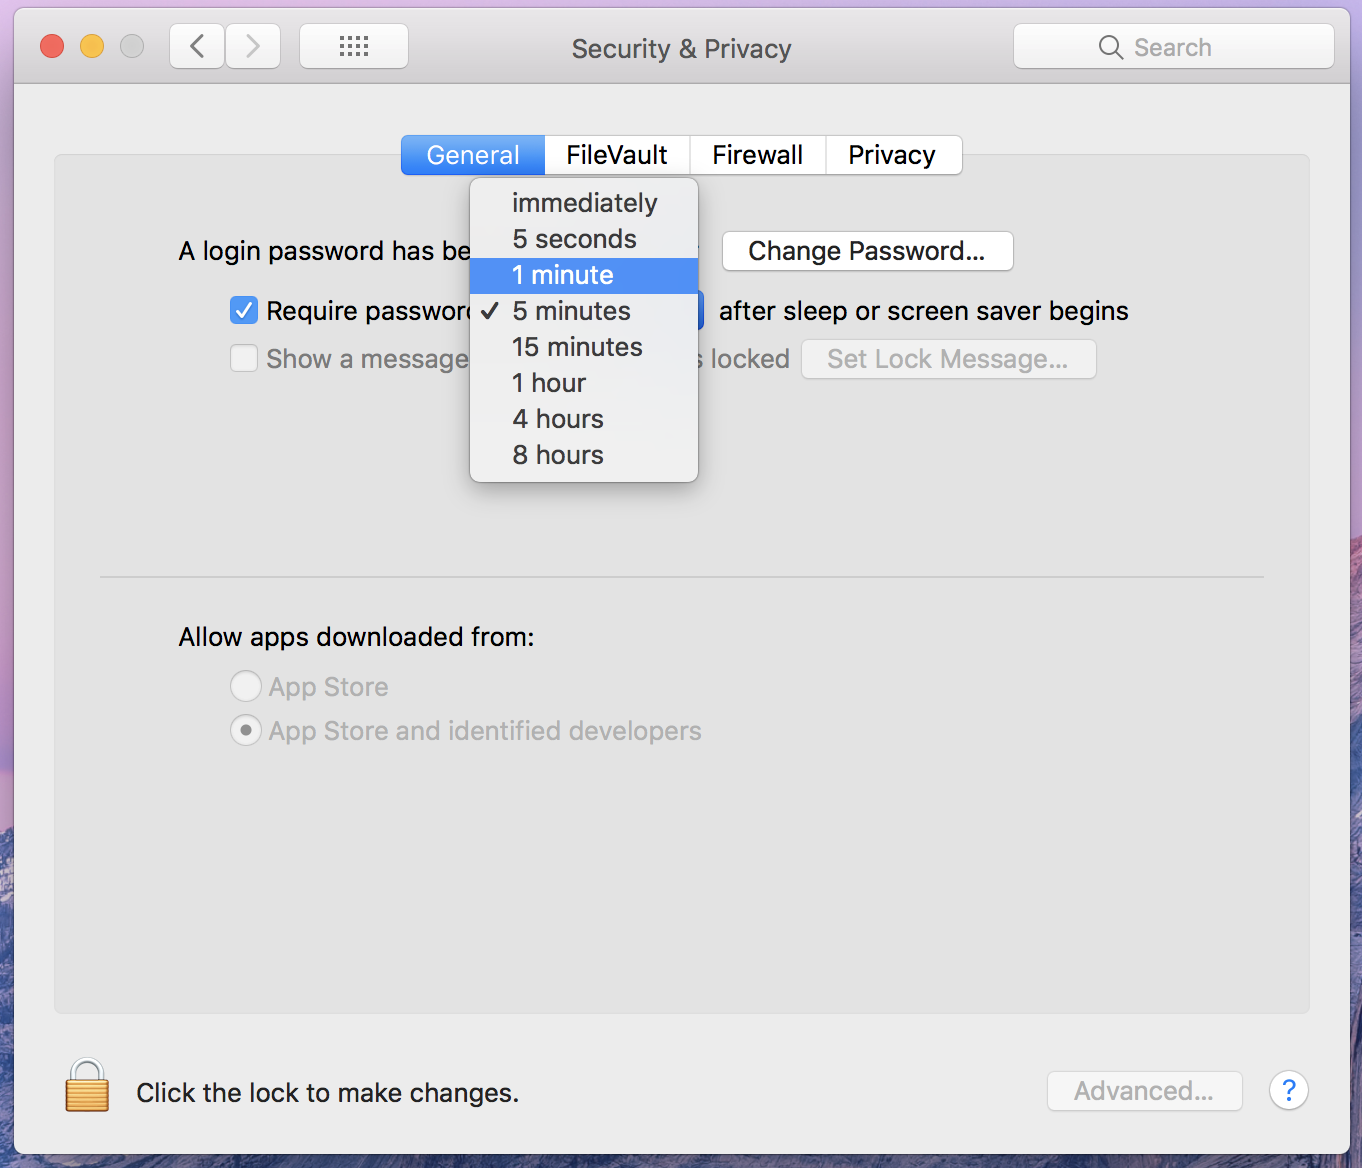
For example, you might want your MacBook to force you to log in if it’s been more than five minutes since it went to sleep (or its screen saver kicked on). This ensures you aren’t always having to type in some super-long password every time you make a short bathroom break.
If you’ve enabled Touch ID, you can probably set this time period shorter — if not “Immediately” — because pressing your finger to your laptop’s fingerprint scanner takes almost no time at all. You won’t sacrifice much convenience for stronger physical security.
Conversely, if you do a lot of working in a local coffee shop and are foolish enough feel safe enough to leave your laptop sitting on your table when you go to order another drink, you might also want to lower the time to prevent anyone from fooling around with your stuff. (Yes, they could also just take your laptop, but, well…)
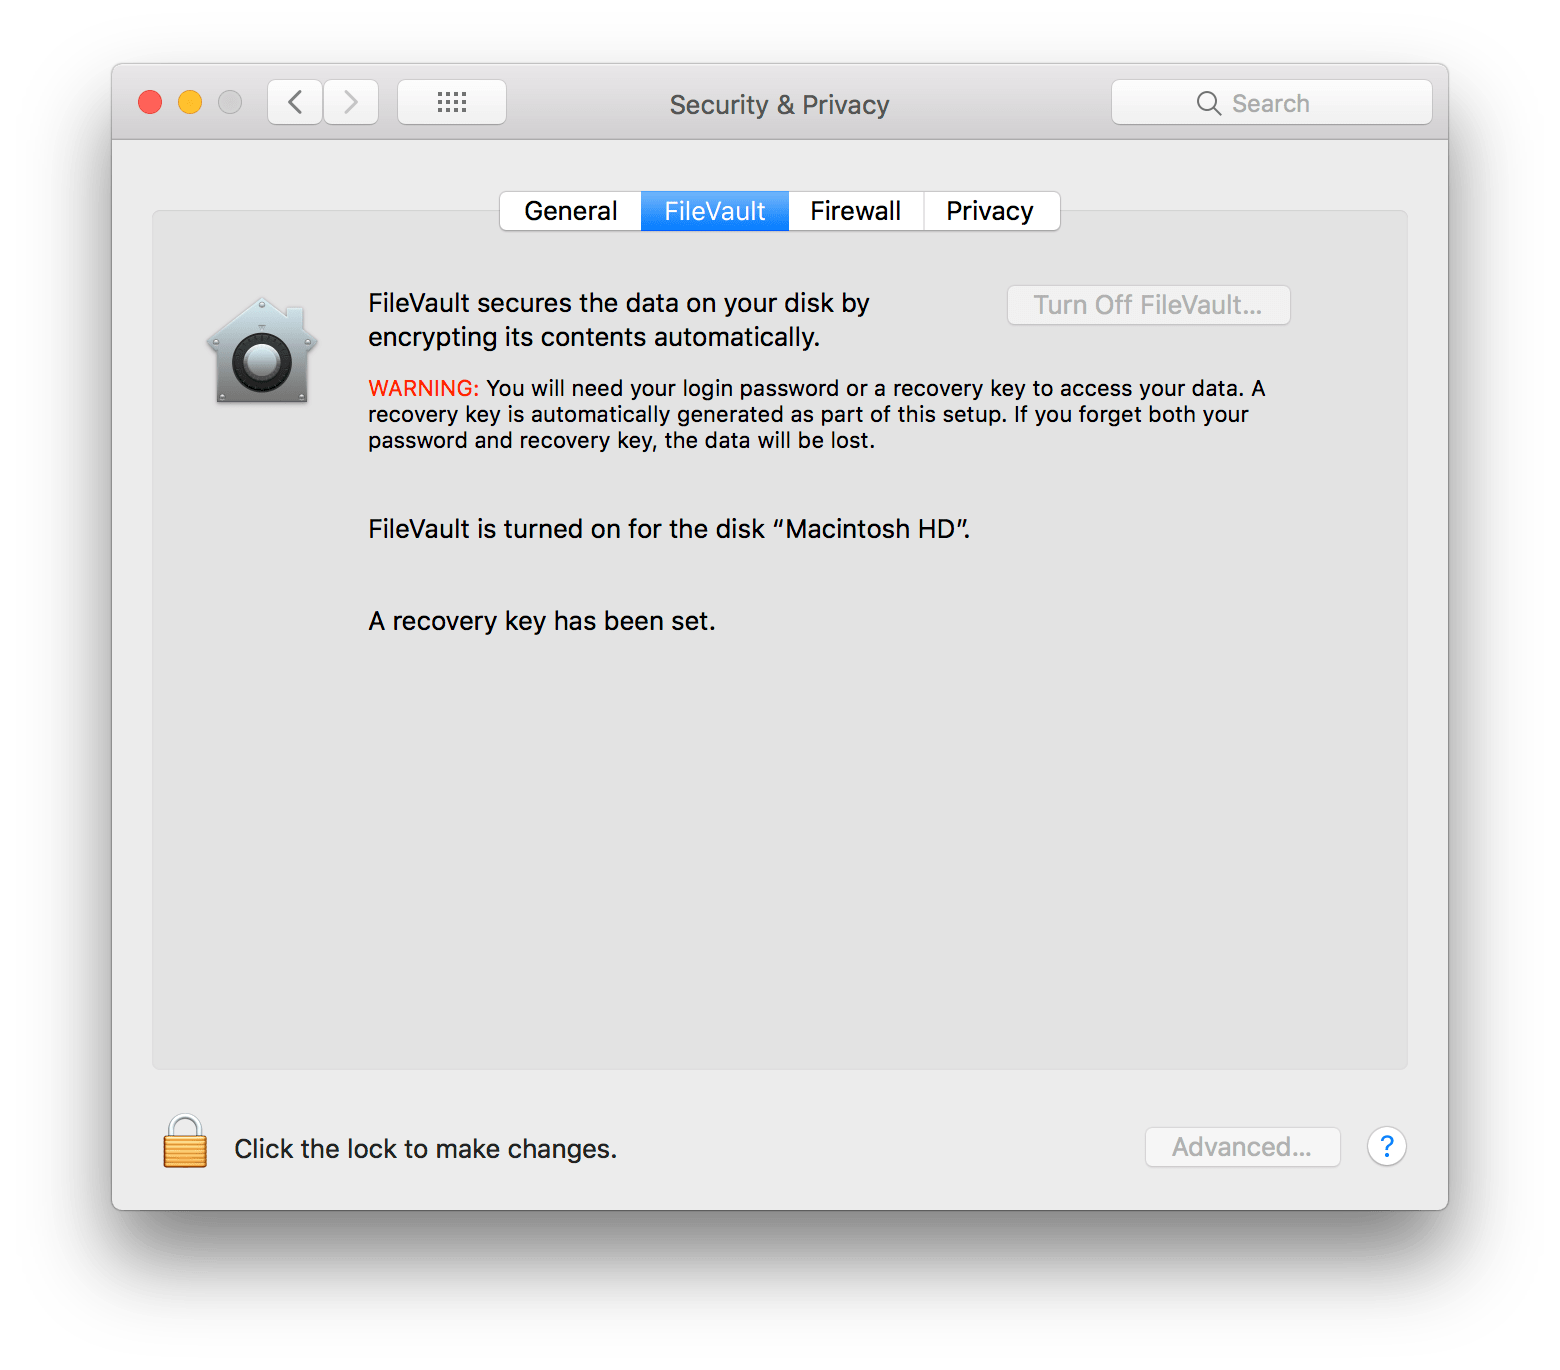
If you haven’t already enabled it, consider using FileVault (found on the FileVault tab) to encrypt your system drive. If someone steals your laptop and rips out the hard drive, they will have a much more difficult time reading its contents, if they will even be able to do it at all.
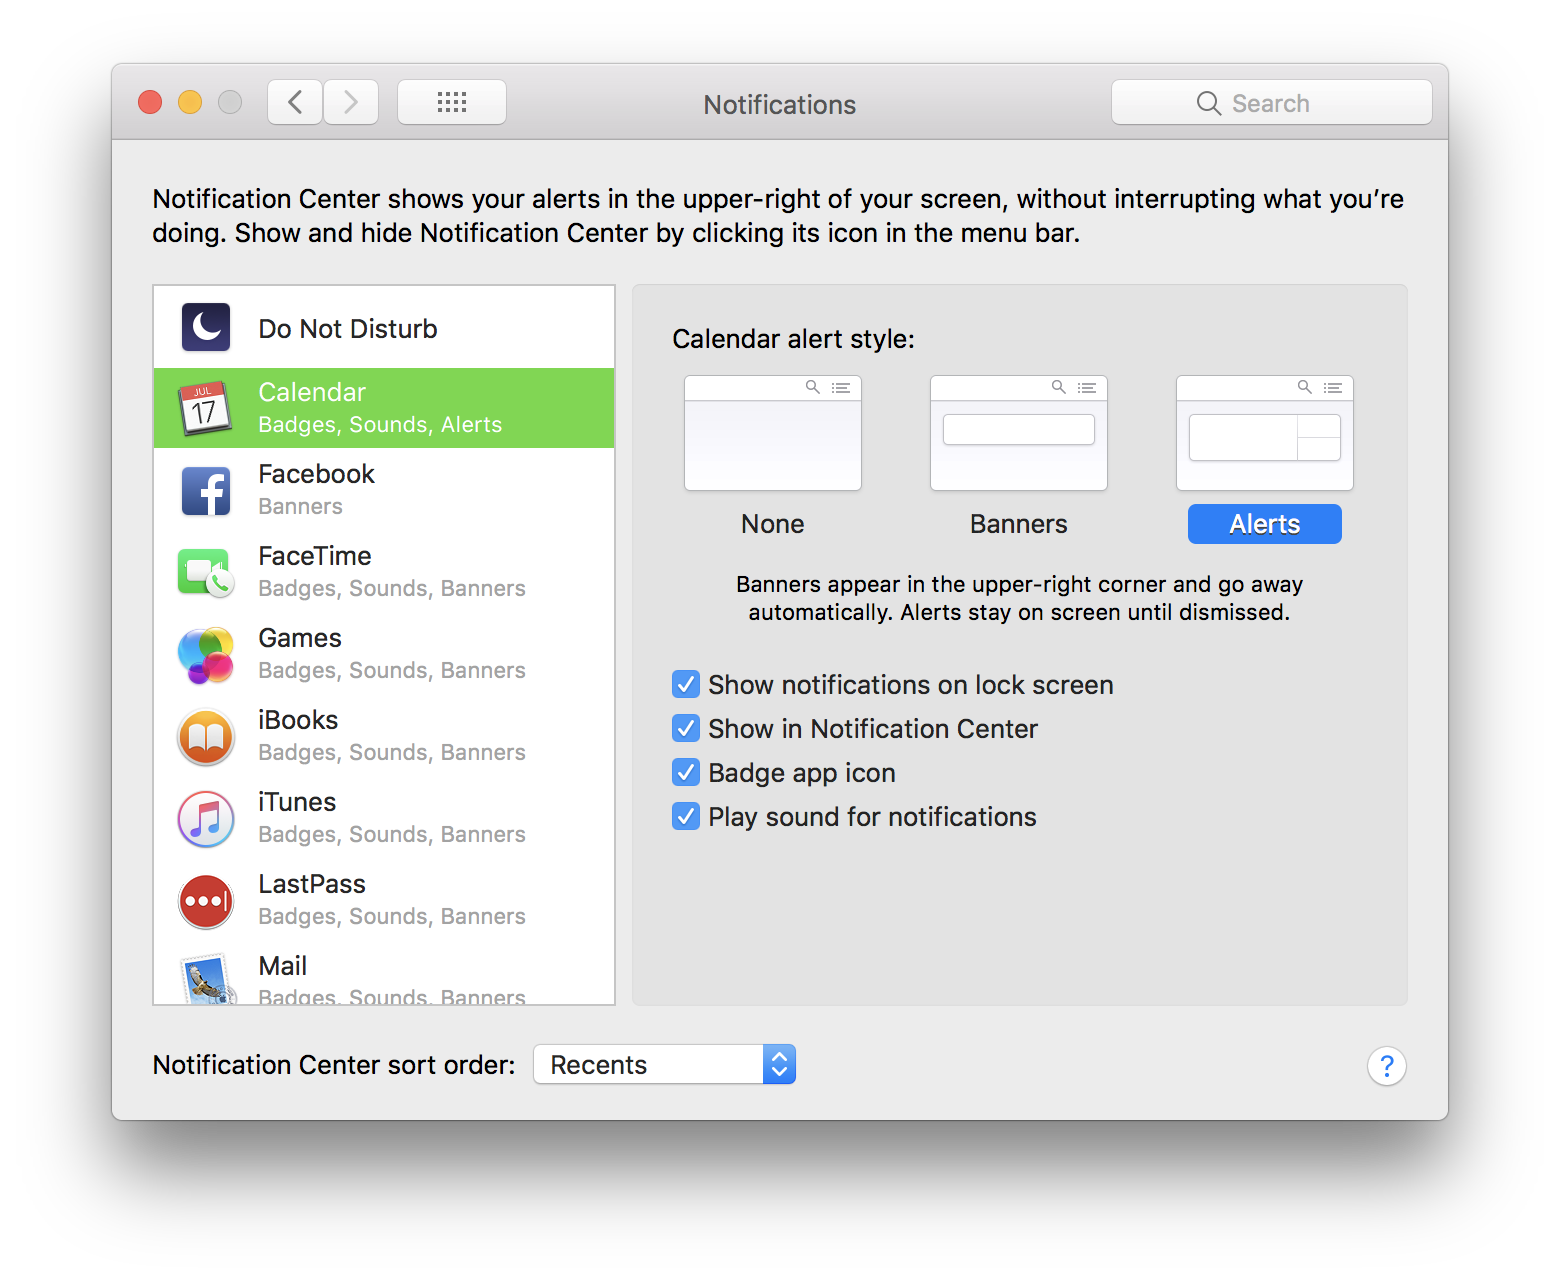
System Preferences: Notifications
You can spend a lot of time in this screen customising how you want notifications to appear for each app that’s installed on your system. This is going to take forever to set up, but it’s worth doing if you hate being bothered by some apps, but not others.
One feature that everyone should check out is macOS’ Do Not Disturb mode, which allows you to turn off all banners, alerts, and audio notifications in certain instances (mirror your screen) or times (when you’re asleep).
System Preferences: Displays
There isn’t much you probably need to adjust in Displays, but you might want to consider turning on Night Shift to give your eyes a bit of a break in the evening. Doing so will affect the warmth of the colours macOS produces, which you can adjust separately (or turn off, if you find that you can’t stand the colour shift).

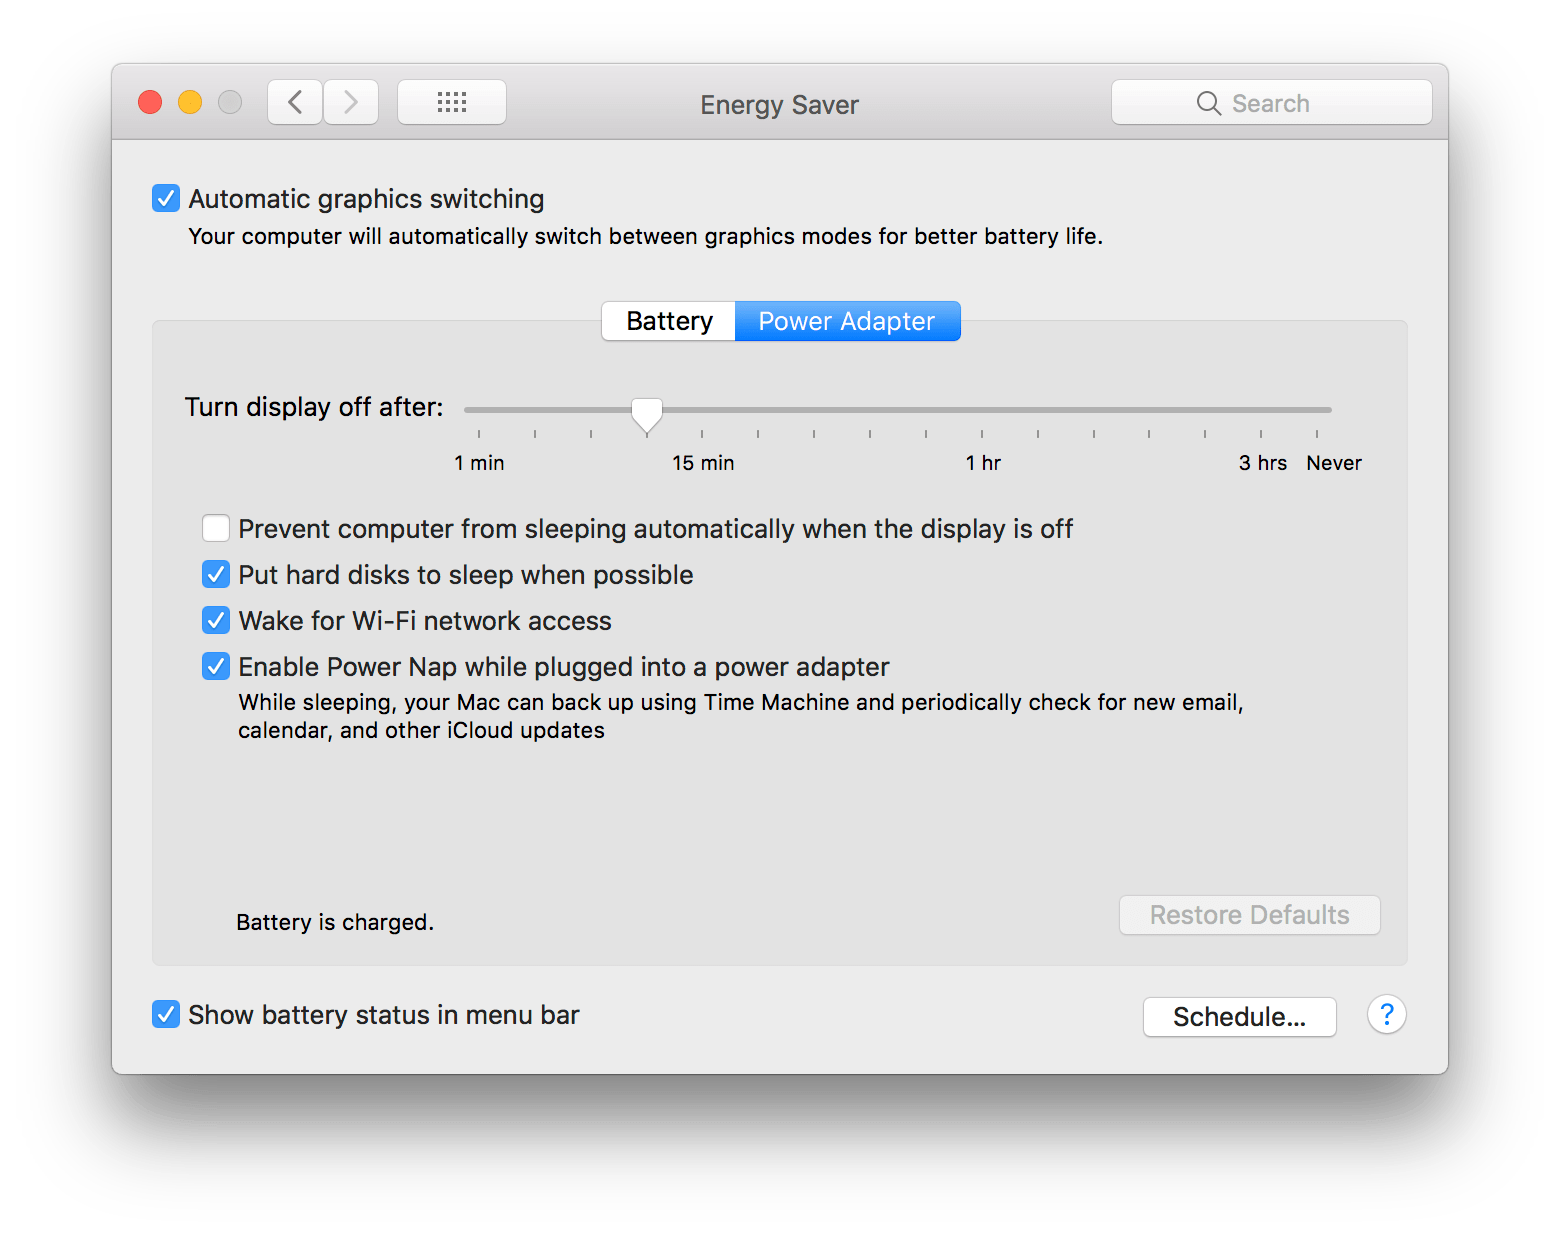
System Preferences: Energy Saver
When you’re on your laptop’s battery, you want to make sure that your display — a big battery leech — is set to power off when you aren’t actively using your MacBook. Make sure your system is also sleeping your drives “when possible” and dimming the display to conserve as much battery power as possible.
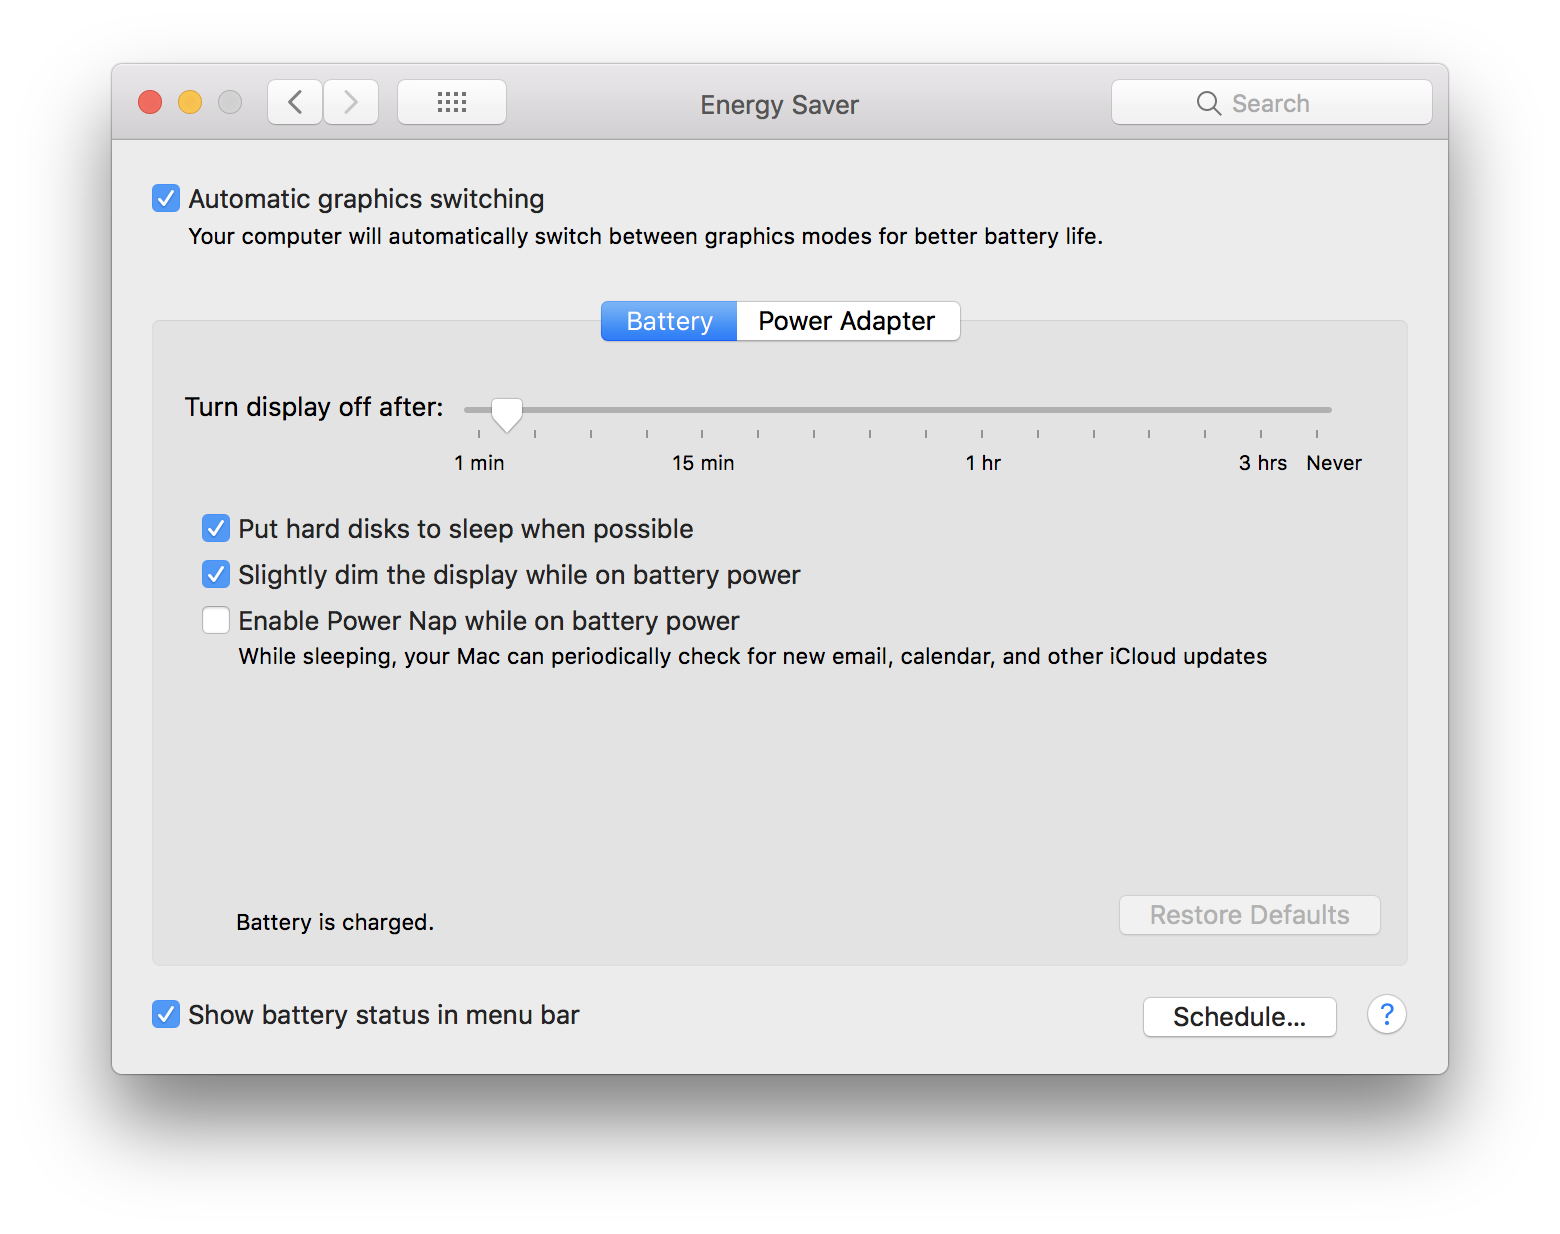
When your system is plugged in to the wall, make sure you’ve enabled the Power Nap setting so it can run Time Machine backups, check for email, and grab other updates even while it’s asleep. It’s a handy little feature that’s worth using unless you’re the kind of person who shuts down your system instead of putting it to sleep when you’re done for the day.
System Preferences: Keyboard
I normally never visit this section in System Preferences, but writing this guide encouraged me to check it out. And, go figure, there are a few options worth exploring. First, you can set your keyboard’s backlight to power down after a certain time period. That’s probably not going to save you hours of battery life, but every little bit helps. Why light the keys when you aren’t using your MacBook?
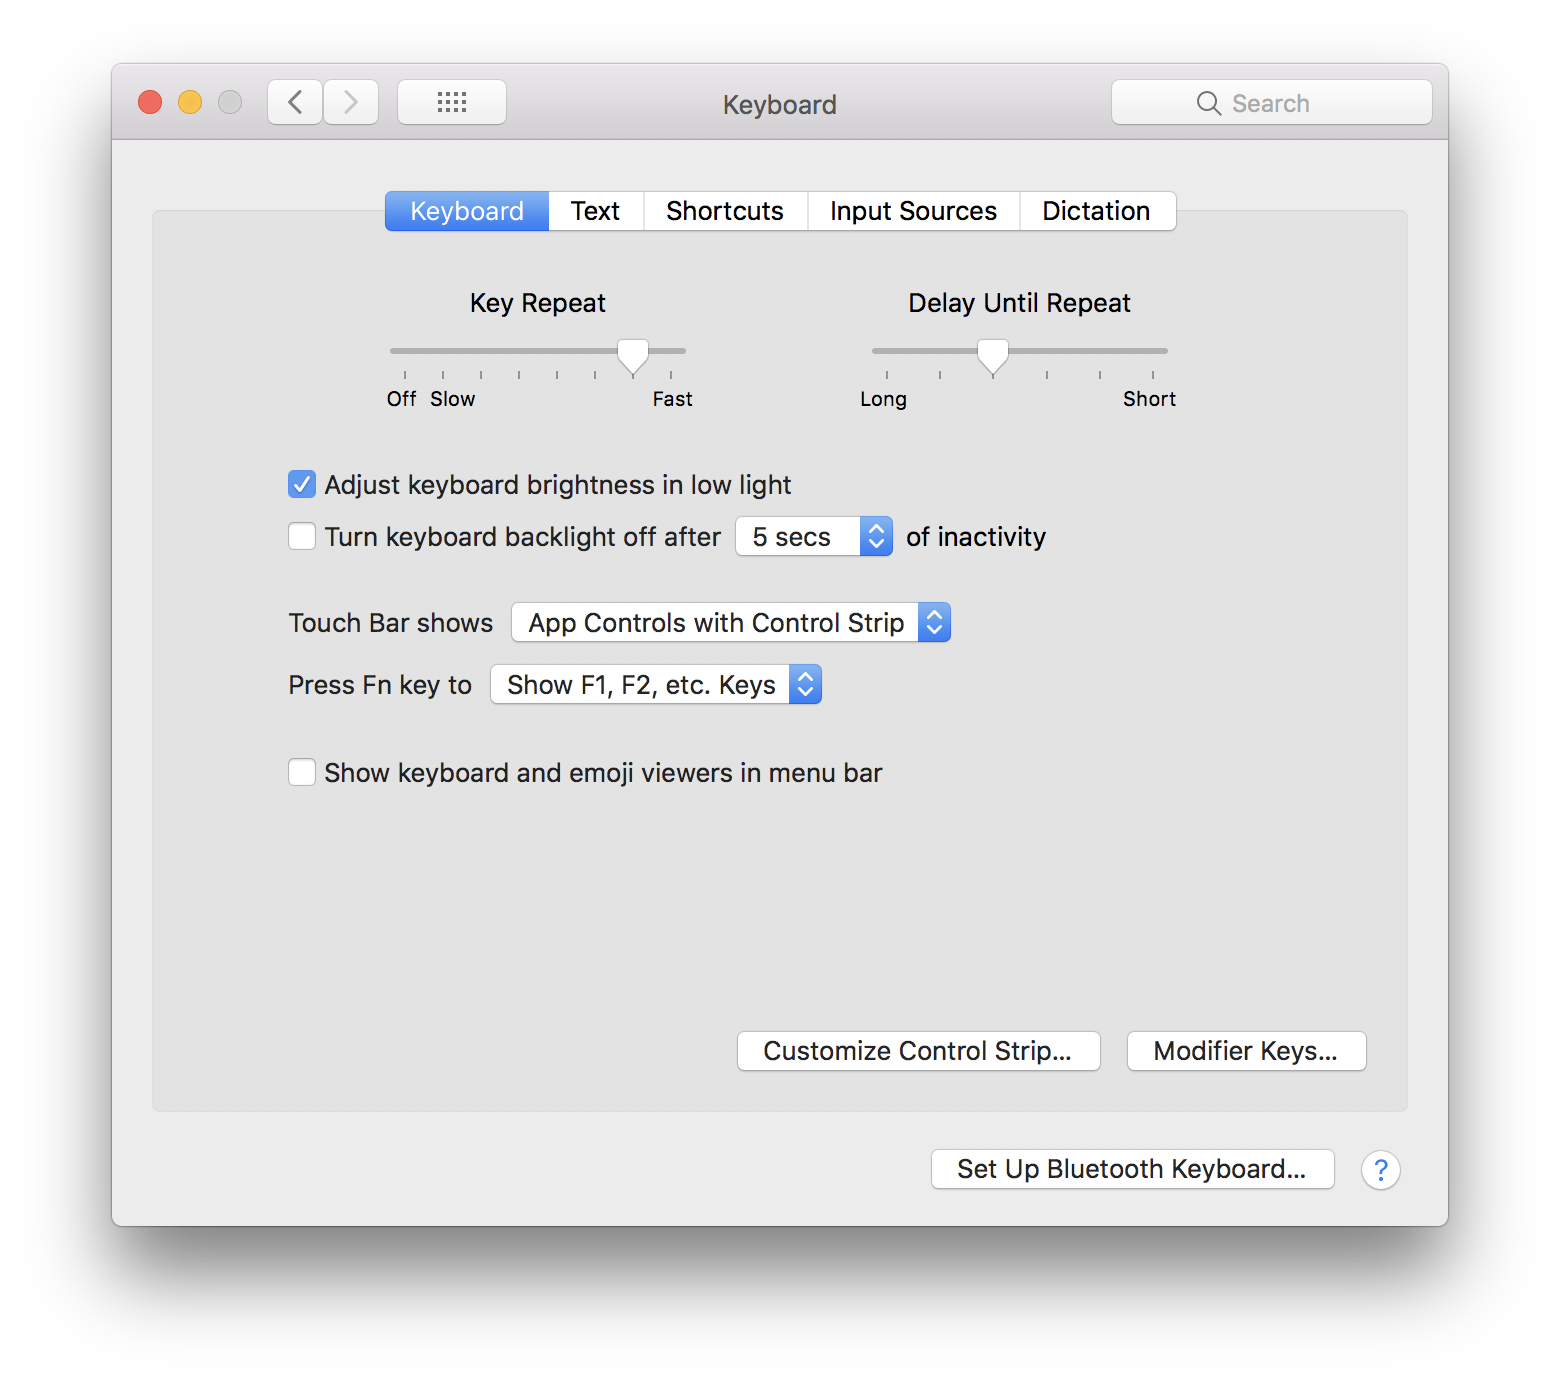
More importantly, the boringly named “Customise Control Strip” button is what you’ll use to edit the default icons that appear on your Touch Bar, if you’re using one of Apple’s fancier MacBooks.
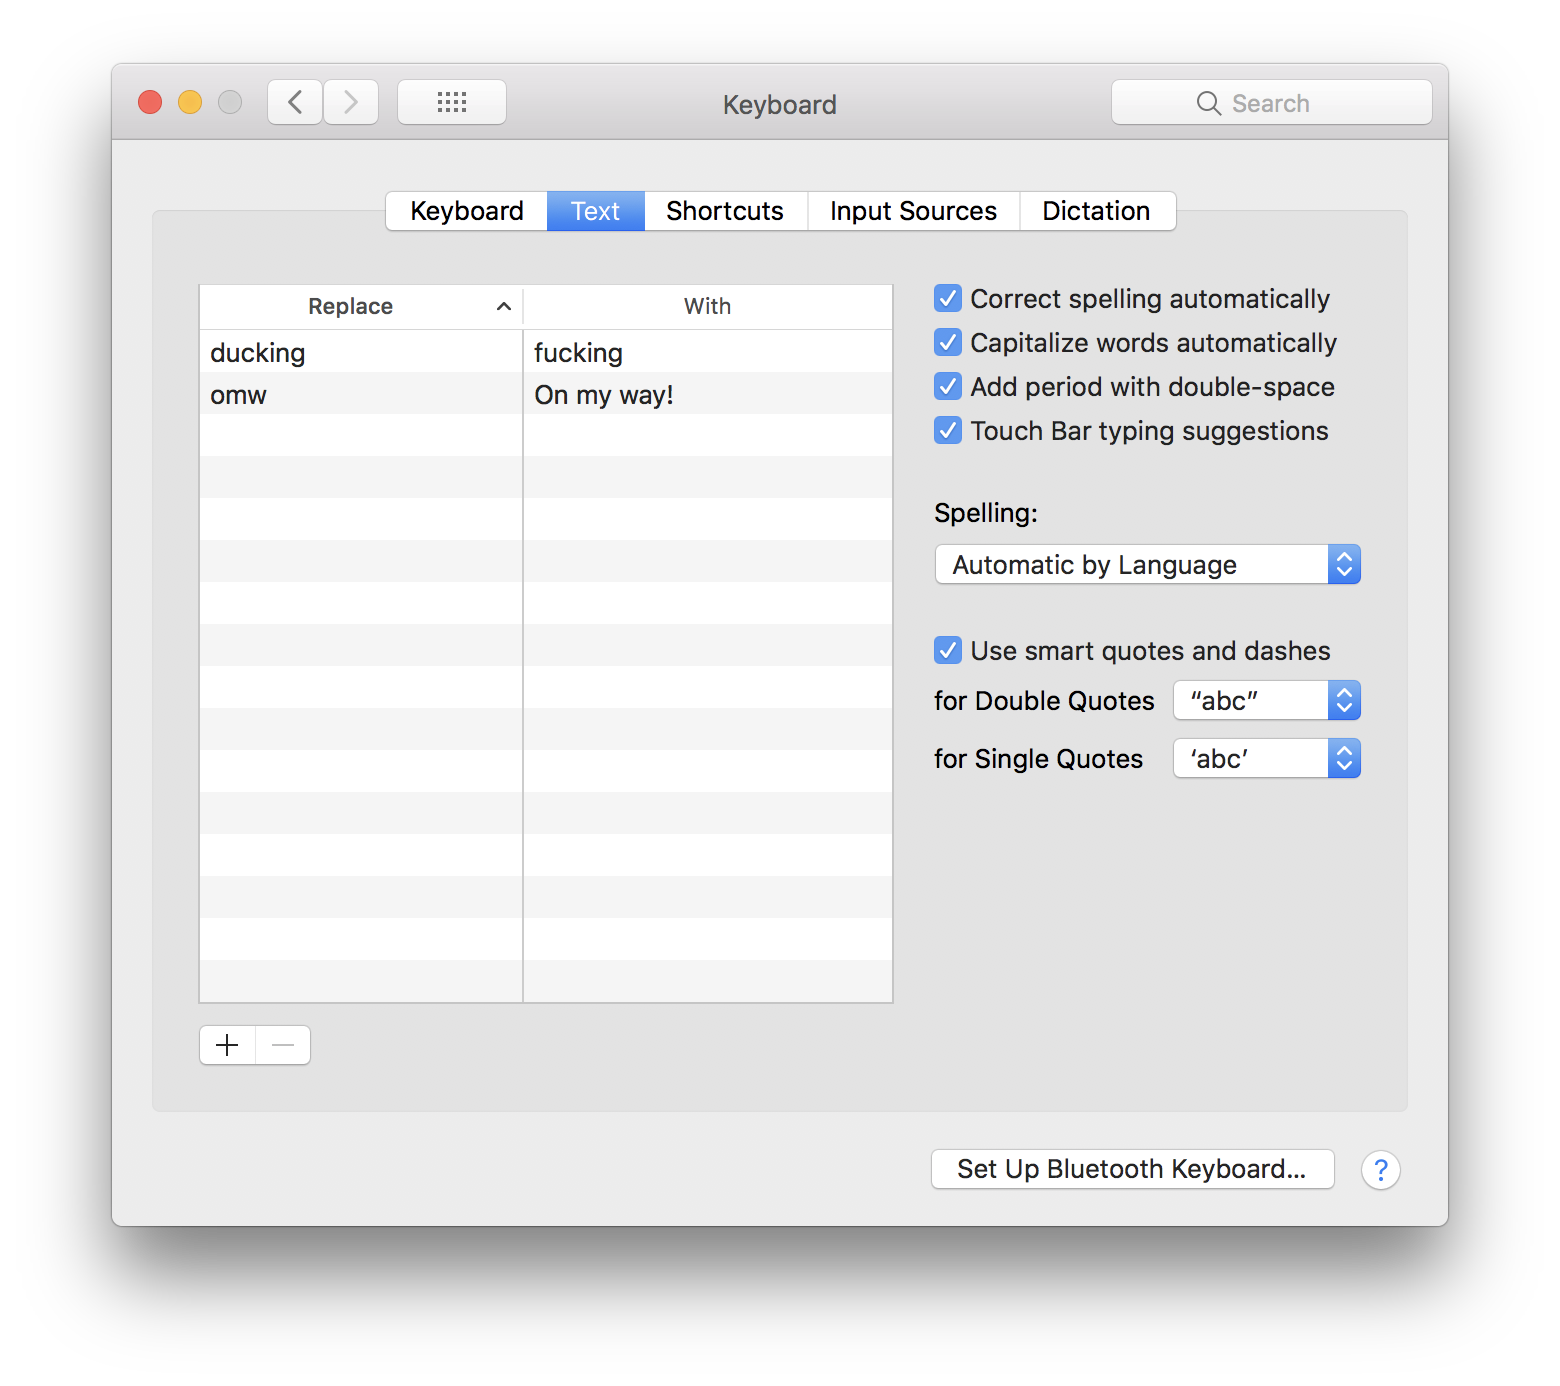
Finally, the Text tab is where you can to go set special autocorrect rules, which ensures you’ll never tell your friends how ducking stupid something is the next time you’re upset. (Since I love a good emdash, I also set mine to automatically correct two hyphens to ” — “.)
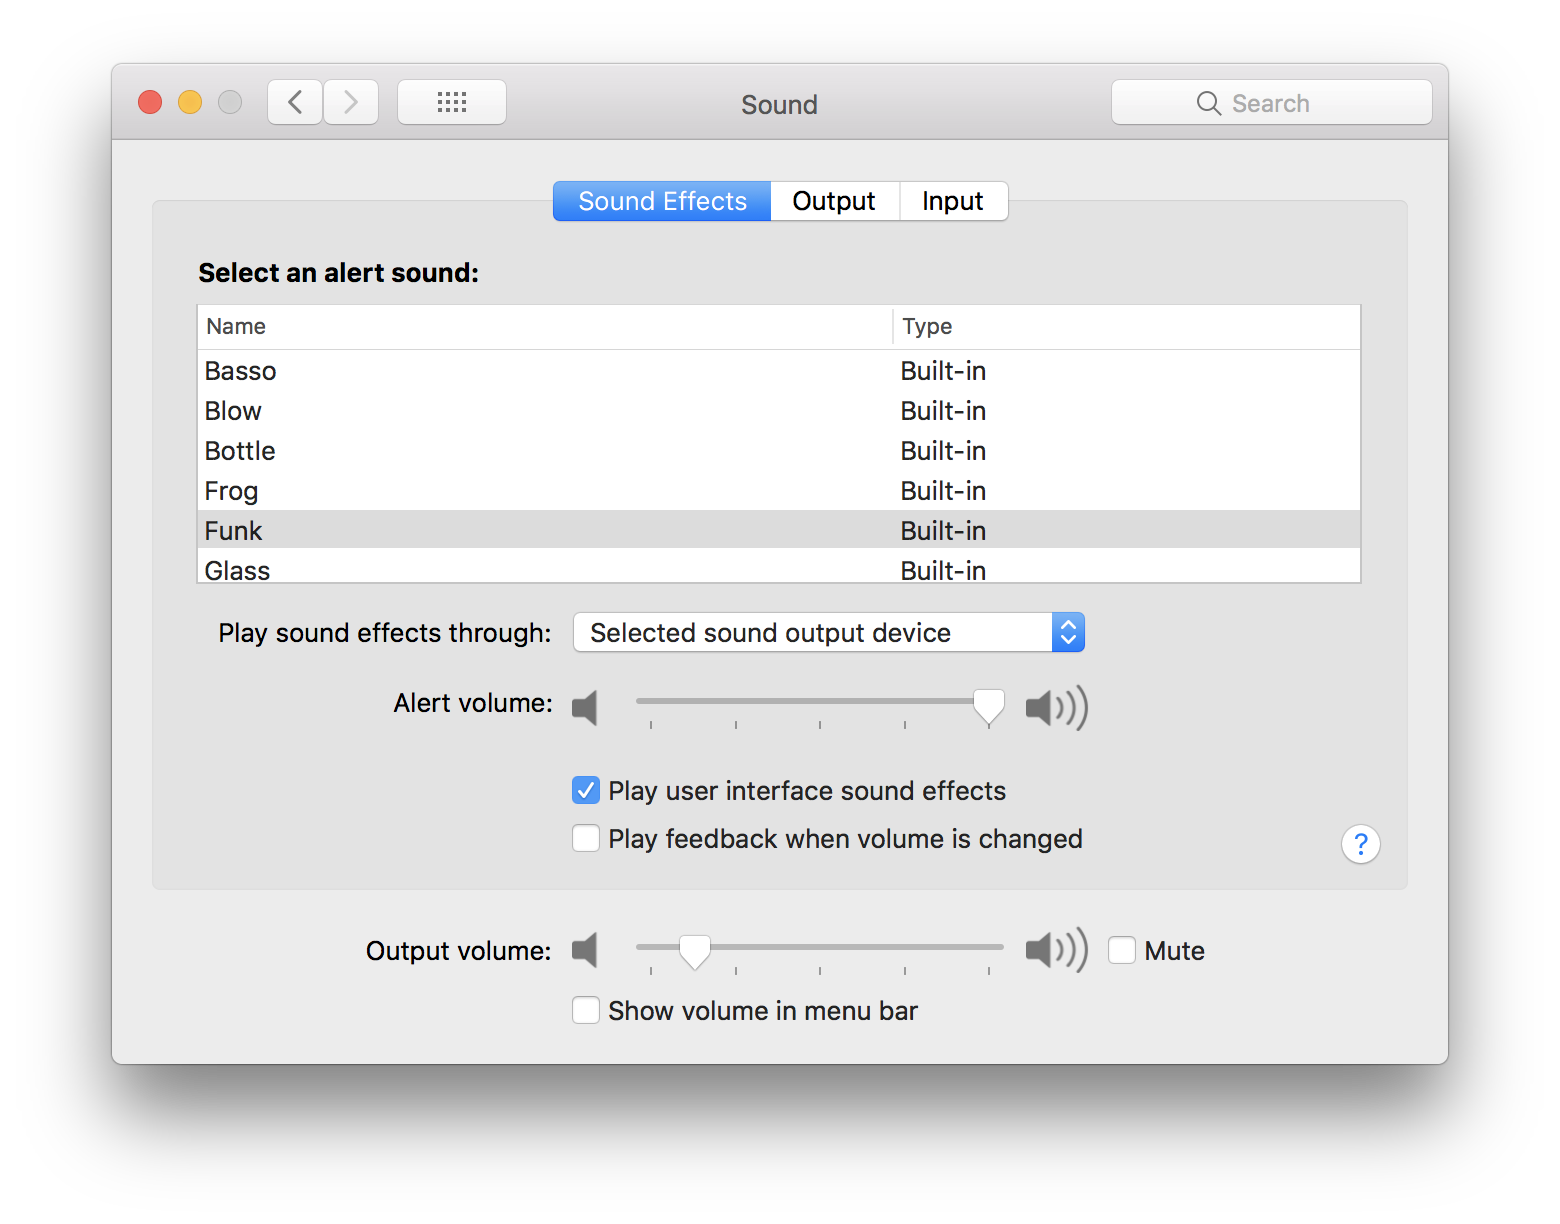
System Preferences: Sound
There’s not much you need to adjust in the Sound window, but you can toggle macOS to “play feedback when volume is changed” if you miss the boop-boop-boop when tinkering with your laptop’s loudness.
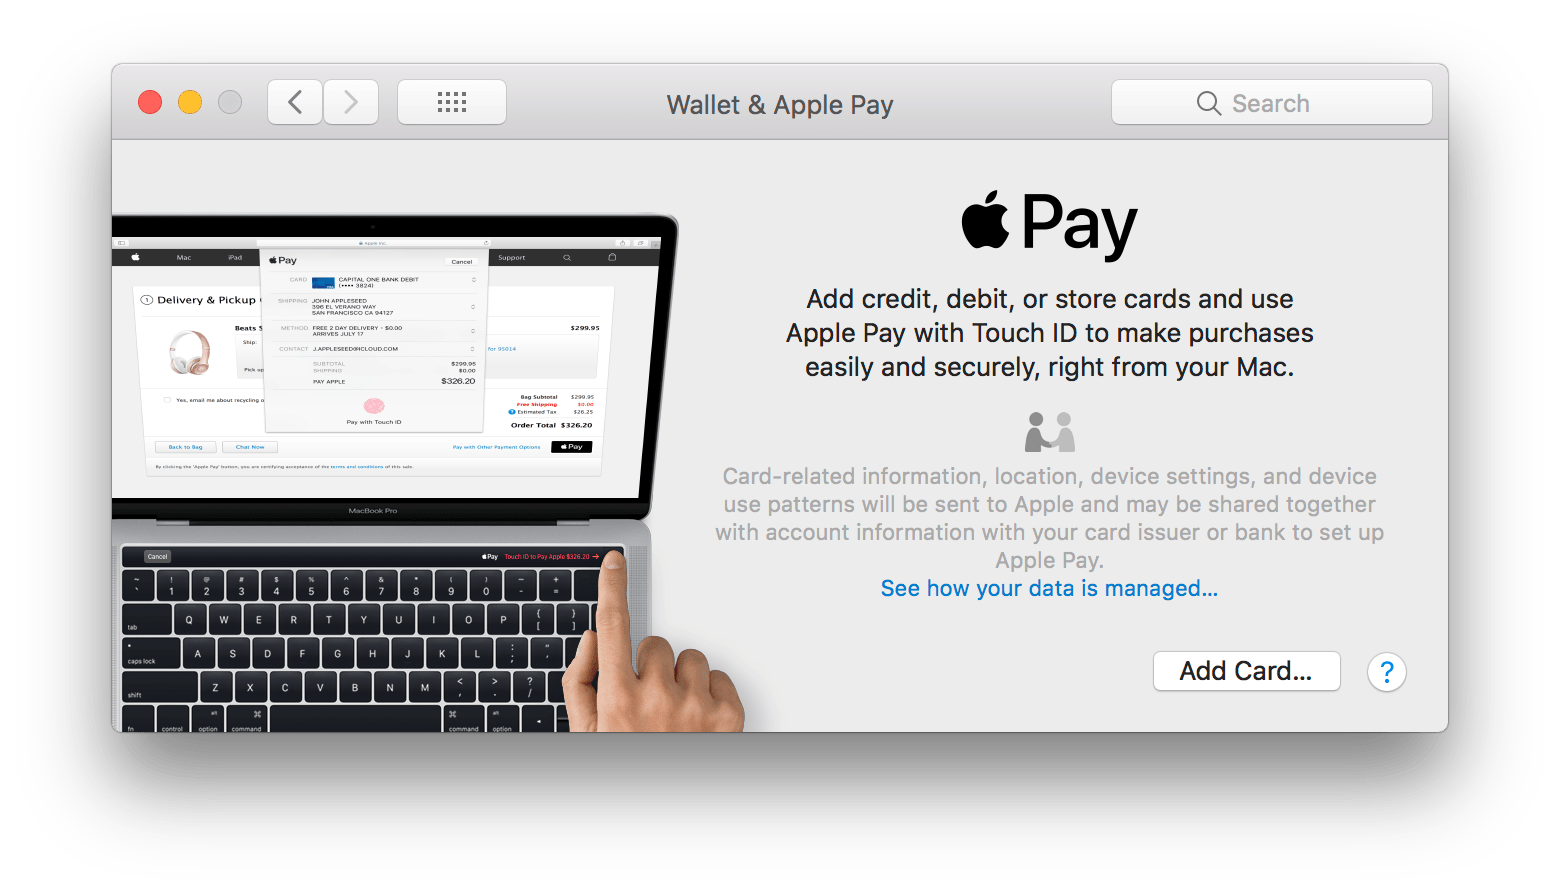
System Preferences: Wallet & Apple Pay
If you have a MacBook with Touch ID, and you think you’ll want to make purchases using Apple Pay on your laptop, it’s worth linking a credit card to Apple’s service. I find it convenient to use, but I’m much more of an Apple Pay person on my iPhone than on my laptop.
System Preferences: Network
The biggest setting you’ll be messing with in Network — and you might find yourself back here a few times — is its Preferred Networks option, accessible via the Advanced button on the primary Network screen. If you’re annoyed that your MacBook is always connecting to your slower 2.4GHz network instead of your faster 5GHz network (assuming both have different SSIDs), use the Preferred Networks section to put the faster network above the slower network.
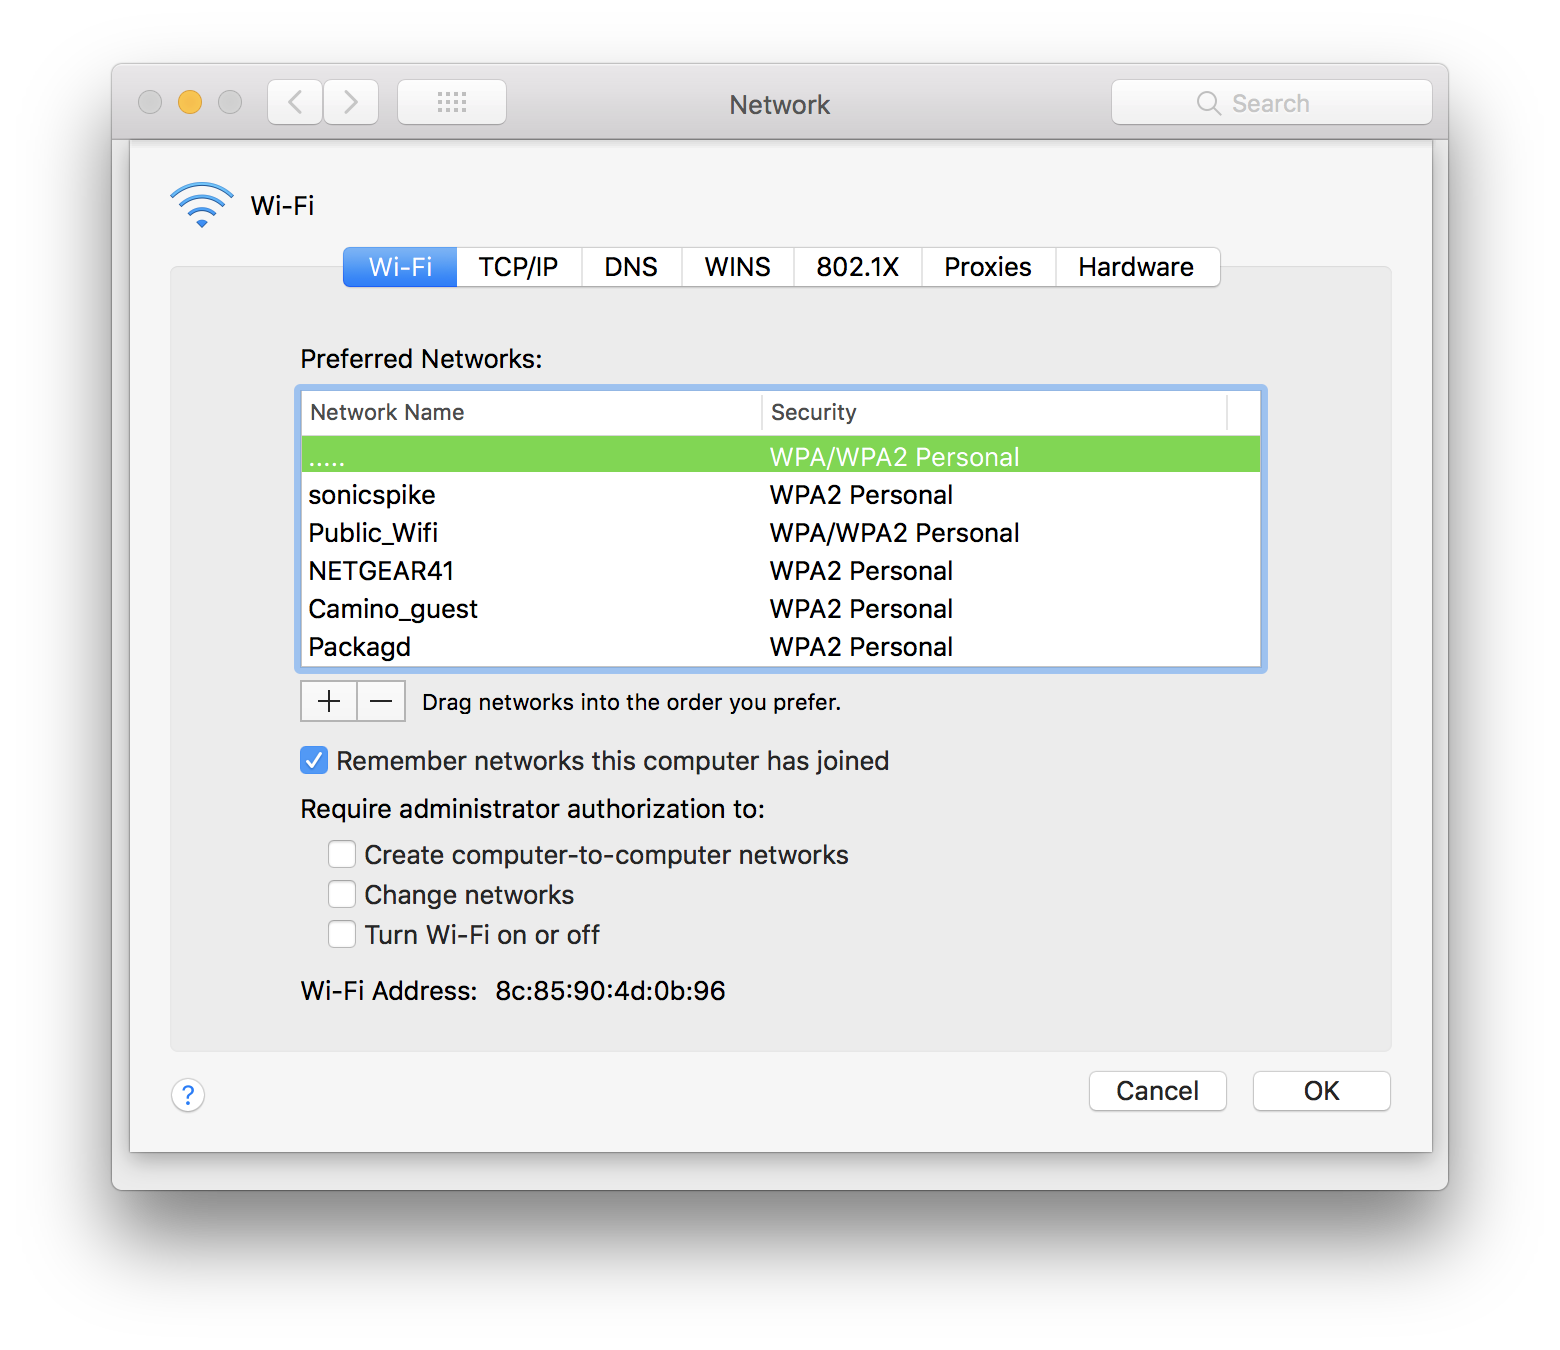
I also like to uncheck “Remember networks this compute has joined,” You’re still given the option to remember a network when connecting to a new wireless network, but this ensures that macOS isn’t just remembering everything — including open networks — by default.
System Preferences: Touch ID
If your MacBook has Touch ID, I recommend enabling all the options in this section. It’s just a lot more convenient to use a finger to unlock your MacBook, authenticate into Apple Pay, and purchase things from the App Store and iTunes.
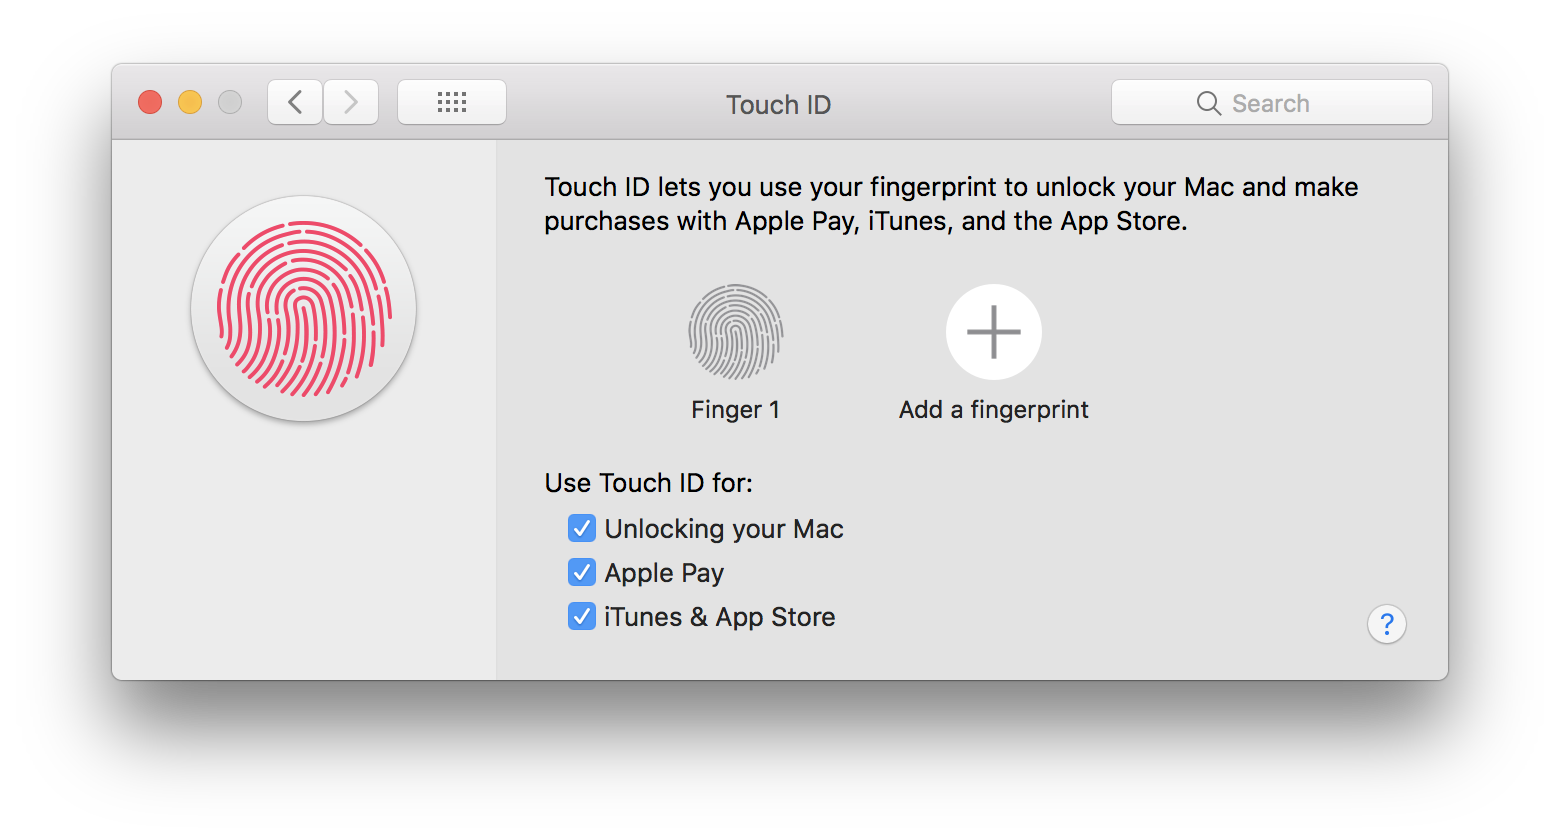
You can also use this screen to add extra fingers for Touch ID to recognise, but odds are good that you’re probably using your right-hand pointer finger like everybody else.
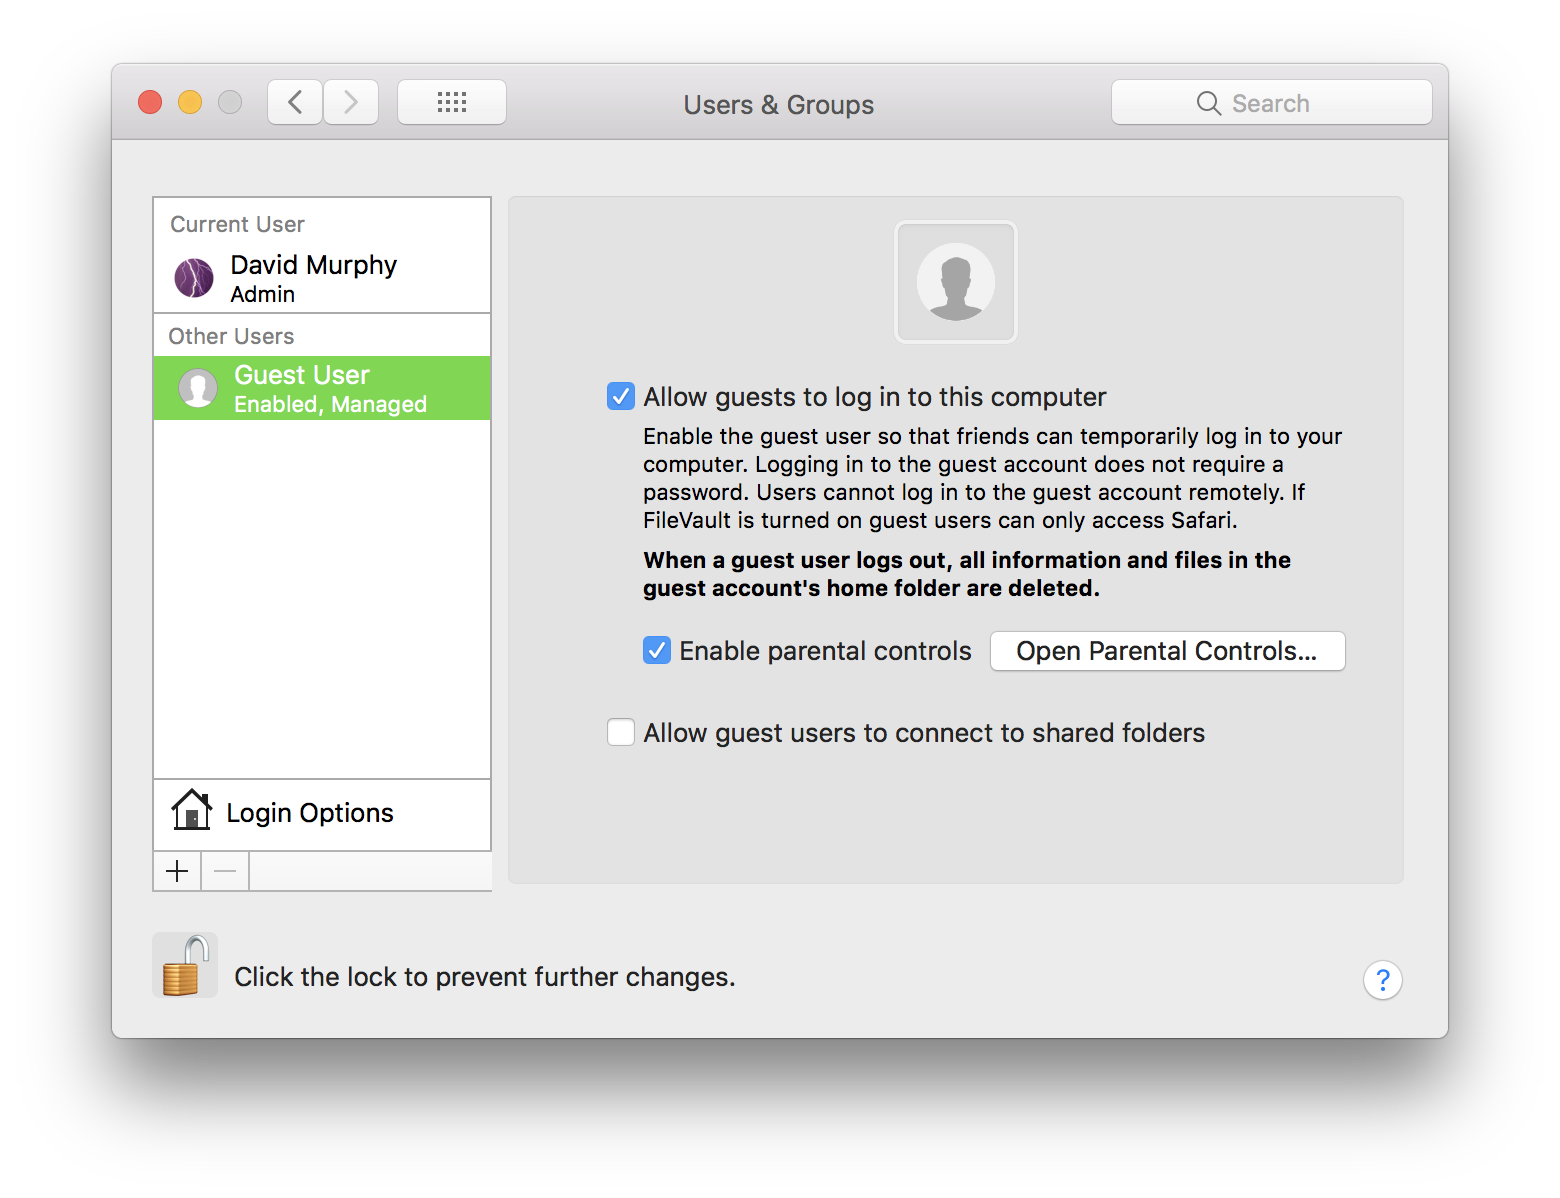
System Preferences: Users and Groups
If more than one person needs to use your MacBook, you’ll use this screen to create extra user accounts. I recommend turning off the guest user account as a matter of housekeeping and security. This will remove the option for said account when you initially log into your MacBook. I always hate seeing it there, and how often do you really let your friends just mess around on your laptop, especially on a special “guest” account?
System Preferences: Siri
I didn’t know that you could pull up Siri by holding down ⌘ + Space, but there you go. You can change this hotkey combination for summoning your digital assistant, and you can also change Siri’s voice to something more pleasing and proper — British, obviously.

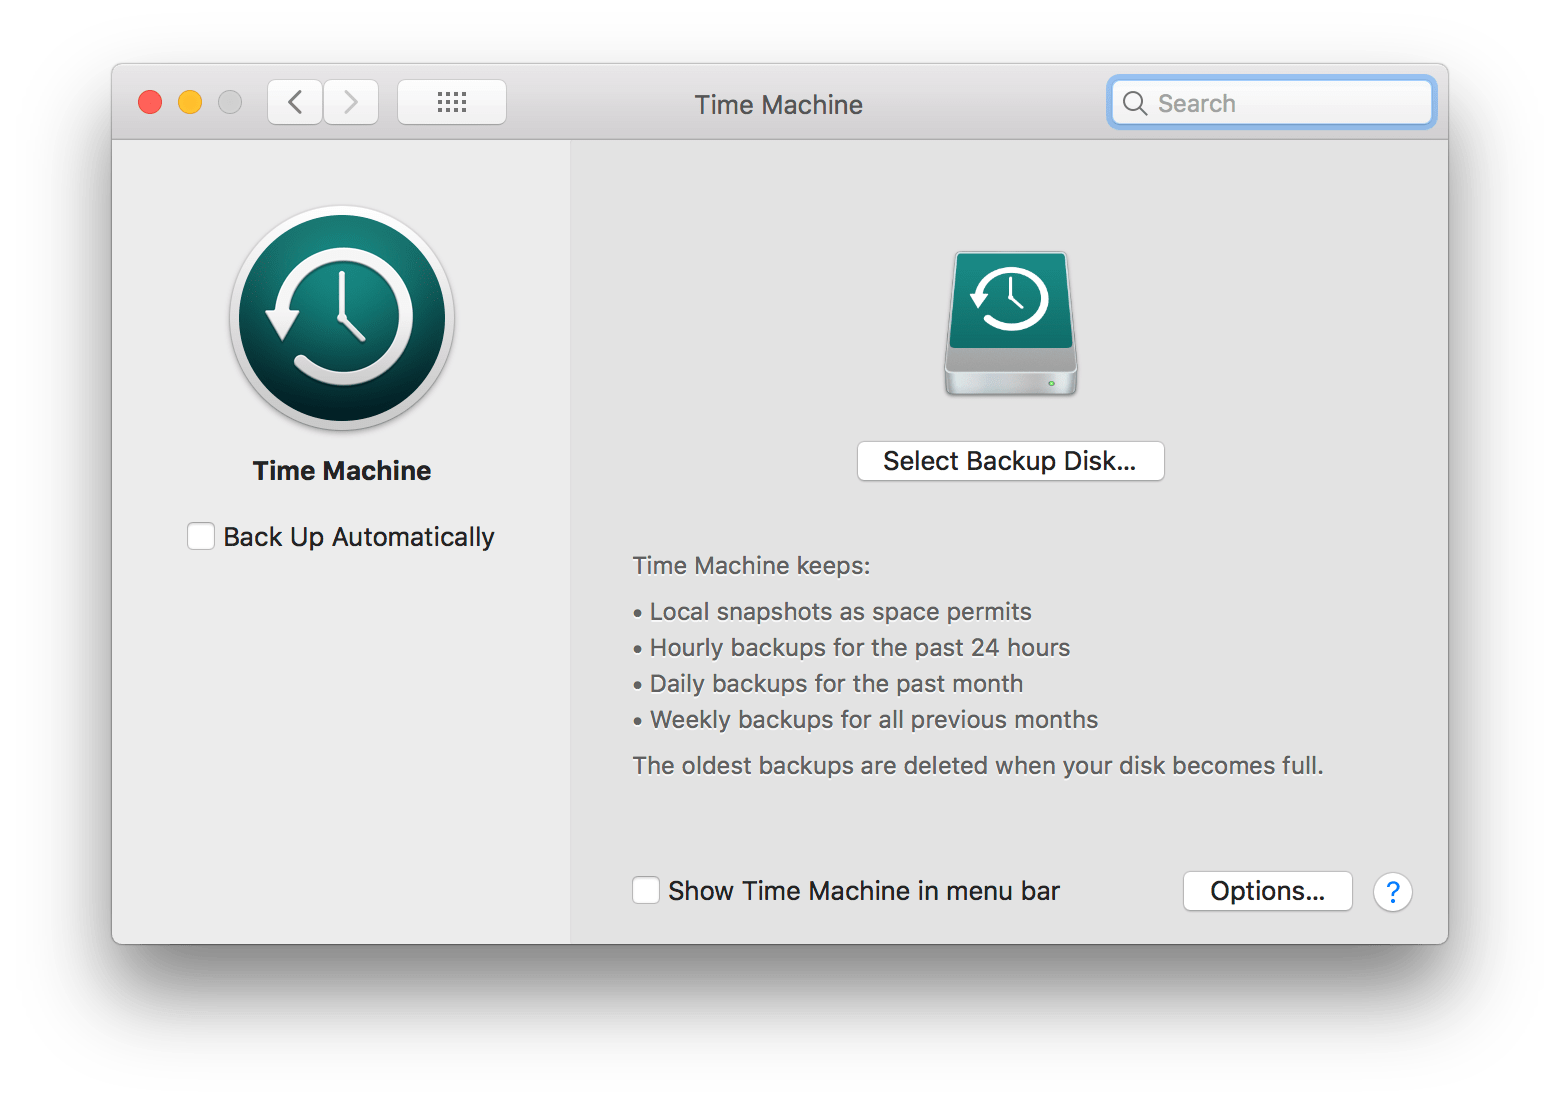
System Preferences: Time Machine
You should be backing your MacBook up at regular intervals. If you have a network-attached storage device that supports Time Machine, or even a huge external drive, this where you can (and should) enable the feature. Apple’s backup system is a no-brainer, but it does require you to tick this little box to get started. You can do it. I believe in you.
Let’s install some apps
Those are all the main System Preferences you should care about but, as mentioned, please go on a little search of your own to see if there’s anything else you might want to configure that I didn’t mention. We’re all unique, after all.
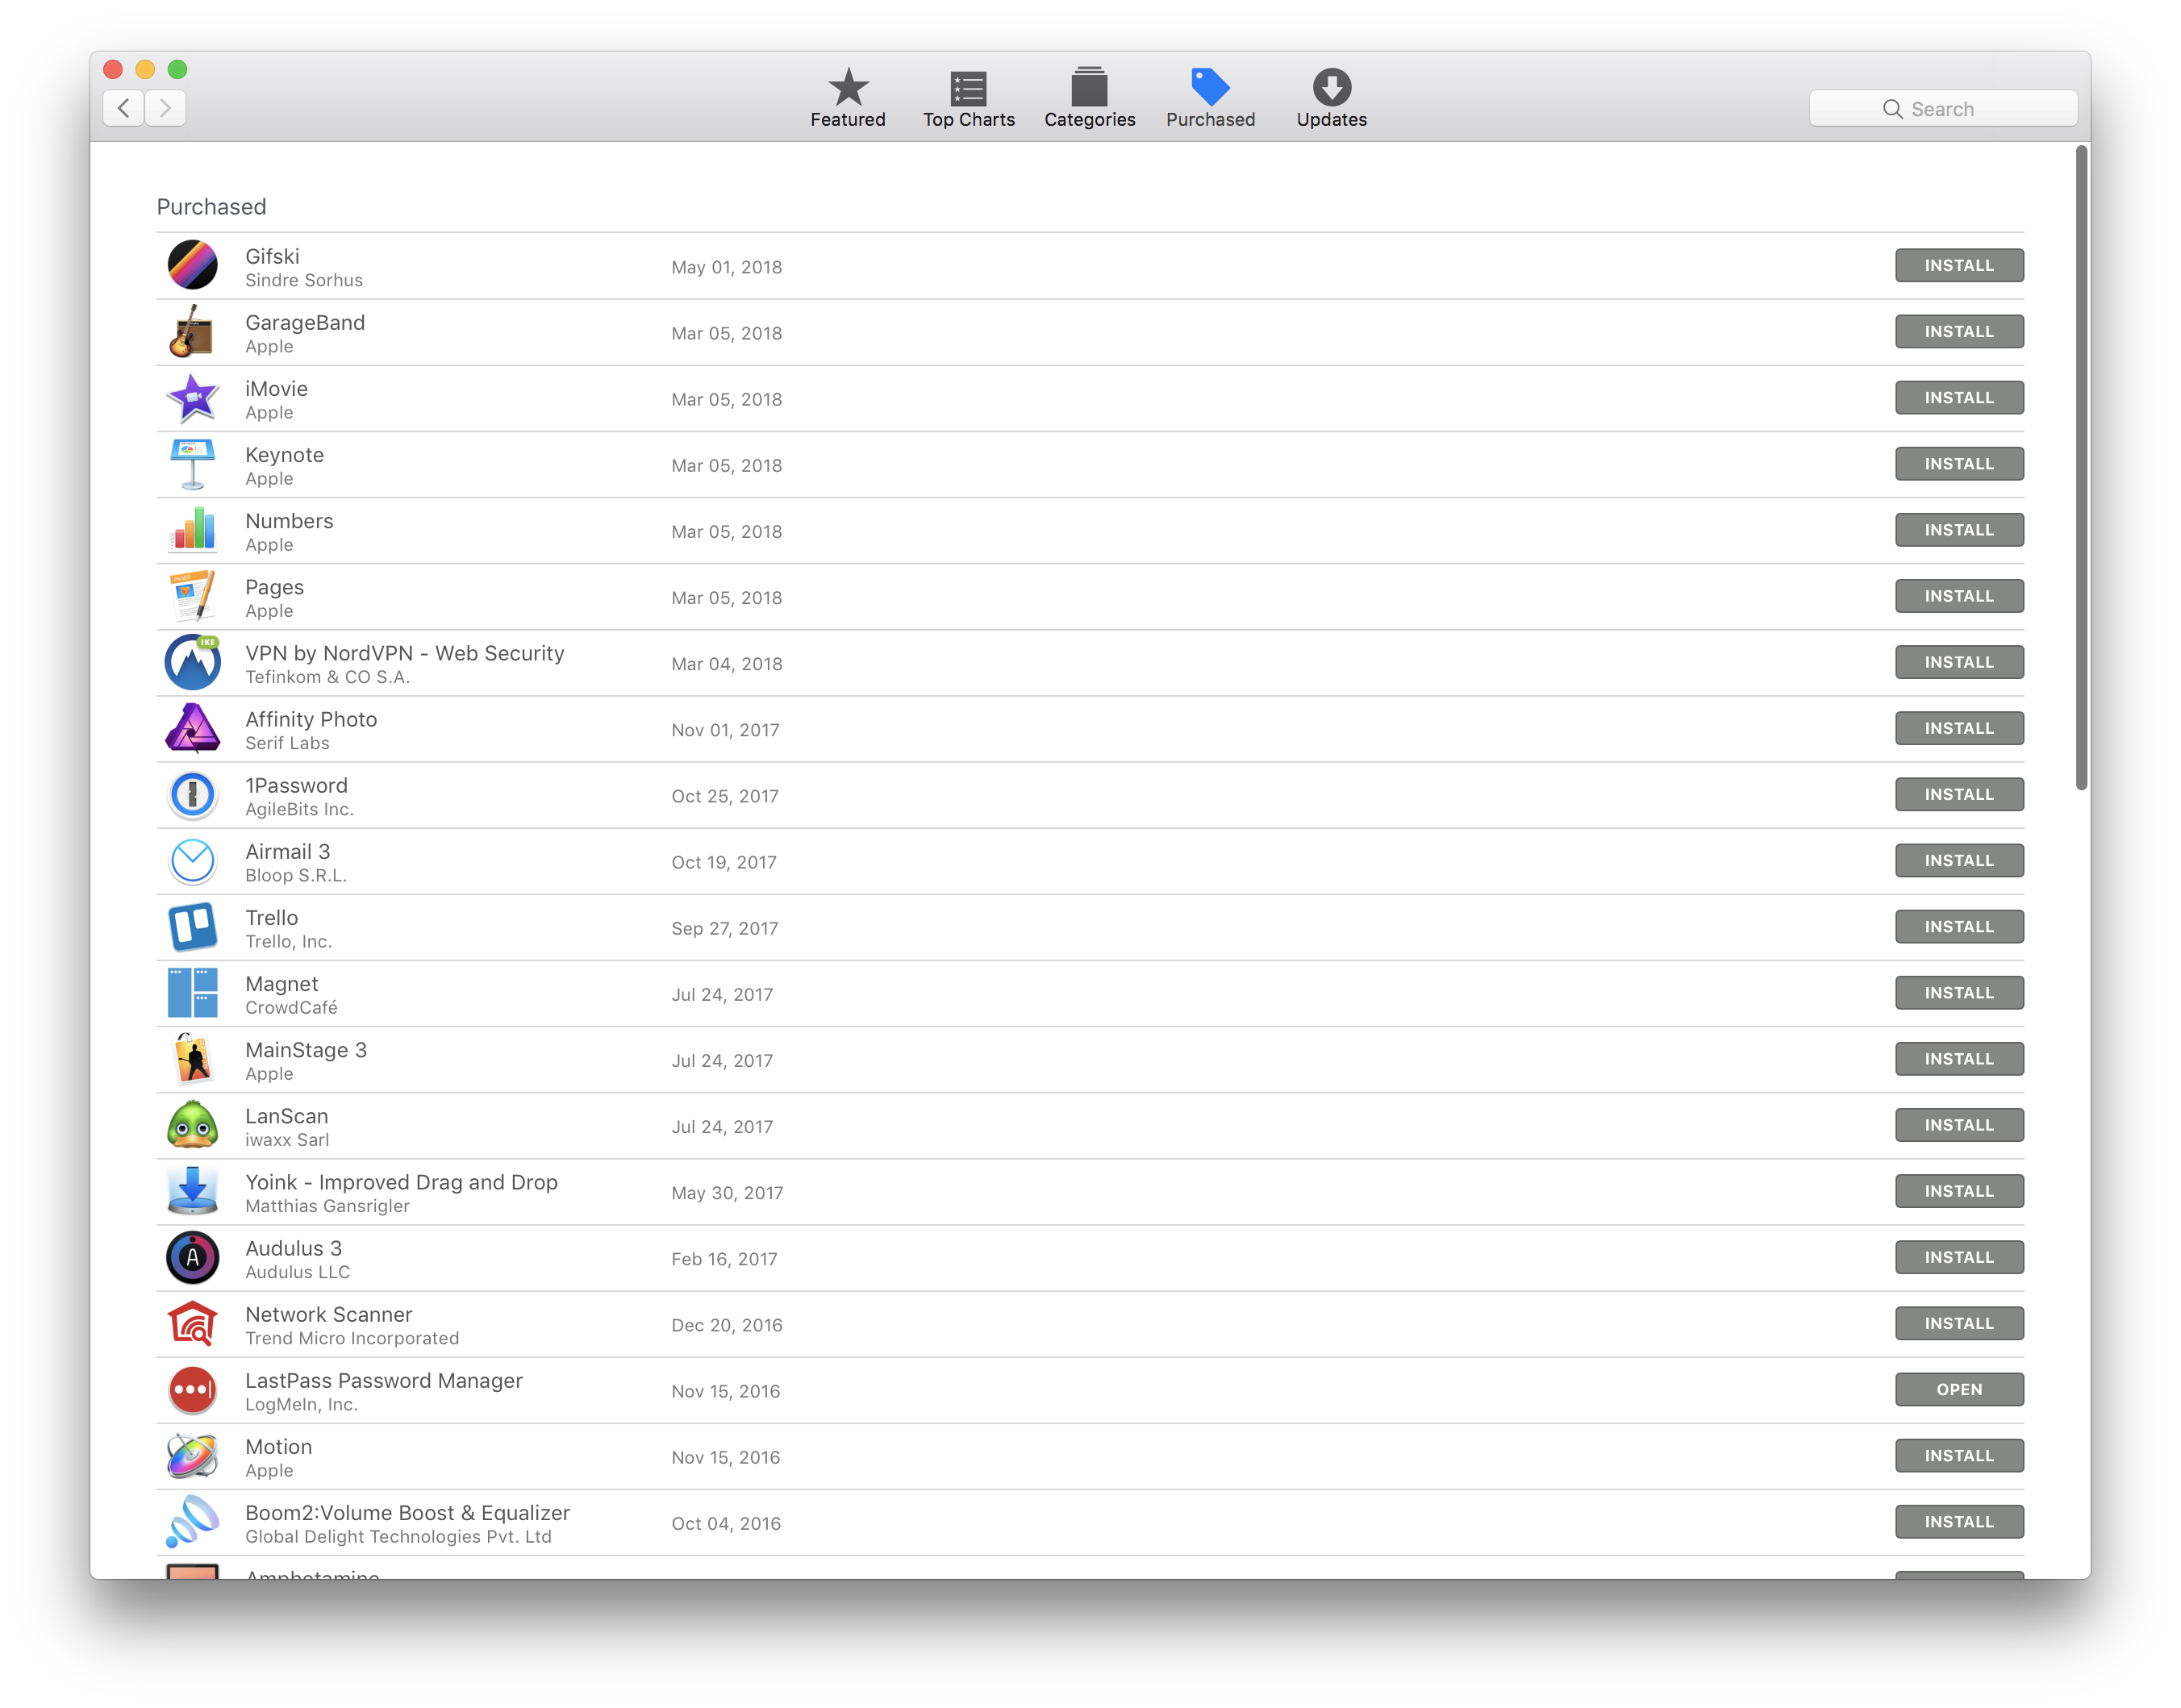
Now that your system is ready to go, it’s time to grab some apps. You can download anything you’ve already purchased from the App Store by clicking on its Purchased tab and clicking Install for any apps you want to grab.
For apps you won’t find on the App Store — like Chrome or Firefox, for example — I recommend checking out macapps.link or Get Mac Apps. Both websites allow you create installer packages: just click on all the apps you want on your system, click on whichever button the sites use to create a package of apps, and use that to install everything at once. You’ll save a lot of time versus downloading and installing each app individually.
If you’re a badass, or you just really love Terminal, you can also install apps using Homebrew and Cask. +10 enthusiast points for you.
Comments