
If you own multiple Apple devices, you’ve probably signed into all of them with your Apple ID. You’ve also probably noticed that when you get a Facetime call your computer rings, or when you get an iMessage your iPad beeps. For most of us, this is a small annoyance worth fixing. For others, it’s a potential privacy nightmare.
Case in point, the lurid tale of now-former Alabama Governor Robert Bentley, whose goofy love poetry iMessage thread with his former political adviser and mistress accidentally synced up with his state-issued iPad that he also happened to share with his wife. Whoops.
Chances are, most of us want to keep access to iMessages on just our phones and maybe a laptop, and we don’t need it on every Apple device we own. Here’s how to audit where you’re signed on and prevent something like this from happening to you.
See All the Devices You’re Signed Into

First things first, lets give your Apple ID a little audit to see every device you’re signed in on.
- Head to your Apple ID page and log in.
- Scroll down to the Devices section and take a look at where you’re logged in.
- If there’s a weird or old device here, click on it, then select Remove to log out.
Now, you should know exactly what devices you own that are still linked up to you Apple account.
Turn Off iMessage On Extra Devices
You probably do not want to log out of you Apple ID entirely on every device. Good news though, you can turn off just Messages (and Facetime, while you’re at it).
How you do so depends on which device you’re on:
On iPhone, iPad or iPod Touch
If you don’t want iMessages showing up on an iPad or on an old iPhone, it’s easy to disable:
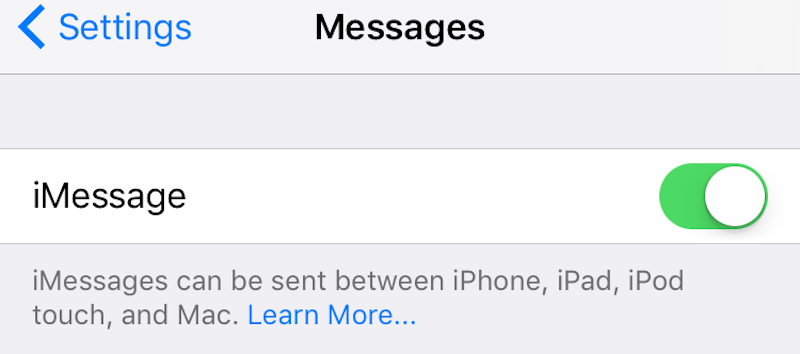
- Open up Settings > Messages.
- Set the iMessage toggle to off.
- You may also want to disable Text Message Forwarding, which sends regular non-iMessage SMS messages from your phone to Messages on your Mac or iPad. Tap the Text Message Forwarding option, then uncheck any devices you do not want SMS messages to go to.
On a Mac
If you don’t want iMessages showing up on your Mac, you just need to log out:
- Open up Messages.
- Click Messages > Preferences, then select the Accounts tab.
- Select your iMessage account, then click the Sign Out button.
- To log out of Facetime, open Facetime, then head to Facetime > Preferences, then click Sign Out.
Now, your messages won’t sync up anywhere you don’t want them to.
Share Your Purchases Without Sharing Your Private Data
There’s a chance that one reason you might be signed into your Apple ID on multiple devices is because your family doesn’t want to purchase the same apps, music or movies multiple times. Well, in that case, you’re doing things wrong. Don’t share your account with your family; set up Family Sharing so you can both have individual accounts.
With Family Sharing, you can share each other’s iTunes, iBooks and App Store purchases without actually sharing accounts. This means your phone calls, iMessage conversations, Safari browsing history, photos and everything else that’s linked to your Apple ID remains yours and yours alone. With Family Sharing, one person is the family organiser who sets it all up. That organiser adds other users to the account, then confirms any purchases someone else in the group tries to make. Theoretically, you could also do this with your personal account and a work account, which would help keep private data private.
Again, set up here depends on which devices you have:
On an iPhone, iPad or iPod Touch
- Go to Settings and tap your Apple ID.
- Tap Set Up Family Sharing, then tap Get Started.
- Tap Continue to agree to being the Family Organiser, then follow the rest of the instructions to add additional members to your family group.
From here on out, you can manage, remove or add new family members by heading to Settings > iCloud > Family.
On a Mac
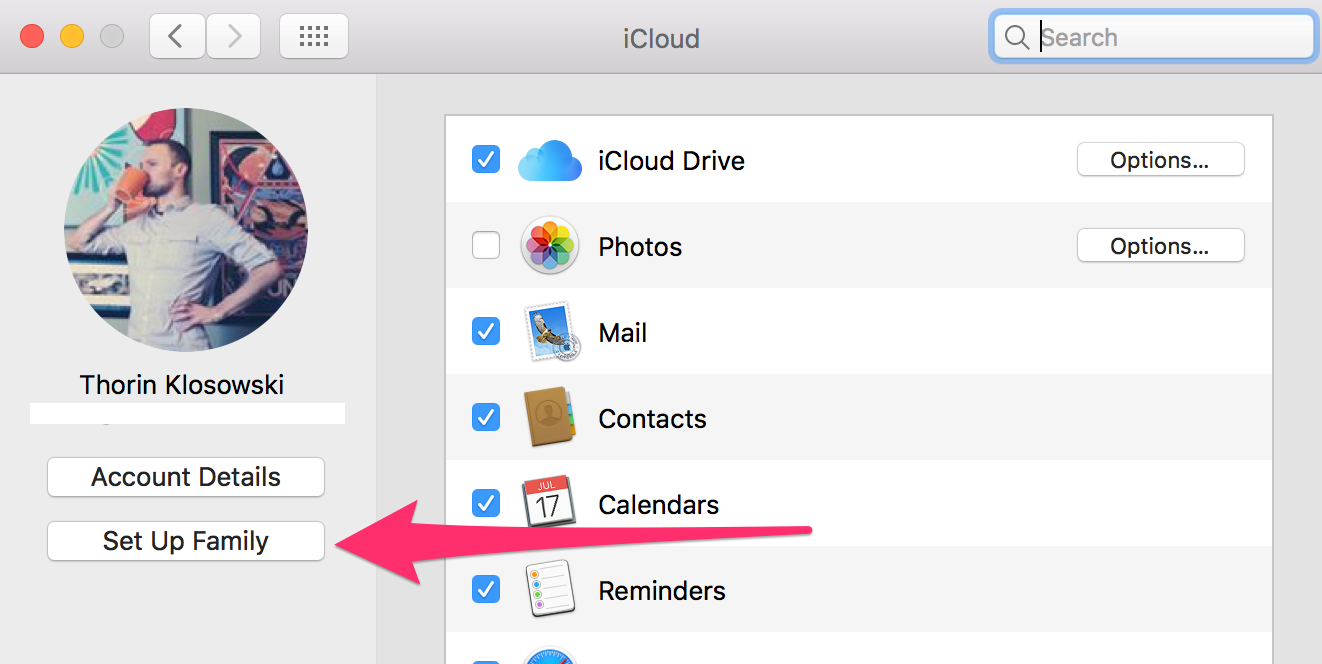
- Open up System Preferences.
- Click iCloud.
- Click the Set Up Family button, then follow the rest of the instructions to add additional members to your family group.
You can now manage, remove or add family members by heading to System Preferences > iCloud > Manage Family.
Enable Two-Factor Authentication

Finally, the last thing you’ll want to do is enable two-factor authentication if you haven’t already. This not only secures your Apple ID and every device connected to it, it also prevents you from doing anything by accident in the future because it requires a few extra steps to sign in. With two-factor authentication, when you sign into a device for the first time, you need to authorise it with a verification code sent to another, trusted device.
For example, if you get a new MacBook, you can’t sign into your Apple ID on that MacBook until Apple sends a code to your iPhone. Yet again, set up depends on which device you’re on. This might sound cumbersome, but Apple’s implementation is less annoying than other options, and the security is well worth it.
[referenced url=”https://www.lifehacker.com.au/2013/12/heres-everywhere-you-should-enable-two-factor-authentication-right-now/” thumb=”https://img.gawkerassets.com/img/17xe179dw2fr8jpg/original.jpg” title=”Two-Factor Authentication: The Complete List Of Everywhere You Should Enable It ” excerpt=”Two-factor authentication is one of the best things you can do to make sure your accounts don’t get hacked. We’ve talked about it a bit before, but here’s a list of all the popular services that offer it, and where you should go to turn it on right now.”]
On an iPhone, iPad or iPod Touch
- Open Settings, then tap your Apple ID.
- Tap Password & Security.
- Tap Turn on Two-Factor Authentication, then follow the directions on screen to finish the set up process.
On a Mac
- Head to System Preferences > iCloud > Account Details.
- Click the Security tab.
- Click Turn on Two-Factor Authentication and follow the directions on screen to finish the set up process.
Now, your Apple ID is not only secure, it’s also much less likely you’ll accidentally sign into a device without realising the repercussions of doing so.
Beyond all that, one final thing: Do not link your personal accounts to your company-issued devices, especially if you work for the government. It’s not only bad form, it’s also a privacy nightmare. Besides the fact that you may potentially look like a dummy when someone in your IT department figures it out, most company-issued devices grant access to everything you do on that device to your company. Which is to say, if you send an idiotic, racist, scandalous or whatever other stupid message to a friend on that device, your company might just happen upon it.
Comments
One response to “How To Prevent iMessages From Accidentally Appearing On Other Devices”
This is great, thanks!