
Cooking and eating at home is one of the best ways to save money and eat nutritiously, but you need a clean and organised kitchen to do it effectively. Having a neat and tidy fridge and pantry makes it easier to see exactly what you have, meaning you’re able to craft better meals, and waste less food and money. Here are our best tips for getting your kitchen in fighting shape for the new year.
Art by Sam Woolley. Photo by First, take every single thing out of your refrigerator. Literally. Every. Single. Thing. From there, sort it all into three piles: “Definitely OK”, “iffy” and “sketchy AF”.
You know what to do with foods that look “definitely OK” and “sketchy AF”, but for stuff that looks “iffy” — such as cheese with mould or condiments you’ve had maybe a little too long, we have guidelines:
- Cheese: You’ve probably heard that, since “cheese is mouldy milk anyway”, it’s OK to eat mouldy cheese. This is sort of true, but it depends on the type of cheese. Soft cheeses such as cream cheese, cottage cheese, ricotta and brie with mould should be discarded immediately, as mould can thread its way through the dairy. This mould can also harbour harmful bacteria such as listeria, brucella, salmonella and E. coli, all of which will make you quite ill. These rules also apply to any cheese that has been crumbled or shredded, so toss fuzzy looking blue cheese or feta without question. Blocks of cheddar and wedges of Parm are a different story, though. Mould has a harder time penetrating semi-soft and hard cheeses, so you can cut away the mouldy part — the Mayo Clinic recommends “at least one inch [2.5cm] around and below the moldy spot” — and continue to enjoy your cheese.
- Condiments: Tomato sauce may seem eternal, but nothing lasts forever, and even condiments have an expiration date. Luckily, those expiration dates are usually printed right on the bottle or jar, but if it’s worn off (of you can’t find it), go ahead and consult this handy table of condiments.
- Fruits and Vegetables: Different types of produce stay “good” for varying amounts of time. If you can’t tell whether a carrot or onion is good just by looking at it, you should consult Eat By Date, a massive database that gives you the true expiration date (printed dates often relate more to quality than safety) of almost any food you can think of.
Since you already have an empty fridge, now’s a good time to give it a nice, deep clean. The video above visually walks you through the whole process, but it goes a little something like this:
- Remove all of the shelves and drawers and wash them with hot, soapy water (or, if you have a super stinky fridge, a mixture of bleach and water).
- Take a cup of bicarbonate of soda and 4L of water, mix it together and use this mixture to scrub down every surface in your refrigerator and freezer.
- If needed — as in, you’re dealing with a very smelly situation — unplug your fridge and let it dry out overnight, but if everything smells OK, go ahead and put your food back in.
You could put all of your food back in now, but you might want to take this opportunity to set your fridge up for smoother operation. Some smart steps you can take include:
- Find the Cool Spots and Stop Accidentally Freezing Your Food: Set glasses of water in the various “zones” of your fridge — upper back, upper front, cheese drawer, middle part of the second shelf and so on — and place a thermometer in each one. Check the temp after 24 hours to identify the coldest regions.
- Clean Your Condenser Coils: The coils at the back of your fridge can get dusty, shortening the life of your fridge and causing quite a stink. To clean them, unplug your fridge, open the panel to access the coils (unplugging every wire you encounter) and spray them with warm soapy water. (Place a paper underneath them to catch drips.) Wipe them down with a microfiber cloth, and let it all air dry before putting it all back together.
- Put Your Condiments in Containers to Minimise Drippage: This is almost too simple. Just put your condiments in a plastic bin and, when they get sticky with gunky drips, toss it in the dishwasher.
Now you’re ready to re-stock, but you don’t want to just throw everything back in all willy nilly. Certain items do well in certain regions of the icebox. This article breaks it down fully, but here are some general rules:
- Dairy Products: Milk, cheese and yogurt are best on the top shelf, where the temperature is most constant.
- Eggs: Keep eggs on a shelf, not in the door, which is the warmest part of the fridge.
- Vegetables: Unless they belong in a “cool dry place” — think potatoes, alliums and winter squash — vegetables should be kept in the crisper drawer, away from ethylene-producing fruit like apples, pears and kiwis.
- Fruit: Melons, citrus fruit, bananas and tomatoes should all be kept on the countertop and out of the fridge entirely, but all other fruit can be kept in the other produce drawer (you know, the one without the vegetables).
To get the most out of your produce drawer, make sure you have the humidity controls set correctly. Different plant parts last longer in different environments, and the simple mantra of “rot-low, wilt-high” can help you remember how to set each drawer. The saying is pretty self-explanatory, but basically anything that will wilt — such as leafy green — should be kept in a drawer with the humidity set to “high”, and produce that is prone to rotting should be kept in a drier environment.
Going forward, you’ll want to put a system in place to make sure everything stays as fresh as possible. Keeping a whiteboard can help you keep track of perishables, but the best way to keep your fridge under control is to have a nightly once over where you get rid of sketchy food and potentially smelly offenders. This is a good time to wipe up any spills and sticky spots. Finally, a bowl of activated charcoal or a vanilla-soaked cotton ball can help absorb or mask inevitable odours.
Tackle the Pantry
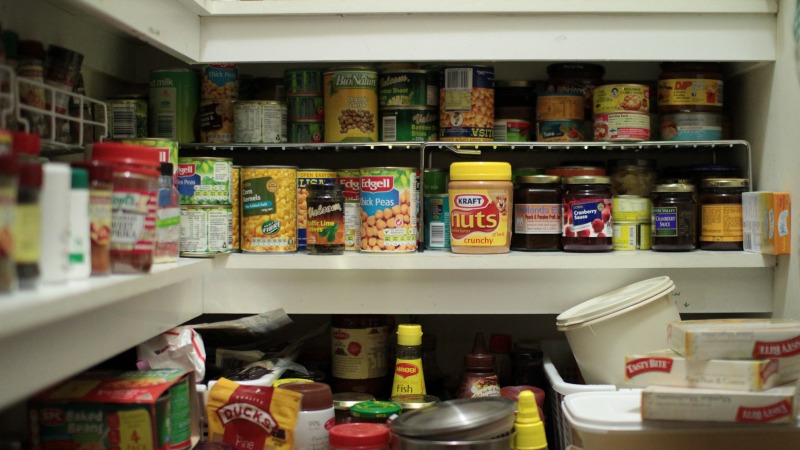
Now that your refrigerator is in order, it’s time to get your pantry up to snuff. Once again, I’m going suggest you remove all of the things, so as to get a clear view of what you have and the state of the pantry itself. If you keep your dry goods in a cabinet, go ahead and dust it out, wipe up any sticky messes and set out ant and roach bait if needed. Then it’s time to turn your attention to the food.
First, make sure that everything you’re storing in the pantry actually belongs in the pantry, and not the fridge. If you’re not sure where something is supposed to live, there is a whole series of graphics to help you figure out where and how long to keep your most common kitchen sundries.
Also, make sure that your pantry is, in fact, a “cool and dry space”. It should be at 21C and have a humidity of 60 per cent or less. (You can pick up a humidity gauge online for relatively cheap.) If your cupboard or pantry is a little moist, you can throw some silica gel packs in there (if it’s a small space) or plug in a dehumidifier (for a larger, walk-in pantry).
Once the environment is ideal, make everything a little easier to access with a few lazy Susans, group similar items together or cascade items with the largest ones in the back, so everything is visible. I also highly recommend getting your spices out of the cupboard and onto a spice rack, because being able to locate your spices makes them easier to use. If you want to build your own, try this minimalist one or this cupboard door one.
Show Your Appliances a Little Love
Once you have the food storage situation under control, it’s time to pay a little attention to your favourite kitchen tools. If you do nothing else, please, please, please sharpen your knives. A sharp knife is — in my opinion — one of the most important things for a home cook to have. It makes cooking easier, more pleasurable and so much safer. The above video can teach you how to expertly sharpen your blades with a whetstone, but there is absolutely no shame in taking them to a professional, especially if it will ensure they actually get sharpened.
Of course there is more to a kitchen than knives and blades, and you need to pay attention to your workhorse appliances that don’t get a ton of TLC on a daily basis.
- Toaster: Flip it that thing upside down over the rubbish bin and shake out the crumbs. If it’s plastic, give the outside a good wipedown with a multi-surface cleaner, but if it’s metal, degrease it with a tablespoon of cream of tartar and a few drops of water, or go the store-bought route and use Bar Keepers Friend.
- Microwave: The video above shows you how to clean your microwave oven without any commercial cleaners, but all you have to do is squeeze a whole lemon into a bowl, add half a cup of water and microwave for three minutes. Keep the door closed for an additional five minutes to let the steam do its thing, then wipe all the gross grime off the walls, ceiling and floor.
- Oven: To get rid of stubborn oven grease, heat your oven to 65C and then turn it off. Place a pot of boiling water on the bottom rack, set a cup of ammonia in a heat-safe dish on the top rack and shut the door overnight. The next morning, open the door and let it all air out for about 15 minutes. Mix the ammonia with 1L of water and a couple of teaspoons of dishwashing soap and, using a heavy-duty nylon scrubbing pad dipped in the ammonia mixture, wipe away the greasy grime in the oven. (Don’t bother with your oven’s self-cleaning function; it does more harm than good.)
- Stove: Ammonia is also the key to degriming your stove burners. Just seal each burner in a plastic bag with a quarter cup of ammonia overnight, then wipe away the greasy buildup.
Now that you have a clean fridge, an organised pantry and appliances that are so fresh and so clean, you’re ready to cook and eat your way into the glorious new year.
Comments