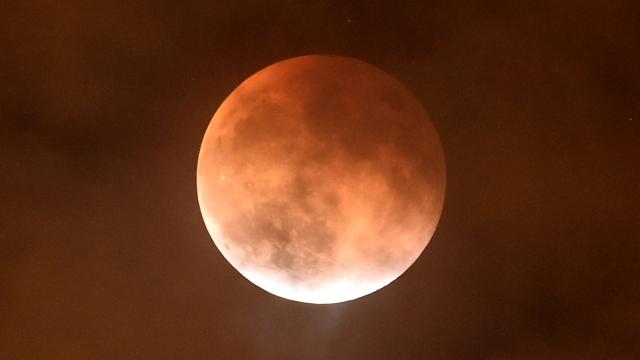
On November 15th, we’ll get the closest full moon since 1948, and it won’t happen again for 18 years. If you want to snap a photo of the moon in all its glory, be prepared. Here’s how to take a picture of next week’s supermoon that will do it some justice, and may even be wallpaper-worthy.
Photo credit: Kevin Winter/Getty; Pixabay, John Sullivan
Start With the Right Camera and Lens
The moon looks beautiful, big, and bright. You snap a pic with your phone and take a look. Wow. You might as well have photographed a speck of dust because that’s what it looks like. If you’ve ever taken a photo of the moon with your phone, you know this feeling. It’s pointless.
The biggest and most obvious reason your moon photos suck is that the moon is just so far away. It’s hard enough to take a decent smartphone picture of your cat across the room, much less something that’s 384,472km away. Granted, the moon is much, much bigger than your cat, but still, it’s a long way from your camera.
You can’t take a great photo of anything that far away with your smartphone because, despite all its other cool settings, your phone’s zoom and focal length just aren’t designed for it. In basic terms, focal length is the distance between a lens and its focal point. Most decent photos of the moon are taken with telephoto lenses with focal lengths of at least 300mm. The capture in the video above, for example, was taken with a 500mm lens. By comparison, your phone’s focal length is probably about 20mm. Smartphone cameras and point and shoots are designed to be compact and convenient enough to fit in your pocket. They’re just not built to handle the same functions as a DLSR, mirrorless camera, or any other camera with interchangeable lenses.
However, there are detachable smartphone lenses available that come with optical zoom. As you can imagine, those aren’t that powerful either, but you can get slightly better shots with them. They won’t be amazing, but they will be better than what you would get otherwise.
No, I’ve seen brilliant iPhone pics of the moon, you might say. Yes, those photos are amazing, but keep in mind, iPhone astrophotographers like astronomer Andrew Symes use telescopes to get those detailed, close-up shots. It’s called afocal photography and it involves taking a photo of the telescope’s eyepiece (you can try it with a pair of binoculars to see what happens).
You’ll have better luck getting a decent picture of the moon with a DSLR, or EVIL (electronic viewfinder with interchangeable lenses) camera, like a mirrorless. These cameras are equipped to handle better lenses. For lunar photography, you’ll need to rent or buy one of those 300mm or higher lenses we mentioned. Prices can range from about a hundred bucks to a couple thousand bucks. Here’s a low-end one I recently bought for my DSLR. It will do the job, but it’s nothing special.
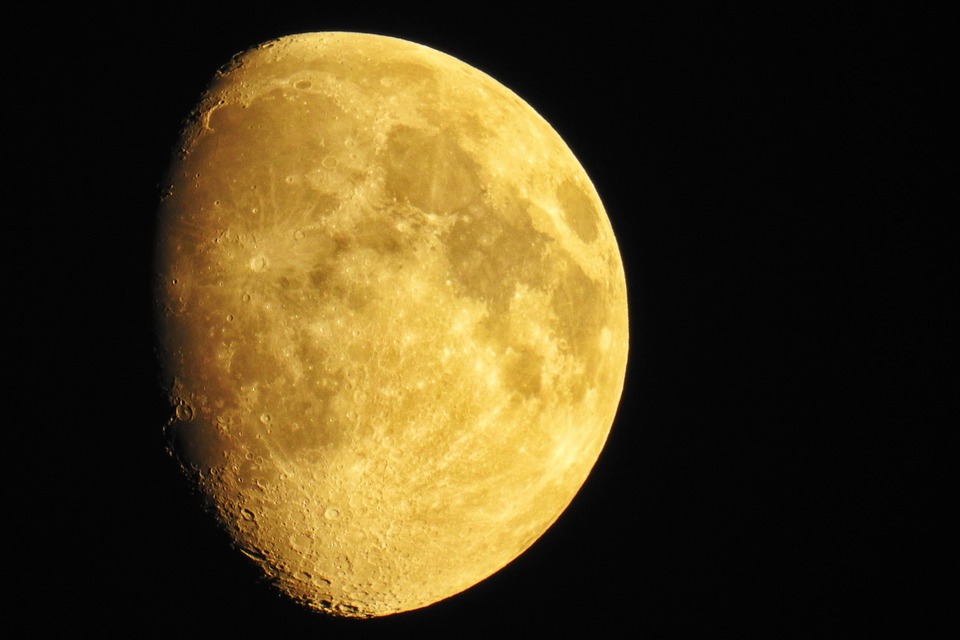
On the other hand, some EVIL cameras have pretty good built-in optical zoom that can get great shots even without a lens. For example, the Nikon P900 takes impressive pictures of the moon, as you can see in the above image.
Adjust Your Camera’s Exposure Settings
Basic, boring photos of the moon also look crappy because the moon is so bright. That’s why it looks like a big blurry light bulb in your photos, lacking definition, or those clear features on the surface you’re probably trying to capture.
If you want to get even a hint of the moon’s craters and shadows, you have to adjust your camera’s exposure settings. You could use your camera’s metering mode for this. This function usually found in your exposure settings and it measures and analyses the light of particular area to adjust your settings so that the area is properly exposed. With spot metering, you choose a smaller area. Instead of the night sky, your camera will focus on a specific spot (the moon) and adjust its exposure accordingly. It’s easy to adjust these exposure settings yourself, though.
Your camera’s exposure depends on three factors: aperture, shutter speed, and ISO speed, also called the “exposure triangle.” Here’s what each of those three settings mean and how you should adjust them to get your moon photo.
Aperture
Aperture is the amount of light your lens lets in and it’s measured in f-stops. The wider the aperture, the lower the f-stop (f/1.0 is pretty wide). Narrower apertures will have a higher number, like f/11. In fact, f11 is the ideal aperture for moon pictures. There’s even a name for it in lunar photography: the Looney 11 Rule. This narrow aperture doesn’t let too much light in, which is ideal, since the moon is super bright. According to Wired, you’ll at least want to stay in the range of f8 to f16. You’ll be able to pick up more detail, like craters and shadows. The downside is, if you want to get the surrounding landscape in your photo, you probably won’t be able to see it because your aperture is so narrow. We’ll tell you how to fudge this later, though.
Shutter Speed
Your camera’s shutter speed determines how long your camera’s sensor will be open to let in the light. The faster the shutter opens and closes, the less light it allows. When you have a long shutter speed, you let in a lot of light. Shutter speeds are measured in fractions of a second. For the moon, you want a speed around 1/125 to 1/250 second. The moon is already bright, so you don’t need to keep your shutter open that long.
ISO Speed
ISO determines how sensitive your camera’s sensor is to incoming light. The higher the ISO, the more sensitive it will be to light. If it’s dark, you can take a brighter picture without a flash by adjusting the ISO upward. The problem is, this typically makes your photo really grainy, too. When shooting the moon, you usually want a lower ISO (about 100-250) since the moon is super bright.
The Looney 11 Rule falls within the above ranges, but here’s what it calls for specifically, depending on the moon:
- Full moon: Shutter speed at 1/125, aperture at f/11, and ISO 250
- Quarter moon: Shutter speed at 1/60, aperture at f/11, and ISO 250
- Thin crescent moon: Shutter speed at 1/15, aperture at f/2.8, and ISO 250
Of course, you’ll want to play around with the settings a bit to see what yields the best results. These ranges should get you in the ballpark, though. Also, make sure your camera is in manual focus so you can the clearest shot possible. Focus on the moon, then shoot. You also want to use a tripod to make sure the image is stable and not blurry.
Choose the Right Environment
Barring a bunch of Photoshop tricks, your picture of the moon can only be as good as it looks in real life. If it’s obscured by a bunch of clouds, you’re not going to get as good of a shot. For a truly striking photo, you might even want to drive a little out of the city so there’s less light pollution to contend with.
You may want to wait until it’s pitch black so you can get a really bright and clear shot, too. On the other hand, as Wired points out, the moon looks bigger when it’s near the horizon, so you might also want to try within an hour of sunset or sunrise.
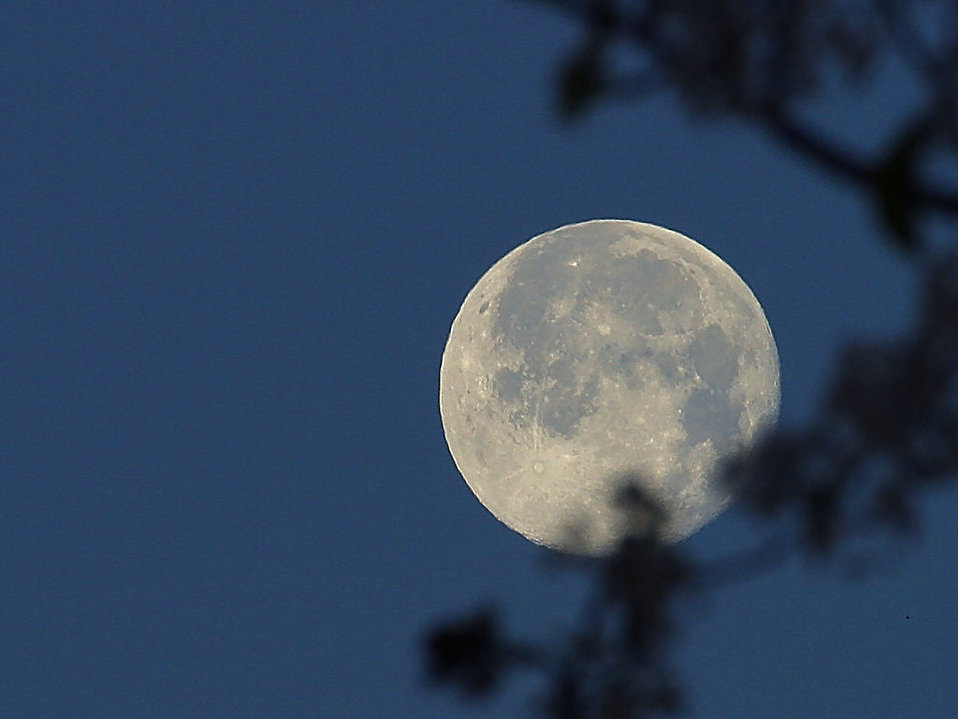
Finally, keep in mind: a decent image of the moon often means a terrible image of your surroundings. The moon is very bright, after all, so when you underexpose for that brightness, anything around you will be dark, since these surroundings aren’t as bright as the moon. You’ve probably seen images where both the moon and its surroundings are exposed beautifully, though. That’s usually because photographers take two separate photos and merge them.
First, you take a picture of the moon with the proper exposure settings, then adjust to expose the rest of the scene. In the second picture, the moon will look terrible, but you can layer and blend the two images in Photoshop (here’s a good tutorial). If that’s too much work, just try to add some basic composition, like the photo above, where you keep the focus on the moon and minimise the background in the shot. Photograph it with the silhouette of some trees in the foreground, for example.
With the right kind of camera and lens, you can get beautiful pictures of the moon, even if you’re not a professional photographer. If you don’t have access the right camera or lens, renting might be a better option, especially if you’re just interested in photographing specific events.
Comments