Google Assistant, the new intelligent, conversational virtual assistant, is sadly only officially available for their new Pixel phones. However, with a little tweaking, you can get it — and all of Assistant’s powerful search and chat features — on any phone running Android Nougat. Here’s how.
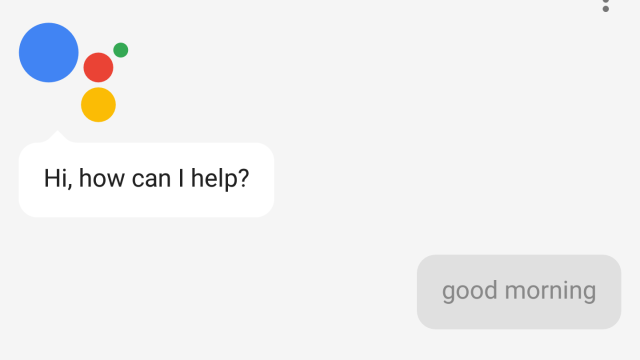
The new Google Assistant brings some welcome changes to how Google’s voice commands work. You can get a daily briefing every morning that tells you the weather in your area, traffic on your commute and what you have on your calendar for the day. You can also have complex conversations with your phone. For example, when you ask what movies are playing, you can follow it up by asking for showtimes and reviews. All your old favourite voice commands are still there, but the whole experience is way nicer. If you’re comfortable tweaking your phone, it’s well worth trying it out.
What You’ll Need
Surprisingly, getting Google Assistant on your phone is easier than you think. To oversimplify, we’ll be tweaking a file on your phone called build.prop which includes a lot of information about your phone. We’ll change it so that when a program asks “What phone are you?” it responds “I’m a Pixel XL!” instead of whatever phone you have. It’s a simple tweak with minimal risk.
There are a couple of ways to do this. Method #1 involves editing the build.prop file directly and requires root, while Method #2 will flash a .zip that can apply the tweak for you and doesn’t require root. Here’s what you’ll need for both methods:
- Android Nougat: This tweak only works on phones running the latest version of Android. This includes the Nexus 6P, 5X, 6 and 5. You can read an updating list of devices that this tweak is confirmed to work with here.
- Root Access (Method #1): If you want to update your build.prop file manually, you’ll need root access on your phone. Check out our guide here on how to root your phone if you haven’t done so already.
- A Root File Explorer (Method #1): Any file editor that allows you to edit root files will work so you can take your pick. We’ll focus on our favourite file manager Solid Explorer.
- Flashable .zip Files (Method #2): XDA user FaserF has shared flashable .zip files here that you can use to edit your build.prop without rooting your phone. Download them before continuing.
- Unlocked Bootloader (Method #2): In order to flash the .zip files, you’ll need to unlock your phone’s bootloader. Note, this isn’t the same as rooting your phone, but it still requires a little technical know-how. Our guide to rooting explains the difference and how to get started.
- Custom Recovery or Fastboot (Method #2): You’ll need a way to flash your .zip files. If you have a custom recovery on your phone already, you can use that. If you don’t want to bother with a custom recovery, you can use fastboot to flash the files. We’ll focus on using a custom recovery, but you can read more about how to use adb and fastboot here.
While the tweak to enable Google Assistant is easy, you should still be comfortable with using the command line, flashing files to your phone and modifying system settings before you proceed.
Also, keep in mind that Google could patch this at any time, so it may work today, but not necessarily tomorrow. Finally, if you’re part of the Android Beta Program, future updates (like the Android 7.1 developer preview coming later this month) could mess with your root access and cause you some headaches down the line. As long as you’re comfortable with the risk, proceed!
Method #1: Manually Edit the Build.prop File (Root Required)
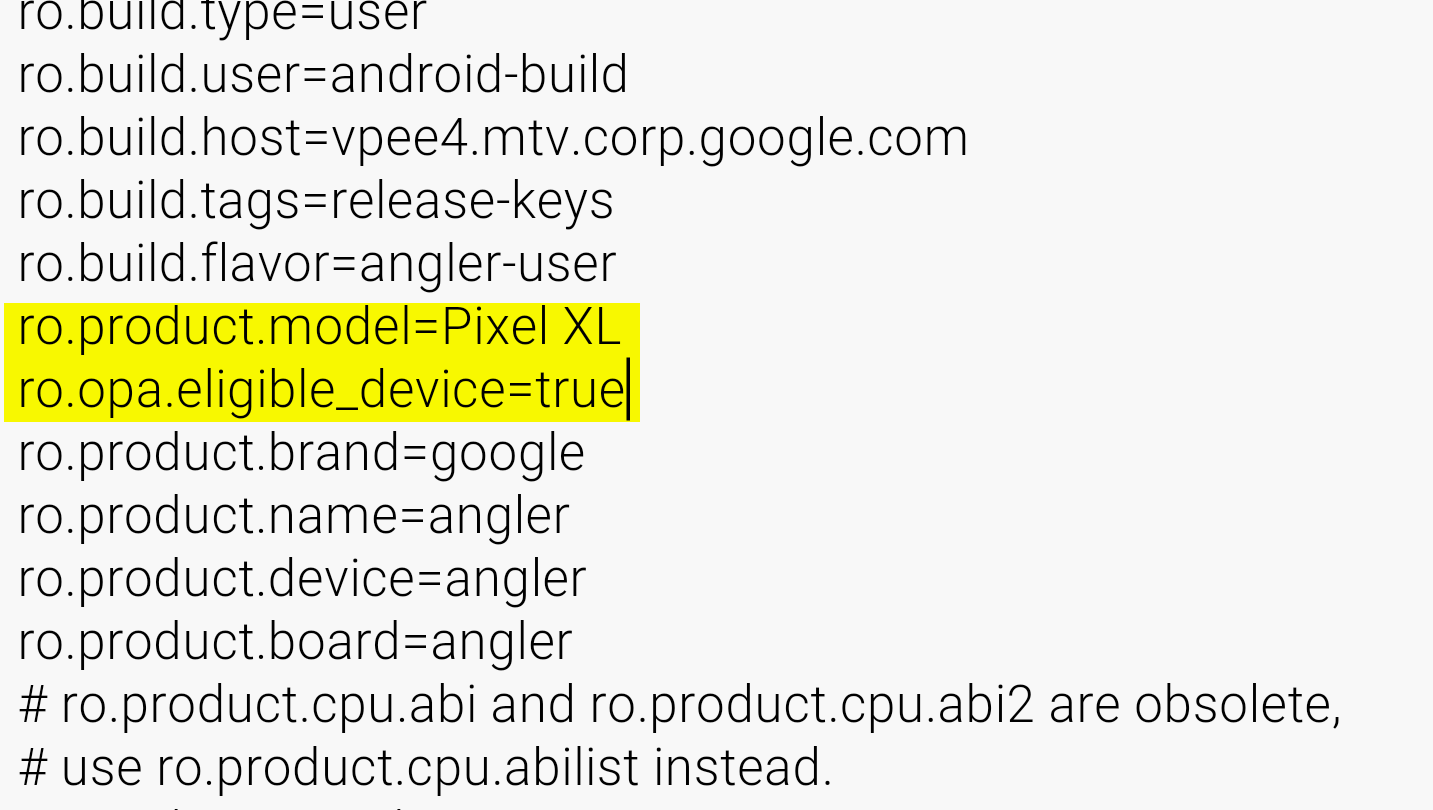
Just add these two little lines to your build.prop file. Easy, right?
If you already have root access on your phone, this tweak is easy. Once you have all of the items listed above, follow these steps:
- Open Solid Explorer. (Your preferred root file explorer app may have slightly different steps.)
- If you haven’t enabled root storage, slide out the left-hand panel and tap the settings gear icon. Scroll to the bottom and enable “Show root storage”. Exit settings.
- Slide out the left-hand navigation panel and tap Root.
- Scroll down and tap System.
- Scroll down and tap “build.prop”.
- Open the file using SE Text Editor.
- Find the line that reads ro.product.model=[YOUR DEVICE] and replace it with the following: ro.product.model=Pixel XL
- Add the following on its own line: ro.opa.eligible_device=true
- Save and exit the file.
- Reboot your device.
Once you’ve rebooted, navigate to the Apps section of your Settings app and find the Google app to clear its data and cache. After the app restarts, you should be able to activate Google Assistant by long-pressing your home button. Congratulations! You have a Pixel-exclusive feature before the phone’s even out.
Method #2: Flash .Zip Files
XDA user FaserF created some handy flashable .zip files that you can use if you don’t want to root your phone. Avoiding root may be handy if you want to get early updates through the Android Beta Program. You can either use a custom recovery to flash the .zip files, or use fastboot to do so from your computer. We’ll show you how to do it with a custom recovery, but the method you use is up to you.
- XDA user mjp93 recommends uninstalling the Google app entirely before proceeding with this method.
- Download the three .zip files from this link and copy them to your phone’s internal storage.
- Reboot your phone into recovery mode.
- Tap or navigate to Install in your custom recovery. For the popular TWRP recovery, Install will be a large grey button on the first screen you see in recovery.
- Install GoogleAssistantVelvet.zip
- Install GoogleAssistantBuildProp.zip
- Reboot your phone.
Once your phone reboots, you’ll need to manually give it permission to use things like your microphone by heading to the Apps section of your Settings app. From there, find Google, then tap Permissions and enable the necessary permissions. Once again, long-press the home button to bring up Assistant.
Comments
2 responses to “How To Get Google Assistant On Any Phone Running Android Nougat”
Or just install ‘Allo?
Allo doesn’t give you quite the same level of always-on-ness I’m told.