One of the relatively unsung new features in iOS 10 is a smarter Photos app that wants to make organising photos less of a chore. Generally, it succeeds at this, but some of its best features aren’t evident, or obvious to use. Let’s take a look at how to use the new features.
Add People’s Faces and Names

Photos can now search for people’s faces in photos, which makes it a heck of a lot easier to find pictures of your friends. It’s not super-obvious how to make use of this feature or set it up though.
In the Photos app, you’ll find a People section under Albums. When you first open up Photos, it might take a while to scan your library to find faces. Once it’s done with that, tap Add People, then find a person’s face. Tap the picture again, then tap the somewhat hidden “Add Name” box at the top of the screen. Type the person’s name, and Photos will attempt to find them in other photos.
Once you get a few people set up, you can tap and drag anyone’s picture to your favourites menu so they’re easier to find in the future. You can also tap Select to bring up another menu where you can hide people, favourite people in bulk or merge two different sets of photos into one.
Search Through Images with Keywords

On top of recognising faces, Photos now attempts to recognise objects as well. It does this behind the scenes by scanning your photos and adding labels. Photos never explicitly tells you this, nor is there any way to see what labels are applied to photos.
So, the only way to see this new search feature in action is to tap the search bar and attempt to search for an object. Photos seems pretty capable here and is able to spot objects like clouds, cars and buildings.
Edit Titles in the Memory Tab and Customise the Slideshow

Photo automatically creates slideshows called Memories that work similarly to the slideshows in Google Photos. At a glance, you can only edit some of these, and oddly there’s no way to manually make your own.
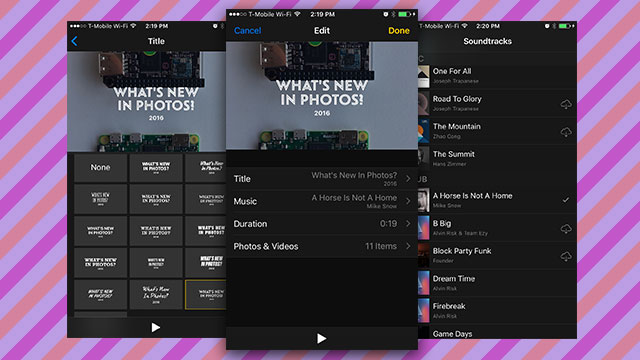
You can edit any Memory that includes a full slideshow (it shows a play button). Tap the play button, then tap the screen again. Here, you’ll find a screen where you can quickly swipe through different “tones” that alter the font and music of the slideshow. These includes options like “extreme”, which plays ridiculous sounding dad-friendly-heavy metal, or “uplifting”, which adds a Lord of the Rings-esque soundtrack to your slideshow.
If you want a little more control, tap the Settings toggle in the bottom right. Here, you can pick your own songs, pick which photos appear and change the title. Oddly, you can only pick pictures that Photos automatically assigns to that memory.
Also remember: These slideshows are created automatically, oftentimes with seemingly random pictures from your photos. So, be careful what pictures you have saved and hide any you don’t want showing up here.
Draw on Photos with Markup

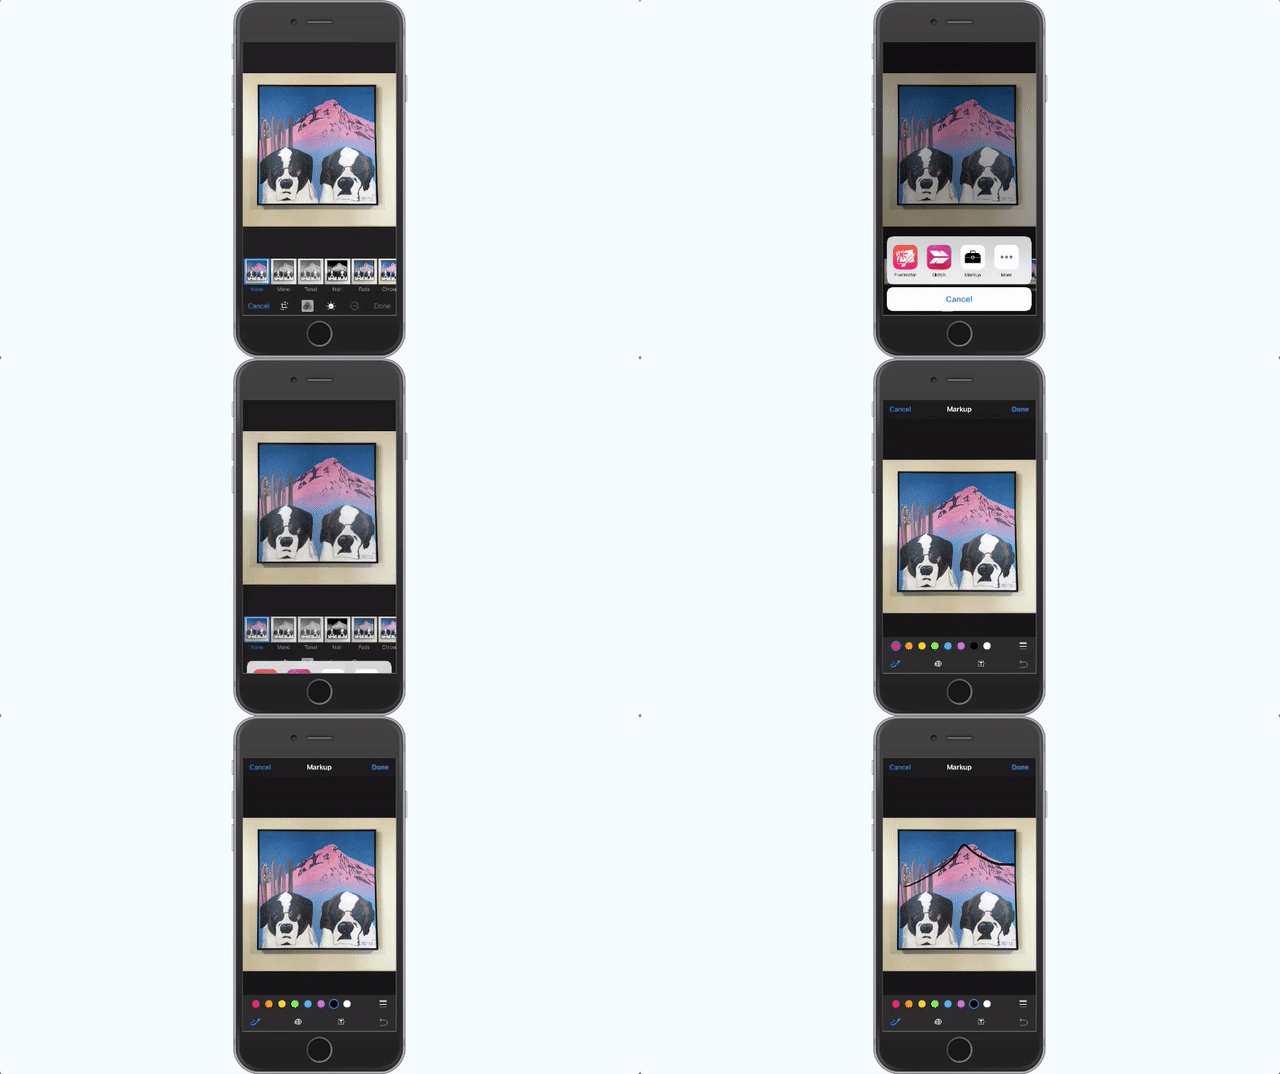
Markup has been available in several apps for a while, but now it’s fully integrated into Photos. When you’re on the photo editing screen, tap the Settings button, then the “…” icon, then Markup. Here, you’ll find tools to draw on an image, magnify a section and add text.

Comments