The weekend is coming up, it’s too cold to do anything outside and the kids are restless. It’s the perfect time for at-home science experiments. These five experiments are fun even if you don’t have kids, but if you do, there’s even more reason to spend an afternoon exploring science.
Illustration by Sam Woolley
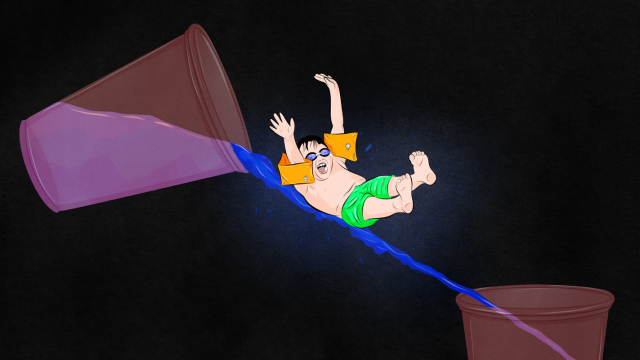
The Travelling Water Trick
In this experiment, water travels from one cup to another by way of a string. This is an interesting one to watch, but it requires a steady hand, so you probably want to try it outside or over a sink.
What you need
- Two cups
- Scissors
- Coloured water
- String
- Tape
What to Do: Use food colouring to colour the water so it’s visible. Cut a length of string, get it wet and squeeze out excess water. Tape the string to the bottom of one empty cup, then fill the other cup with the water and hold the string inside the lip of the filled cup. Holding the filled cup above the empty cup at an angle (and with the string taut), slowly pour the water down the string into the empty cup.
How it Works: Cohesion — like molecules sticking together through intermolecular attraction and forming a bond. Since the string is already wet, the water molecules on the string stick to the water molecules in the water. These molecules bond, making the water stick to the water on the string as it travels down the string.
The Soft Drink-Fuelled Skateboard
Yep, this is the old Mentos-and-Coke trick, but with a fun upgrade. Instead of just watching the whole thing explode, which is still pretty awesome, you add a skateboard to the picture. Extra awesome.
What You Need
- Small skateboard
- Mentos
- A roll of tape
- A bottle of Coke
What to Do: Cut a small hole in the Coke bottle and turn the Mentos wrapper into a “loading mechanism” so the whole thing fits inside the coke bottle. Tape the bottle to the skateboard, then remove the bottle cap. Quickly drop the Mentos into the bottle, screw the cap back on, set the skateboard down and watch it go.
How It Works: The carbon dioxide in the Coke causes a physical reaction when you bring Mentos into the picture. The carbon dioxide is already rushing to escape the soft drink since it’s been released from pressure, but the tiny pits in the irregular surface of the Mentos provide nucleation points where carbon dioxide can form bubbles. This creates a ton of bubbles, which are all rushing to escape without much room to do it. As those gas bubbles rush to escape the small hole, the pressure pushes the skateboard forward.
Colour Changing Flowers
This experiment takes some time, but it’s quick and easy to set up. Bonus: You get a bouquet of colourful flowers when you’re done.
What You Need:
- Glasses filled with water
- Cut white flowers (like carnations or daisies)
- Food colouring
What to Do: Add food colouring to the water, then add the flowers. Let them sit overnight, and you should start seeing them change colour. For even more visual appeal, you could split the stem of a single flower, put it into two different glasses of coloured water, and watch it turn two different colours.
How It Works: Capillary action. This is the ability of water to flow through a narrow space, like a tube, in spite of gravity. This happens because of intermolecular forces between the liquid and the surface. In really basic terms, the liquid sticks to the surface of the space. Capillary action is how water moves within a plant. Colouring the water lets you see this process in action. As the coloured water travels up the stem of the flower and into the petals, the dye allows you to see the water reaching those surfaces.
The DIY Electromagnet
This is a classic science experiment, and if you haven’t shown it to your kids, it’s time. They can create their own magnet with a few things you probably have lying around the house.
What You Need
- An iron nail
- A battery
- A metal paperclip or staple for testing
- A wire
What to Do: Wrap the wire around the nail in a single direction. If you wrap it in opposite directions, you’ll have electric currents creating magnetic fields that run in opposing directions, fighting and possibly cancelling each other out. The more wire you wrap around the nail, the stronger the field will be. Leave several centimetres off of either end of the wire, then tape those wire ends to either end of a battery (be careful, it can get hot). From there, you can test the nail’s magnetism by using it to pick up the paperclip or staple. In fact, the nail will retain a little magnetism even after you charge it (not for long, though). You can disconnect it and still use it as a magnet for a short time.
How It Works: Electromagnets are magnets that are powered by an electric current, and unlike a permanent magnet, an “electromagnet requires a continuous supply of current to maintain the magnetic field”. In other words, they can be turned “on” and “off” via the electricity source. When a wire has an electric current running through it, it creates a magnetic field.
According to Jefferson Lab, the movement of electric charges creates this field, and it runs down the length of the wire. So when you have an iron nail in the centre of that wire (and its accompanying magnetic field), the iron then acts as a magnet.
Make Instant Ice
This one is really simple but also pretty impressive. And, really, all you need is a bottle of water. Chill it, and watch all the fun things it can do.
What You Need:
- A bottle of distilled water (in the video, they use PureFlo)
- A freezer
- Ice
What to Do: Put your water bottle in the freezer for a couple of hours — you want it below freezing but still liquid. It should have a small amount or layer of ice floating around in it. From here, you can hit the bottle on a table and watch the whole thing turn to ice. You could also pour it onto a tray of ice and watch the water immediately crystallise into ice towers.
How It Works: In this experiment, you’re supercooling water, which means the water reaches a temperature below freezing but stays in liquid form instead of completely turning to ice. If the water is distilled, it shouldn’t have any impurities in it, which means the ice crystals lack the nucleation point they need to form quickly at that temperature, so much of the bottle is still liquid. You may have a few ice crystals form, though, and then all it takes it a quick hit to cause the molecules to move around to quickly form more crystals. From there, the rest of the water in the bottle attaches and forms longer crystal chains until all the water in the entire bottle is frozen.
If the kids are bored and looking for something to do, these experiments are a fun way to pass the time. And even better, they get to see science in action.
Comments
2 responses to “Five Fun Science Experiments You Can Do At Home With Your Kids”
Great article Kristen.
We’ve also got Science Alive coming up in South Australia. Definitely worth seeing for kids. Everyone is welcome, except for 4 events that are girls only and a few girls only competitions.
Thankfully, the organisers redefined equal opportunity, so it’s all good.
Demonstrate relativity by using acceleration to nullify gravity.
-Fill a plastic bottle with water and punch holes in the sides. Pop the top, so water streams out in graceful arcs.
-Explain that gravity forces water through the holes.
-Now, put the bottle into a state of zero-gravity by dropping it off a balcony, and watch the streams stop.