It’s clear that bots are having a moment. Even before Facebook’s Bots for Messenger announcement at their developer conference, there had already been a flood of investments, controversies, and critiques. So I wanted to learn how to make my own bot — and put it to work!
On the one hand, chat bots are nothing new. They have been around since the 1960s and the days of ELIZA. But suddenly the tools to create meaningful, personalised conversations are easy enough to deploy at scale. We have APIs, the ability to continuously monitor and parse messages for relevance and enormous messaging platforms for distribution — which is where people are spending the majority of time these days.
To get a sense for the bot world I decided to try my hand at making one.
Introducing EstherBot: My Resume, as a Bot
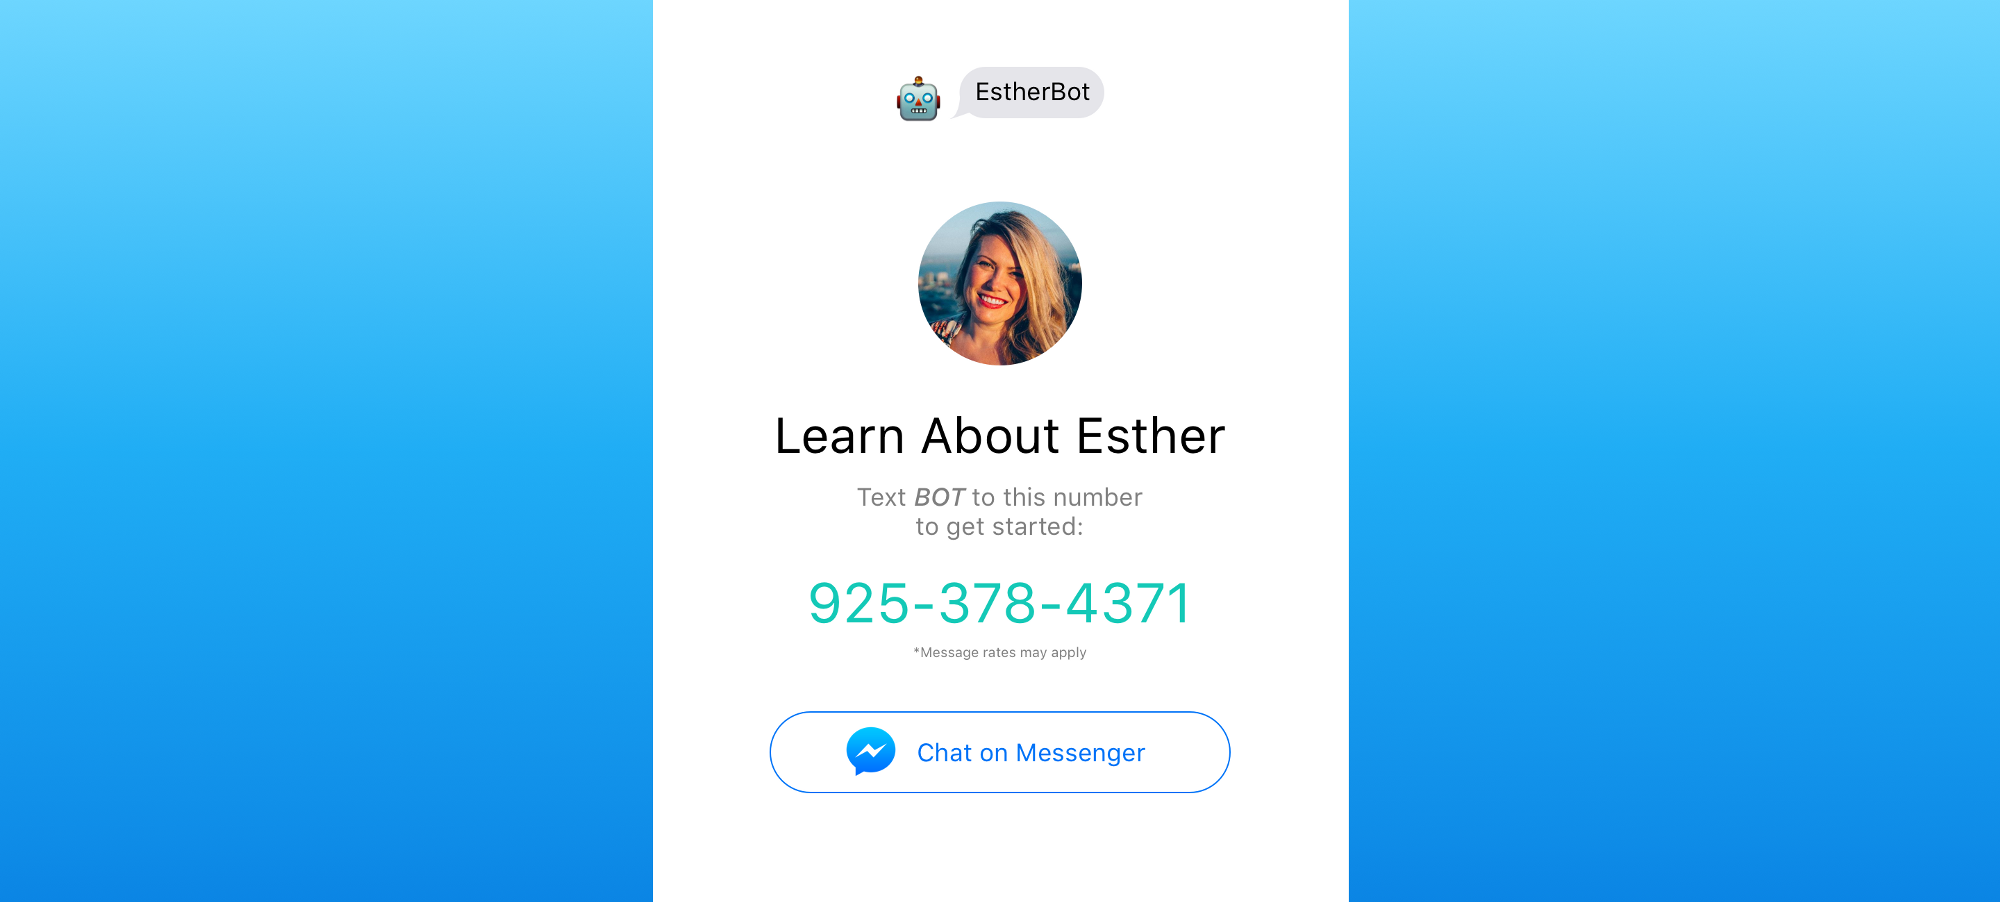
Text BOT to 925 — 378 — 4371 or chat on Messenger or Telegram.
My goal was to create something simple so I figured I’d tackle a subject I know well — me!
LinkedIn profiles haven’t changed much in the last decade. Sure, they’re more attractive than resumes but they aren’t much more engaging. It’s essentially just a list of dates, titles, and buzzwords — which is perfect for weeding out 90% of candidates. But once you’ve found an interesting candidate how do you tell if she’s looking for work? How do you determine if he’s a cultural fit? What if you want to see examples of their work?
I figured a bot could step in at this stage of the recruitment process because bots can easily answer recurring questions (let’s face it: recruiters all basically ask the same things). Bots can also provide more context for line items on a resume, and give a sense of someone’s personality. There’s a ton of information about yourself that could be used to connect you to better opportunities, like your hobbies, values, location preferences, multimedia samples of your work, on and on. A resume can’t hold all of that, but a bot can. My hope was that EstherBot could showcase some of my quirky interests and discuss my personal values.
In Search Of A Not-Too-Technical Solution
I’m not a developer and only know the bare bones of HTML, CSS, and JS, so I needed to find a simple method to create a bot. Builders like Howdy’s BotKit, Microsoft Bot Framework, Kik Bot Kit, Gupshup, Api.ai, and Wit.ai offer more features but were basically non-starters due to their technical requirements.
I was able to get going pretty quickly with a few other messaging services including TextIt (whose visual editor I loved), Sonar, and decided on Smooch. There are a few alternatives — the simplest platform to create a bot on today is Telegram, and using Bot Platform 2.0 you can set up a basic bot in minutes thanks to the “BotFather.”
I used Smooch because they make it easy to send images, GIFs and action buttons across multiple platforms. Plus, they had the key integrations I needed — Twilio (for SMS/MMS), Messenger, Telegram, and Slack (for tracking conversations). I didn’t want any of their other integrations but loved that I could change my mind and add other platforms down the road if I wanted.
Under the hood Smooch connects to a ton of other channels: Android, iOS, Facebook, Shopify, Telegram, WordPress and the web. You can accept payments with Stripe or choose from a bunch of other services to streamline the customer support side of things by turning on Front, Help Scout, HipChat, or Zendesk. Since all conversations sync automatically and get routed through Slack I’m able to jump in and say hello in real-time whenever my bot makes an introduction.
How To Make Your Own Bot
I made a few tweaks to the Smooch example code and simplified the instructions. Even if you’re not a coder, don’t be intimidated by the fact that you’ll be using GitHub. Here’s how to get started:
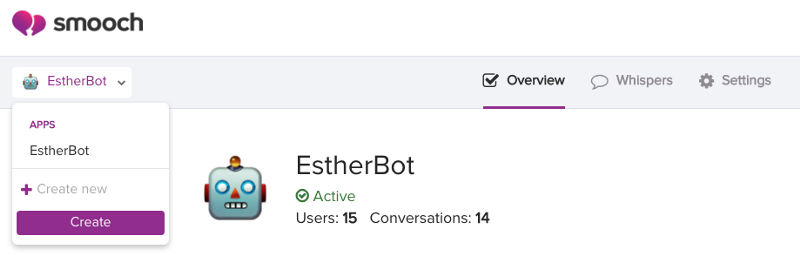
- Create a free Smooch account. Use the drop down menu on the left and Create a new app. Determine what messaging channel to use and connect it. In my case, I used Twilio.
- Sign in to GitHub and go to EstherBot. Click on “Fork” (this just means you’re copying the files to your account so you can edit the files as needed).
Creating this version will give you a web based chat app. With a few integrations inside of Smooch (like Twilio) you can have your bot talking on other platforms too including SMS, Facebook, and Telegram. Next we set up our new Smooch app (these directions are adapted from Smooch’s own example):
-
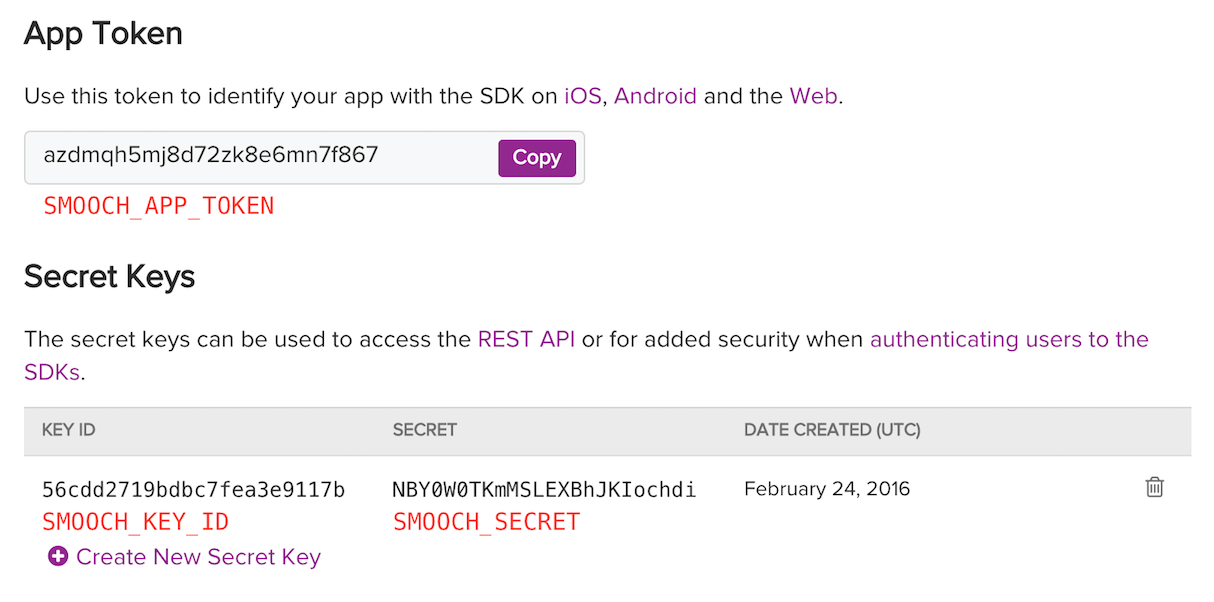
With a new Smooch app created, go to the settings tab and take note of your App Token. Also, generate a new Secret Key, and take note of the key ID and secret.
-
From your forked EstherBot on GitHub, deploy your app to Heroku. (You’ll find the deploy button in the ReadMe.) It’s a service for hosting apps so go sign up if you don’t already have an account — it’s free. You’ll need to specify your app token, key ID, and secret in the app’s
SMOOCH_APP_TOKEN,SMOOCH_KEY_ID, andSMOOCH_SECRETconfig settings. -
Your app should now be running on Heroku but you’re not quite done yet. Take note of the URL where your Heroku app is running, for example:
https://foo-bar-4242.herokuapp.com. You’ll need to specify this in your Heroku appSERVICE_URLconfig variable. You can do this in the Heroku control panel under Settings > Config Variables. (If you don’t see a variable already there, add “Service_URL” as a key and your app’s URL as the value). - Still in Heroku, make sure to go to “Deploy” and connect to your GitHub account. Then, enable “Automatic Deploys” from the master branch (this means anytime you make an edit to your bot’s script, it will automatically update and talk as intended in seconds).
- You should be all set. Open your Heroku app and start chatting with your new bot!
Teach Your Bot To Talk
Now that you have a bot you need to decide what it will say. That’s where the file script.json comes in. It’s the document you need to edit to make your bot talk.
Edit the document on GitHub by clicking on the pencil icon. The keywords are on the left, and the bot’s response is on the right. For example, if a user types “hello” then the bot will say “Sweet, let’s do this…”
Keywords are not case sensitive for users. The only two keywords you don’t want to change are “CONNECT ME” and “DISCONNECT”. CONNECT ME turns the automated chat off, so the bot will stop responding to keywords. DISCONNECT will turn the bot back on. Also, the initial script starts with “So you want to learn about Esther? …” but of course you’ll want to change it. You can edit it in the script.js file.
Unsurprisingly, crafting compelling conversational flows is really hard. Probably the hardest part of the entire process. Being able to add flair, intrigue and personality is a different skill set than building a bot. I started out by mapping a conversation tree on paper but you should use a more sophisticated tool, perhaps something like MindMup, if your interactions are more complicated. And using the Bot UI Kit I played with how the conversation would look to end users with images, GIFs and buttons. (You can go get a free download of my actual Sketch file to get you started.)
If you want to customise your messages a little more with line breaks, images, and interactive buttons, learn more in my ReadMe on GitHub.
Voila! You have added another bot to the internet.
Spoiler alert: My bot is killing it as a recruiter. It’s chatted with folks from every industry and has introduced me to people at Facebook, Microsoft, and Google — plus a half dozen smaller, compelling teams. What’s your take? Are bots and conversational UIs the “most exciting” thing to emerge since the App Store revolution? Will there come a time when we all have bots acting as intermediaries?
Esther Crawford is a Product Marketer with a passion for storytelling and design. Hit up EstherBot to learn more. This article is adapted from Esther’s original post on Medium. Image by Owen Smith via Getty.
Comments