It’s been a long time coming, but the first Steam Machines are finally here: compact computers that give you the quality of PC gaming with the living room convenience of consoles. Too bad most of them cost an arm and a leg. Here’s how to build your own for less.
Building your own Steam Machine isn’t just cheaper; it’s more customisable and upgradeable, too. Any PC can technically work as a Steam Machine, but we’ve put together our very own parts list designed for the living room: high-quality PC gaming in a compact case, a little bigger than an Xbox or PlayStation.
The Parts

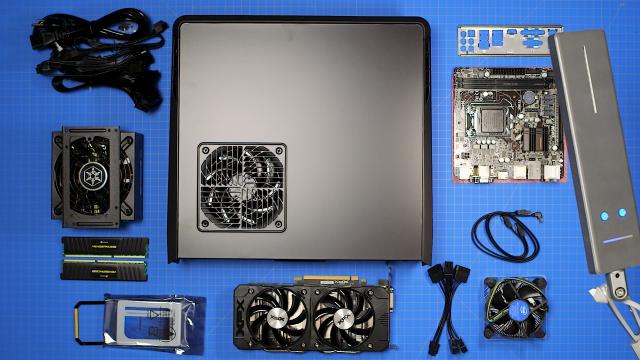
After lots of research and testing, here’s what we recommend for the ultimate DIY Steam Machine:
- The Processor (CPU): Intel Core i5-4460, $269: Skylake may be out, but this entry-level Haswlel i5 should provide all the processing power you need for modern games, and matches with a cheaper motherboard and RAM to bring down the cost of your machine. This processor comes with a cooler that should work just fine, though if you have extra money to spend, this $61 Noctua cooler will be cooler and quieter.
- The Motherboard: ASRock B85M-ITX, $109: ASRock continues to make good budget motherboards, and since we’re going compact with this build, their entry-level Mini-ITX board is a great choice at a good price. Note that it doesn’t have Wi-Fi built in, so if you don’t have ethernet access in your living room, you’ll need either a USB adaptor or a Wi-Fi capable motherboard.
- The Memory (RAM): Corsair Vengeance LP 8GB DDR3, $75: 8GB of RAM should be a decent amount for any present and future gaming.
- The Hard Drive: Western Digital Caviar Blue 1TB 7200RPM HDD, $69: You probably won’t need 1 terabyte of space for just your games, but it doesn’t get much cheaper if you go down in space. An SSD won’t improve the performance of your games, but it will decrease loading times significantly, so if you have a bit of extra cash, an SSD like the Crucial BX100 ($228) is a great alternative.
- The Video Card (GPU): EVGA NVIDIA GeForce GTX 970 4GB with ACX 2.0, $499: The graphics card is arguably the most important part of any gaming build, and we deliberated long and hard before settling on the GTX 970. Despite some marketing controversy, it’s still one of the best bang-for-your-buck cards you can get if you want to play games on high or ultra settings. Plus, it has a lower power consumption than its competitors, which is imperative in a small build like this. It’s also remarkably quiet.
- The Case: Silverstone RAVEN RVZ01B, $105: This is the really unique part of this build. The Silverstone RAVEN series aims to have a more console-like look, feel, and size. It’s a bit bigger than an Xbox One, but fits perfectly in an entertainment center if you lay it horizontally. Alternatively, you can stand it up vertically next to your TV stand. In fact, a lot of for-sale Steam Machines are using this exact case, so it’s perfect for your DIY version.
- The Power Supply (PSU): Silverstone SX500-LG, $130: Power supplies are tough for a compact gaming build like this, but the Silverstone SX500 fits the bill. It’s about as powerful as you can get in such a small form factor, and while it’s a tight squeeze, it fits into our compact case and can power all the above components beautifully.
- The Operating System: Windows 10 Home 64-bit, $179: You could install SteamOS for free on this machine, but you’d only have about 1/4th as many games to choose from, so we’re sticking with Windows for this build. Once you install Steam and set it to launch Big Picture automatically, you’ll barely even notice Windows is there, and you’ll have over 11,000 games to choose from.
- The Gamepad: Wired Xbox 360 Controller, $29: You have your pick of many gamepads, but we like the Xbox 360 controller. It’s cheap, comfortable, and works out of the box with most modern games. If you want to spend a little more, you can upgrade to the wireless 360 controller with a USB adaptor, or the Xbox One controller.
- HDMI cable: you’ll need one. It doesn’t need to be expensive. This one ($14) will work fine.
Final cost: $1478
Buy this build from PCPartPicker
You could build a comparable gaming PC for less money, but our goal here was to do something compact and living room-friendly, which ups the price a little bit. It’s still hundreds cheaper than comparable Steam Machines, though, like the Origin Omega (which would cost $2009 with similar hardware). If you want something cheaper and don’t mind a larger tower, you can just build a normal PC instead.
We went with Haswell on this build to keep the cost down, and because our original test build was put together before Skylake was released (and we didn’t want to recommend a machine we hadn’t built). If you must have the latest and greatest, you can upgrade this build to Skylake: we recommend the Intel i5-6400, the ASRock H170M-ITX/DL, and this set of Corsair DDR4 RAM. You won’t see a huge increase in gaming performance, but you’ll be on the latest and greatest platform for future upgrades.
Alternatively, if you want to save money on our build, you can downgrade the i5 to a Haswell i3, but as games become more CPU-heavy and more optimised for multi-core processors, the i3 won’t keep up quite as well as the i5.
You can also save some money by downgrading the video card to the AMD R9 380. It’s $200 cheaper than the GTX 970 we recommend, but it will decrease performance significantly. You’ll still get a decent 1080p experience, but some games you’ll have to run on low or medium settings, or live with sub-60fps framerates. In addition, it will become obsolete faster than the GTX 970 will. It’s up to you if you want to make that trade-off. (We didn’t.)
How to Build This Steam Machine
This guide assumes you’re familiar with the basics of computer building, but if you aren’t, you can check out our complete guide to building a PC for more. That said, the compact case introduces some interesting quirks to the build process, so we’ll re-outline the basic steps here. Check out the video above to see the whole build step-by-step, too, and when in doubt, check the instruction manuals that come with your case and motherboard for more details.
Here’s the basic step-by-step:
- Start by opening the case. Unscrew the two screws on the back of the side panel and slide the side panel off. Unwrap the front panel cables and put them to the side for now.
- Next, unscrew and remove the video card bracket. There are six screws here, so be sure to get them all. We’ll need this later, so set it aside as well. You should find a box of screws and other accessories under the bracket, which you’ll need for the rest of the build.
- First, install the power supply. Unscrew the power supply bracket — there are four screws — and carefully pull it out. Slide the power supply into the bracket, fan side down, and screw it in. Plug in the case’s power cable, and if the power supply has a power switch, flip it to the on position.
- If you have a traditional hard drive, slide it into the bay on top of the power supply bracket and screw it in.
- When you’re done, put the power supply bracket back in place and screw it in. A magnetic screwdriver is very helpful here, since you can’t really reach down to grab fallen screws.
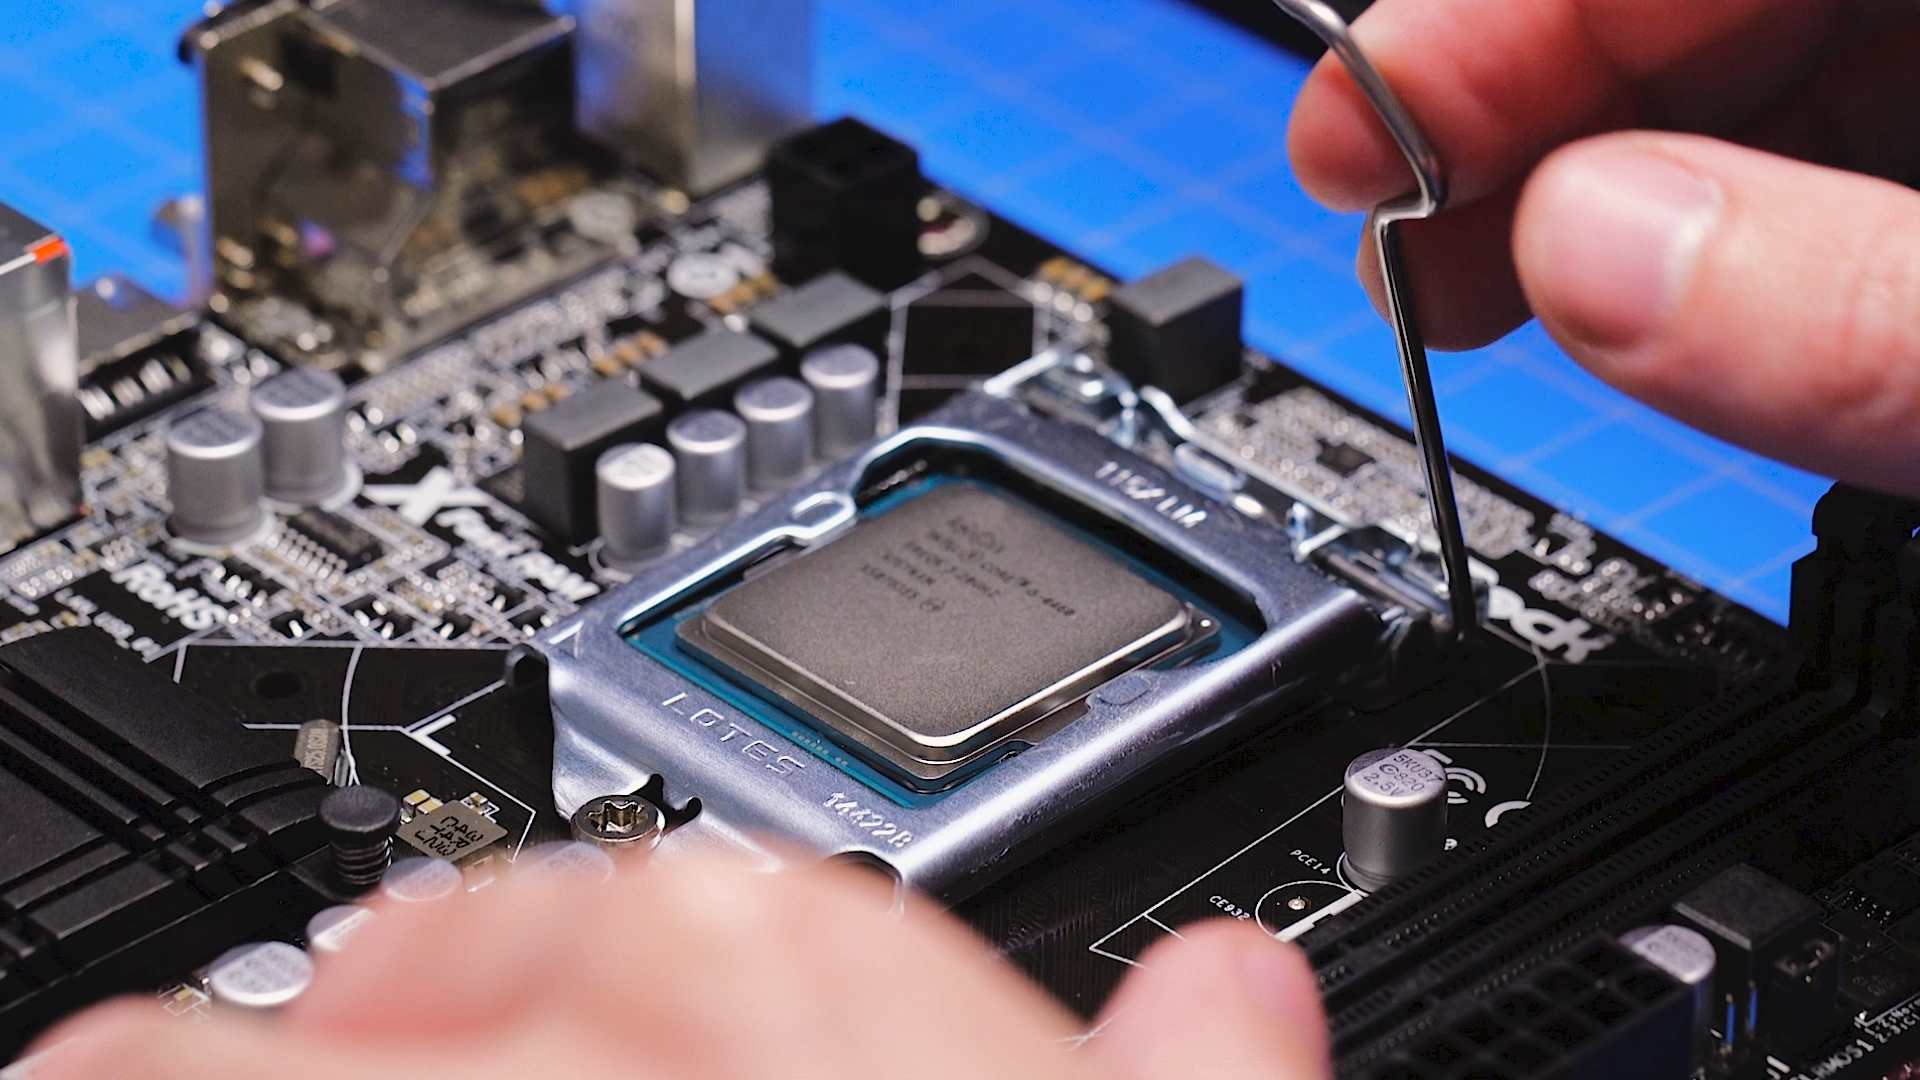
- Next, grab your motherboard and put it on top of the box it came in for a nice static-free workspace. Release the CPU lever and open the bracket. Drop in your CPU, making sure the gold arrow matches up with the arrow on the bracket, and pull down the lever to lock it into place.
- Grab your RAM sticks and undo the latches on the motherboard’s RAM slots. Make sure the notches line up, and press your RAM into place. You should hear the latches on the side click closed.
- Because this case is cramped, now is a good time to plug in a few cables. Grab the 24-pin and 4-pin cables that came with your power supply, and plug them into the motherboard. (Don’t plug them into the power supply just yet.)
- Grab the I/O shield from your motherboard box and snap it into your case. Lower the motherboard into the case, making sure all its ports line up with the I/O shield, and screw it in.
- Once the motherboard is secured, you can start plugging in the the front panel cables, including USB 3.0, front audio, and the power and reset buttons. Refer to your motherboard’s manual for more information on where each of these go.
- When you’re done with that, it’s a good time to install the CPU cooler. Place it on top of your CPU and press the plastic pins down into the motherboard until they click into place. Plug the fan’s cable in to the CPU FAN header on your motherboard, which should be right next to the CPU.
- Now, grab your motherboard’s 24-pin and 4-pin cables — the ones you plugged in earlier — and plug the other ends into the power supply. It’s a tight fit, but you should be able to do it with a bit of wiggling. You can also install the PSU end of your PCI power cable now (the one with the blue tip).
- Now the fun part: installing the video card. This case uses a sideways GPU adaptor to fit big, powerful video cards into a small case. Unscrew the PCI bracket from the mount, plug the little PCI express extender into your video card, and lower the GPU into the bracket. Make sure it’s firmly in place, then screw the GPU in to stabilise it.
- Plug in the PCI power cables, and lower the GPU bracket into its bay. The sideways adaptor should press firmly into the PCI slot on the motherboard. Once everything’s in place, screw the bracket into the case. (Remember, there are six screws in total here — don’t forget any!)
- Your cables will likely be all over the place at this point, so try to tuck them in the spaces around the power supply to get them out of the way of your components and fans.
- If you’re using an SSD instead of a traditional hard drive, you can now install it in the two and a half inch drive bays on the graphics card bracket.
- Plug the SATA power cables into your hard drive or SSD, then plug the other end into the power supply. Do the same with the SATA data cable — one side in your hard drive, and the other end into the SATA 3 ZERO port on your motherboard.
- Your case should have come with a three-pin Y adaptor for your fans. Plug that into the SYS FAN header on your motherboard, and plug the two case fans into that adaptor. When you’re done, close up your case, screw in the side panel, and attach the magnetic fan filters to the outside of the case.
That’s it! The case can lay horizontally in your entertainment center, like a DVD player, or stand vertically next to it like an Xbox. The case comes with little rubber feet you can install on the bottom to stabilise it, as well as some magnetic dust filters you should stick next to the fans. You can even install a vertical or sideways version of the RAVEN logo.
When you’re done, plug your Steam machine into your TV with the HDMI cable, plug it into the wall with your power supply’s included power cable, and press the power button. If you did everything right, it should start up and you should see the POST screen.
If it doesn’t turn on, you’ll need to open it back up and do some troubleshooting. You can find some troubleshooting tips at the end of our general computer building guide here.
How to Set Up Windows, Steam, and Your Games
The hard part’s over. Setting up the software on this system is remarkably easy, but before you install Windows, you’ll want to make a few tweaks to the BIOS first:
- Boot up the computer and press the DEL key to enter BIOS setup.
- First, head to OC Tweaker > Load XMP Setting > XMP 1.3 Profile 1. This ensures your RAM is running at the correct speed.
- Next, go to H/W Monitor > Chassis Fan 1 Setting and choose Performance or Full Speed. This ensures that the fan is running high enough to keep your computer cool. I found that even Full Speed was pretty quiet but your preferences may vary, so try it on both settings to see what works for your ears.
When that’s done, you’re ready to install Windows:
- On your normal PC (not your Steam machine), head to this page and download the 64-bit version of the Media Creation Tool. Launch it when it finishes downloading.
- Select the “Create installation media for another PC” option and click Next.
- Choose your language and edition of Windows. (If you used the copy we recommended, it will be the Home edition. Otherwise, check your box or the email you got when you bought Windows 10.)
- Choose what kind of media you want to create. We recommend using a USB flash drive.
- The Media Creation Tool will download and burn the installation files for you. When it’s done, eject your flash drive, plug it into your Steam Machine, and start it up.
- Boot from your flash drive by pressing F12 as the computer turns on. Then, choose your flash drive from the list that appears.
- You should be greeted with the Windows 10 installer. Follow the initial prompts and, when given the option, choose “Custom: Install Windows Only”.
- Select the hard drive you want to install Windows 10 on. Chances are, you only have one hard drive installed, so click on that one.
- Click the “Format” button. (If the Format button is grayed out, click “Delete”, then click “New”.) Press Next to install Windows on that drive.
- Allow the installation wizard to guide you through the rest of the process.
Your computer will reboot a few times, but when it finishes, you should be able to log into the Windows desktop. You’re almost there! Now you just need to install your motherboard drivers, graphics card drivers, and Steam. This is easy:
- Head to ASRock’s web site and download the INF Driver and Rapid Storage Technology driver.
- Double-click both ZIP files and extract them to your desktop. Run the INF driver installer first, reboot if necessary, then run the Rapid Storage Technology driver.
- Next, go to NVIDIA’s web site and download the drivers for your graphics card (if you swapped out our recommended card for an AMD card, you’ll want to get the drivers from AMD, obviously). Double-click the installer to install those drivers.
- Lastly, download and install the Steam client from Steam’s web site.
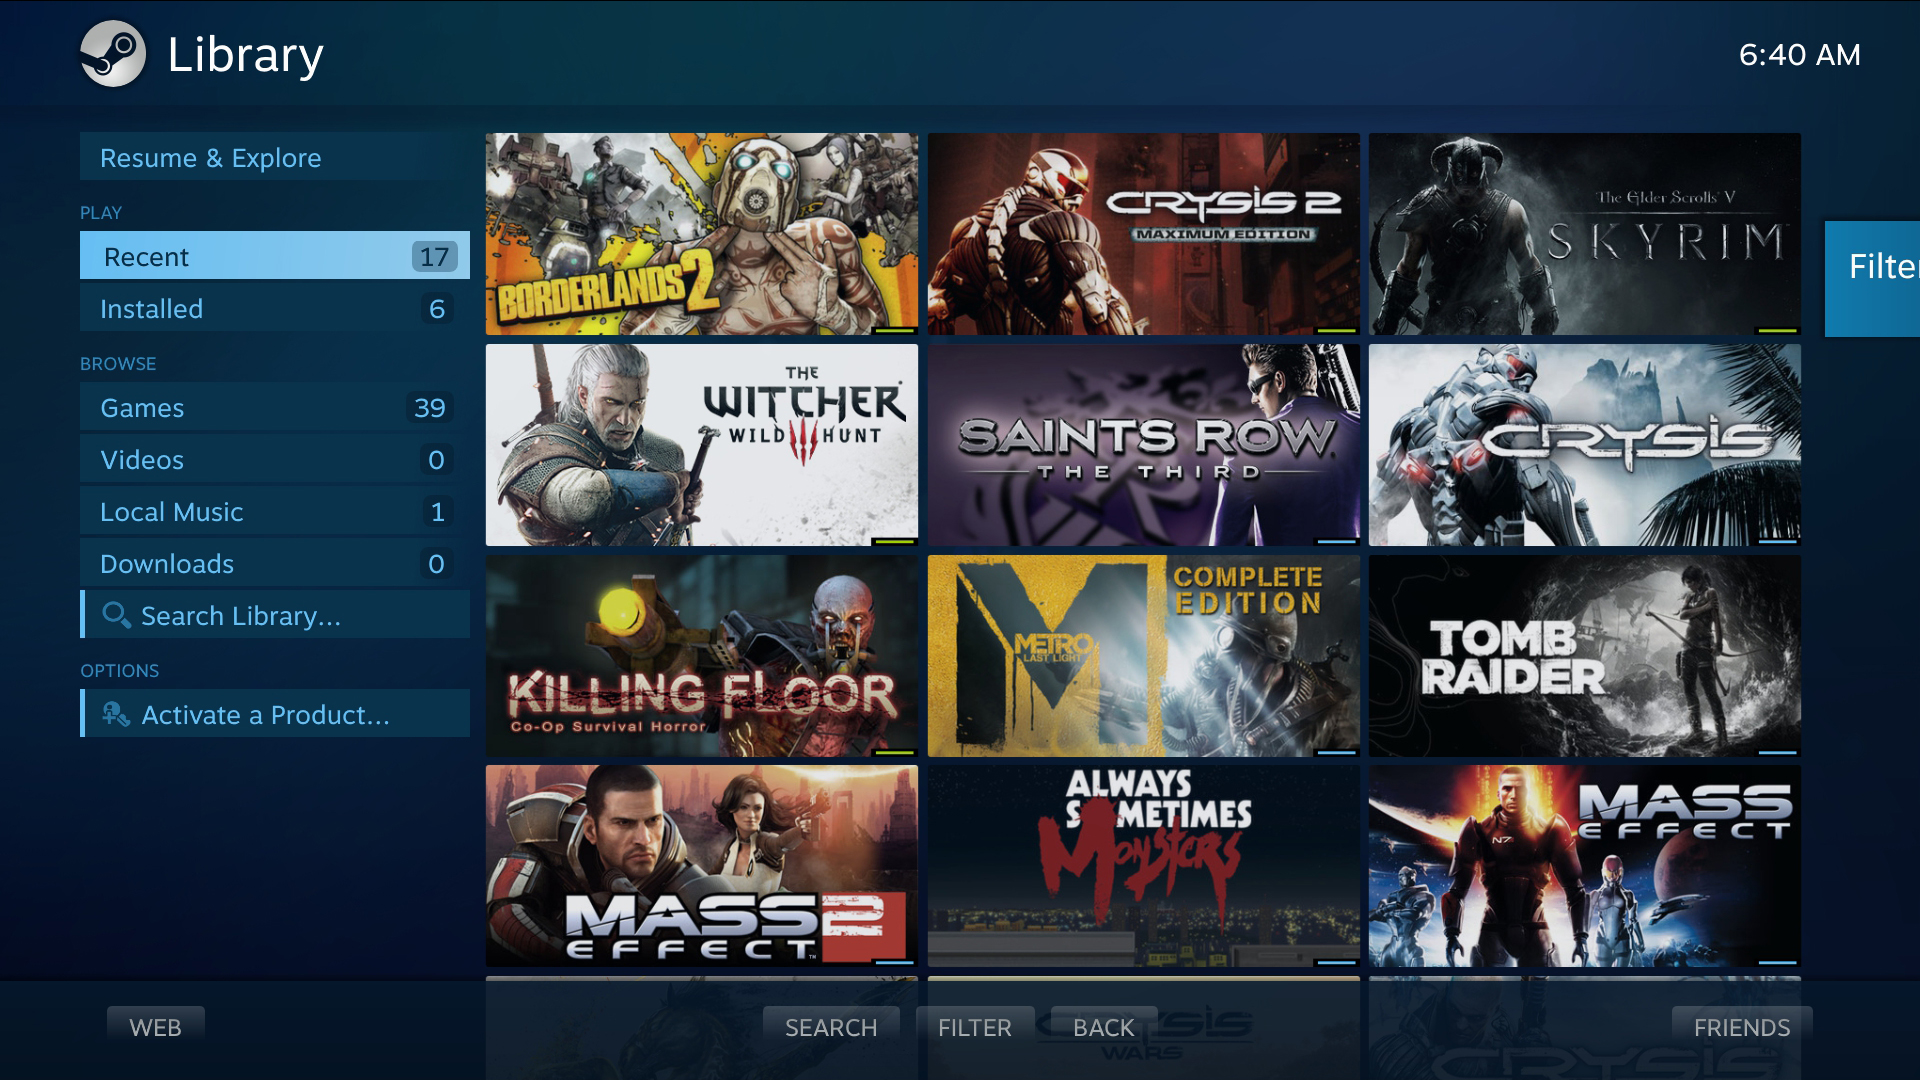
- Once installed, launch Steam and log in. Head to Steam > Settings > Interface. Check the “Start Steam in Big Picture Mode” box.
When you’re done, reboot your computer. If all went well, it should boot straight into Steam Big Picture mode, so you can disconnect your mouse and keyboard and start playing your games straight away. You can even use your controller with games that don’t support it, and stream games from your other computers.
Comments
12 responses to “How To Build A Powerhouse Steam Machine For Hundreds Of Dollars Less”
This article should be titled “How to build a budget gamer pc”. Click bait much?
What games would this PC be able to play? lets just say fallout 4 and COD? as examples. how high could the settings go on them?
According to this (http://www.gamersnexus.net/game-bench/2177-fallout-4-pc-video-card-fps-benchmark-all-resolutions), which admittedly has a much better CPU and twice the RAM, ran Ultra Settings on the 970 @80FPS on 1080p.
Some settings might need to go down a touch because of the CPU/RAM, but probably not much. So it looks like you could play at 1080p@60FPS on ultra.
I advise people who already have a spare laptop/pc lying around to try out in home streaming before dropping any $ on building a dedicated lounge gaming machine.
As the challenge is having games that work well sitting a bit of a distance from the screen and are enjoyable with a controller. It would be a real shame to go through the above only to find you either don’t have games that work in the above setting, or that game that work in the above setting just don’t resonate with you.
I agree, but a lot of the games which I think are best played in front of a TV (“simple” shooters like COD, racers, RPGs like Skyrim, etc) are also the games which can be most frustrating to have even a little bit of input/frame lag. I really like the idea of streaming, but every time I do it the slight delay when I try to rotate the camera really urks me. I don’t think in-home streaming does PC gaming justice.
Agreed, in my experience you’re going to want gigabit wired networking in place for this. But this isn’t always feasible to have network cables lying all over the place. In my setup at home, my “TV” is connected via wired connection to router (the telephone jack is in the kitchen – the joys of living in a shoebox) and my real PC is another room and connects via 300 Mbps wireless and I’ve managed to minimise the amount of physical barriers between the real PC and the wireless receiver.
The key is if you have to use a wireless connection, you’re probably going to want to upgrade from the usual wireless speeds (which usually woefully crap, not that 300 Mbps is stellar either) found on most routers (esp. the one supplied by your ISP). As well as the wireless network cards/dongles used by your machines. Another gotcha I found is if you’re using a usb wireless dongle, try plugging it into a USB 3.0 port, in theory this shouldn’t make a difference but anecdotally speaking it seemed to improve things in my setup.
As for games I’ve palyed in this setup. I’ve managed to play through Devil May Cry and Shadow of Mordor using in home streaming.
You’re mad!!!! only thing better on console then PC is racing games.
wrong. sorry, id say they are on par. especially if you have the steering wheel, pedals and shifter setup.
Yeah I agree, but I was being nice and leaving something for the inferior race 😛
or, if you already have a gaming machine in your office and want to game in your lounge – use steam stream over your network on anything that runs windows… including NUCs, VM’s, laptops, stick pcs…
and by the way @lifehackerinternational,
hundreds of dollars less compared to what?
I’ve had a SteamBox for over 1.5 years now. 7970GHz, and rest similar to here. 500GB SSD for lulz. That rig is amazing.