Everyone knows gaming mice and keyboards can make you barrel through fast-paced games with peak efficiency. But with all those buttons and macros, they can actually help you work smarter, too. Here’s why I swear by them.
Why Use Gaming Peripherals?
We’ve recommended a number of ways to automate tasks over the years. AutoHotkey is excellent for mapping your own hotkeys. With TextExpander, you can automatically fill in blocks of text with just a few keys. On their own, these tools are incredibly useful — but with a gaming keyboard and mouse, they become even more powerful. Why? Because these peripherals were made to automate tasks. Sure, they were designed for games, but they function just as well with normal work, too.
Here are some of the key advantages I’ve discovered:
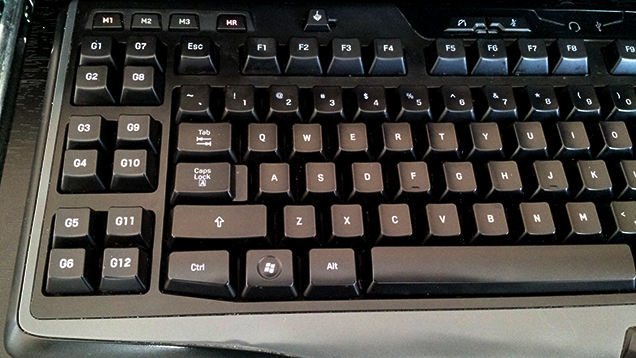
- Dedicated buttons means less finger gymnastics: One of the most annoying things about making custom keyboard shortcuts is finding a shortcut that another program isn’t already using. With a gaming keyboard, I’ve got twelve new buttons that can do whatever I want. Even if I need AutoHotkey, I can map them to a shortcut I’d never be able to pull off with my fingers.
- Mouse buttons are a revelation: I feel this needs its own bullet point because I never realised how lazy my right-hand’s thumb is. With the G600 I got another twelve buttons I could press without taking my hands off the mouse. It’s a little disorienting at first, but once you get used to it, you’ll wonder how you can live without it.
- The software is stupid easy: AutoHotkey and TextExpander are already pretty easy to use once you learn the basics. When it comes to basic automation, however, Logitech’s mouse and keyboard software is even easier. You can set custom shortcuts, record macros, launch applications, or paste entire blocks of common text with a simple interface. The keyboard even includes an on-the-fly macro recording button, so you can create a shortcut for some repeated actions with just a couple of button presses.
There are loads of gaming mice and keyboards out there, but I’ll focus on Logitech and Razer, since they’re the most popular (and their software is pretty killer). Logitech’s Gaming Software has many features Razer’s Synapse doesn’t, but they’re both worthwhile outside of video games. If you’ve picked up peripherals from one of these companies, be sure to install the accompanying software to follow along.
Test Case: Switch Between Browser Tabs With Your Extra Mouse Buttons
I use both a gaming keyboard and mouse, but the latter is easily my favourite. Most mice have two, maybe three buttons that are all programmed for something. Mine has twelve extra buttons that I can map to anything. This is handy for commonly used shortcuts, or just for making complicated shortcuts easier to access. One of my favourites is mapping the shortcut to switch between tabs (Ctrl+Tab, and Ctrl+Alt+Tab) to the buttons on the side of my mouse.
Here’s how to do it on Logitech’s software:
- Open the Logitech Gaming Software app.
- Choose the device you want to program and select the set of buttons.
- Hover over the button you want to program, click the dropdown menu and select Edit.
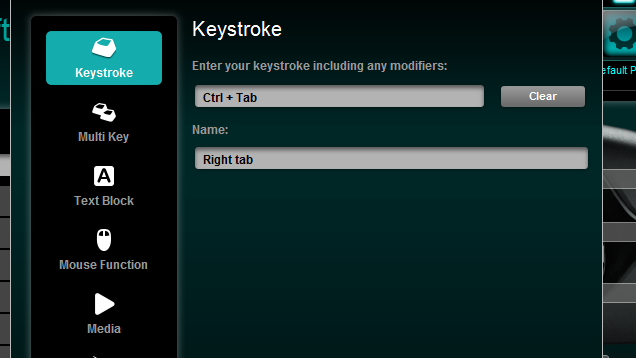
- In the left-side pane, choose Keystroke (this may already be selected).
- With your cursor in the first box, press Ctrl+Tab. Note: any key you press in this box will be interpreted as part of the keyboard shortcut you want to use, so click outside the box when you’re done.
- Under name, type “Right tab” and click OK.
- Repeat steps 3-6 on a different button, with the keyboard shortcut Ctrl+Alt+Tab and the name “Left tab.”
If you’re using Razer’s software, here’s how to do it:
- Open the Synapse software.
- Click the tab for the device you want to modify (in this case, “Mouse”).
- Select the button you want to program. For some buttons, you may need to select left or right side view.
- Choose “Keyboard Function” from the dropdown menu.
- Press Ctrl+Tab to bind the shortcut to your mouse button and click Save.
- Repeat steps 3-5 for Ctrl+Shift+Tab.
Now you can change tabs with just your mouse hand. This works with nearly any keyboard shortcut, which makes it perfect for complex shortcuts that defy ergonomics (looking at you, Alt+F4), or mapping your mouse buttons to apps that only support keyboard shortcuts (like Switcher’s Exposé-like window overview). I actually still press Ctrl+Tab the normal way to move between tabs when both hands are on the keyboard, but when my hand is on the mouse, this method is much easier. Of course, you could always map these shortcuts to your extra buttons on the keyboard as well. Choose whatever works best for you!
Test Case: Empty The Recycle Bin With A Single Button
AutoHotkey isn’t just for remapping keyboard shortcuts. You can automate all sorts of tasks with simple scripts. Pair that with a gaming peripheral and you can create your own custom buttons that perform any action your heart desires.
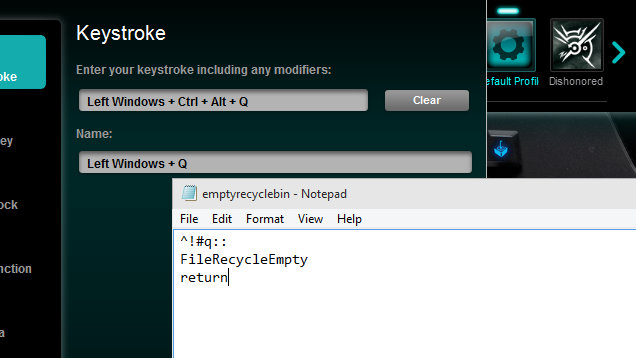
For example, I’ve created a button that empties the Recycle Bin. To get started, create and run the following script in AutoHotkey (if you’ve never used it before, check out our beginner’s guide):
^!#q::
FileRecycleEmpty
return
This script will automatically empty your Recycle Bin when you press Ctrl+Alt+Win+Q. You could use a simpler shortcut if you wanted, but we’ve made this deliberately difficult so it doesn’t conflict with anything. And, it doesn’t matter how difficult the shortcut is, since you’re going to trigger it with one of the gaming keys anyway.
Once this script is running, use the same steps in the previous section to map Ctrl+Alt+Win+Q to one of the keys on your gaming keyboard. Now, instead of having to open the bin itself, or pressing a complex shortcut, you have one dedicated button for the task on the side of your device. Anything you can do with AutoHotkey, you can now do with one of these buttons.
Test Case: Launch And Close Apps With The Mouse
Every once in a while, I have to do some quick maths — just not enough to keep a calculator app open all the time. Keeping it in the taskbar seemed like a bit of wasted space, so I decided to add it to my extra buttons. I already use my right hand on the numpad when doing quick calculations, so I chose to launch it with a mouse button, but you could use one of the keyboard buttons as well. Here’s how to set it up in Logitech’s software:
- Open the Logitech Gaming Software app
- Choose the device you want to program and select the set of buttons.
- Hover over the button you want to program, click the dropdown menu and choose Edit.
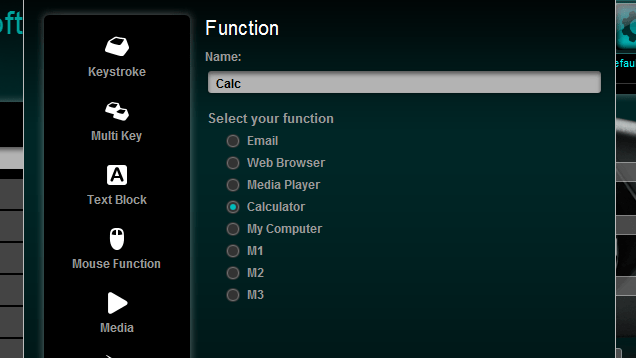
- In the left-side pane, choose Function.
- Choose Calculator from the list and click OK.
You can also use the Function pane to assign common functions like opening a web browser, launching a media player, or opening My Computer. Of course, if you wanted to launch a different application with one of the buttons, you could choose Shortcut instead of Function in the steps above. Then, browse to find the executable file you want to launch.
Here’s how to do the same thing in Razer’s software:
- Open the Synapse app.
- Click the tab for the device you want to modify.
- Select the button you want to program.
- From the dropdown menu, select Launch Program.
- Click the folder icon under “Launch Program” and navigate to the executable you want to run (the Windows calculator app can be found in C:WindowsSystem32).
- Click Save.
Razer doesn’t have a method of selecting commonly used apps like Logitech does. However, you do also have the option in this menu to launch a web site in your default instead of running an application. Both are handy options.
To make my maths smoother, I also map Alt+F4 to one of the buttons on my mouse, as I mentioned in the first section. With one hand, I can launch the calculator app, tap out some maths, and close the application. For my use, it’s extremely quick. Of course, if you choose to make Alt+F4 a shortcut, make sure it’s not somewhere you can easily accidentally press it. While inconvenient, Alt+F4 is hard to press on purpose.
Test Case: Record Complicated Macros On The Fly
I have a confession: I don’t use macros — or recordings of frequently repeated actions — as often as I should. It’s not that I don’t have repetitive tasks I could automate. It’s just that by the time I figure how much time I’ll actually save by re-learning AutoHotkey all over again and building the task, I’ve lost interest and need to get back to work.
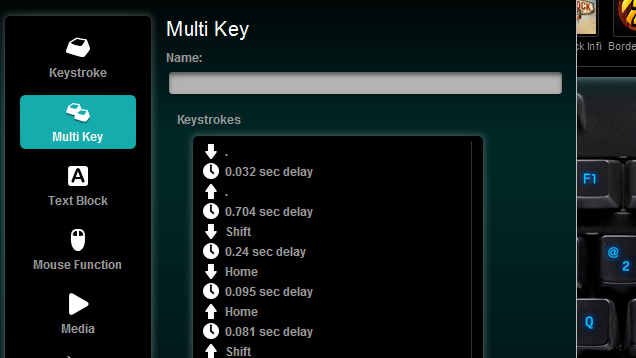
The Logitech software makes it stupidly easy to record repetitive actions. There’s a dedicated button on most keyboard models to record actions. You can also do it in the Gaming Software app, where you can see modify each action individually to tweak it until it works exactly the way you need. To start recording on the keyboard follow these steps:
- On the Logitech keyboard, press MR.
- Press one of the programmable buttons you want to record your action to.
- Perform the action you want to record as you normally would. The keyboard can’t record mouse clicks, but it can record pauses between keystrokes, if you find the software is playing back the actions too quickly for your computer to keep up.
- Press MR again to save the macro.
Razer keyboards have similar functionality, though without the dedicated macro recording button. Instead, you can initiate on-the-fly recording by pressing Fn+F9. To do this, follow these steps:
- On the Razer keyboard, press Fn+F9.
- Perform the action you want to record as you normally would.
- Press Fn+F9 again to save the macro.
- Press the programmable key you want to save the macro to.
It couldn’t get much simpler. I use this method for a lot of simple formatting tasks. For example, on many Lifehacker articles, we have photo credits. I’ve programmed my keyboard to automatically type “Photo by [name].”, select the entire line, and send Ctrl+I to italicize the line. The only thing I need to do then is change the name. If I tried to program that task in AutoHotkey, it might not even be worth my time, but since I can record it while I’m already doing it, it’s super-easy.
Test Case: Simplify Repetitive Emails With Quick Blocks Of Text
Replying to emails is tedious enough without having to repeat yourself a hundred times. You don’t need to custom tailor your “Thank you, but our company is not interested” or “I need to have those TPS reports on my desk by Friday” responses to every recipient. It would be easier to just press one button and past the whole thing.
Fortunately, Logitech’s app has the ability to paste text blocks. While this method does involve taking your hand off their position while typing, I’ve personally found that having dedicated buttons for text blocks helps me mentally organise my shortcuts better than a text expander does. You can even enable Unicode mode if you want to have quick access to some of the more eclectic emoticons.
Here’s how it works:
- Launch the Logitech Gaming Software.
- Select the device you want to program and click on set of buttons.
- Hover over the button you want to program, click the dropdown menu and select Edit.
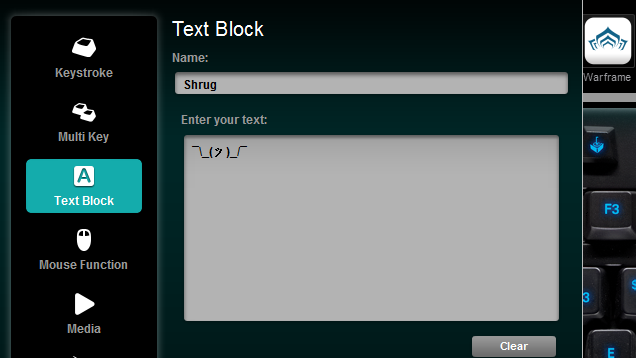
- In the left-side pane, choose Text Block.
- Write or paste the text you want to assign to the button under “Enter your text”.
- Give this shortcut a name under “Name”.
- Optional: Enable “Use Unicode playback” for any special characters. Normal text shouldn’t have a problem either way, but if you want special characters like these, you’ll need to turn it on.
After you’ve created your text block, open up Notepad and give it a try. In my experience, text blocks longer than a sentence or two do better if you enable “Use Delays Between Characters” and set the delay to about 3 milliseconds. Unfortunately, Razer doesn’t have the ability to save entire blocks of text. However, text expanders are always an option.
Comments
6 responses to “Why I Started Using Gaming Peripherals To Get Real Work Done”
I use a Naga for work with Revit, so very handy to have all the functions of Revit on my mouse.
Definitely increases my productivity by 200%
Oh wow, that would be a real boost. Not having to move up to the toolbar all the time.
Similarly I use my G110 and G500 in AutoCAD, not as many buttons on the mouse, but a definite improvement.
I use my Logitech mouse in Autocad as well. It does make things quicker
I’m planning to sell my Logitech G502 Proteus Core for a Logitech MX Master, which is already on its way.
I think I’m going to miss the G502 now.
If only my work laptop wasn’t locked down so I couldn’t install the Logitech software, my G700s would be so much more useful.
Couldn’t you work out the scan-codes for the keys then use a compiled AHK .exe to map them to scripted functions? It’s been done with a G9 mouse, should be achievable with a G700: http://www.autohotkey.com/board/topic/39126-logitech-g9-g9x-mouse-with-autohotkey/ .
I have used many of Logitech products more than 10years and it never disappointed me until now
I still find my Logitech gaming peripherals extremely useful when it comes to things like shortcuts in Chrome, Excel, Word, etc…