HDTVs come with all kinds of advanced settings designed to “improve” the picture, but most of them are just marketing gimmicks. In fact, your picture will actually look better with some of them off. Here are some of the settings you’ll find in the advanced menu, and what you should do with them.
Picture: Semisatch/Shutterstock
Think of this guide as “Part II” of our HDTV calibration guide. We’ve covered the basic settings, including brightness, contrast, sharpness and tint, and you should learn how to adjust those before moving on. So, if you haven’t read that guide and performed a basic calibration of your TV, do so now!
A Note on Your TV’s Presets
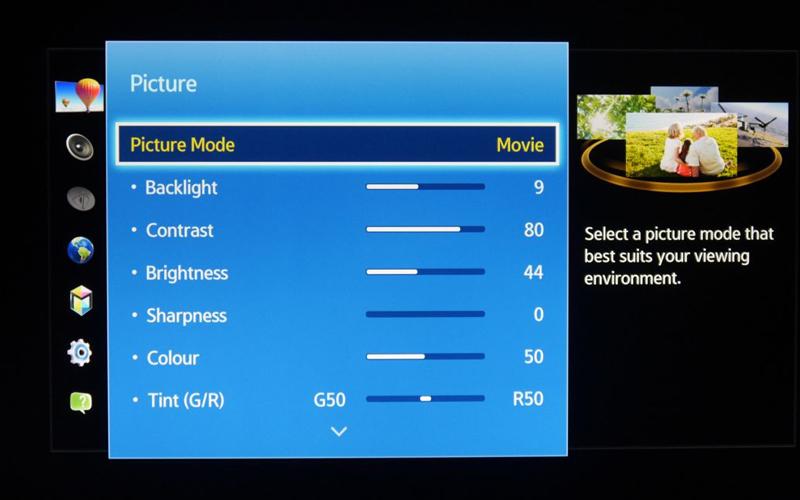
Before you adjust your TV’s advanced settings — nay, even before you calibrate it — take a look at your TV’s “presets”. It will probably have a few different modes, such as Vivid, Movie and Standard. These will not only contain different presets for Brightness, Contrast and other basic settings, but also the advanced settings — and in some cases, those advanced settings will be “locked” so you can’t change them. So, it’s quite important to start with the right preset. In most cases, you’ll want to start tweaking under Movie mode, which “locks” the fewest settings.
If you’ve calibrated your TV from a different preset, I recommend switching it to Movie mode and re-calibrating it before moving on.
The Most Common Advanced Settings (and What They Do)
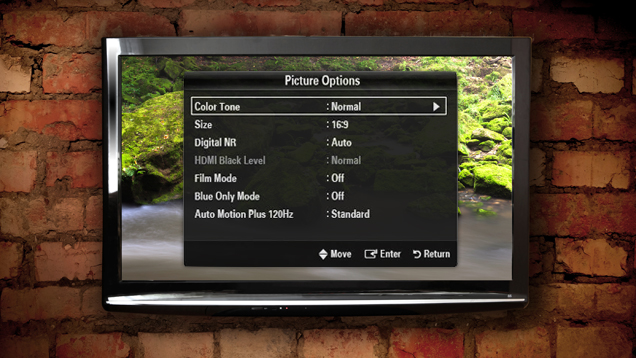
If you head into the picture settings menu of your TV, you’ll probably find a few deeper menus, usually labelled “Advanced Settings” or something similar. Here are some of the more popular settings you’ll find inside and what they do:
- Colour Temperature is an important setting that determines colour accuracy. It usually comes in a few settings, such as “Cool”, “Normal” and “Warm”. “Cool” will give whites a bluish hue, while “Warm” will make them look reddish. However, this is a bit of a trick on your eyes: “Warm” is usually the most accurate (not to mention it’s not as harsh on your eyes when watching in a dark room). Try it on Warm and give your eyes a few days to adjust — if you still hate it, then try Normal. Be sure to set this before you calibrate your TV for the most accurate colours. For more information, check out this CNET article.
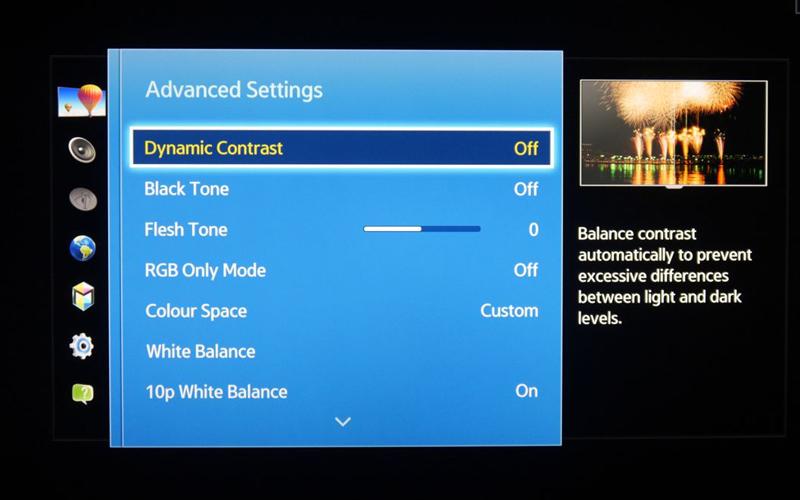
- Dynamic Contrast automatically adjusts as video plays, to make the dark areas darker and the light spots brighter. In short, it makes the picture “pop” a little — but usually at the expense of detail. You’ll find that blacks and whites get “crushed” with this setting turned on. So, for the best picture, it’s usually advised to keep this turned off. However, some TVs do this better than others, and some have varying levels of dynamic contrast instead of just an “on” and “off” setting — which may offer a good compromise if you like the way it looks. (I personally like mine set to “Low” — don’t tell anyone). Some people also like it on for sports.
- Black Tone and similar features attempt to make blacks look darker, but like Dynamic Contrast, will usually just cause a loss of detail. Generally, we recommend leaving these turned off. You may have a Black Detail setting that does the opposite (which we still recommend leaving off). Don’t confuse these two settings with Black Level, which is something else entirely (and something that, in most cases, you shouldn’t need to mess with).
- Local LED Dimming is a feature on LED TVs that affects black levels. Essentially, it allows the LED backlights to dim in certain areas of the screen, making black areas look darker than they would with the setting turned off. However, not all dimming features are created equal — some TVs do this much better than others, which may experience a blooming effect with dimming turned on. Try watching dark scenes (like those in space) with the feature both on and off to see which you prefer. Read more at this Rtings article.
- Motion Blur Reduction does exactly what it says: if you find that some scenes get a little too blurry when things are moving fast, you can try turning this setting on. Some TVs have better blur reduction than others, and it can produce flickering or dimming, so try it both on and off to see which you prefer.
- Noise Reduction (DNR) is usually unnecessary for HD videos like Blu-ray, but it can help make old or lower-quality sources — such as VHS tapes or some SD broadcast channels — look better. If you watch anything in that category, try turning DNR on and see if you like it. But for HD content, it’s best to leave it off.
- Flesh Tone is a setting on some TV that allows you to adjust skin colour without affecting the rest of the picture. In theory, if your TV’s colour and tint is properly calibrated, you shouldn’t need this, but it’s there if you feel you need it.
- Colour Management, White Balance and other features usually refer to fine-tuned colour adjustments reserved for professional calibrators. In general, you can probably leave this alone, unless you really know what you’re doing and want to just make some minor tweaks.
- Motion Interpolation goes by many different names, such as Samsung’s Auto Motion Plus or Sony’s MotionFlow. It essentially smooths out motion on 120Hz and higher TVs by creating artificial frames in between the normal ones you usually see. This is what causes the “soap opera effect” — some people like it, most people hate it, but it can be nice to turn on for sports.
- Game Mode reduces input lag, which is — you guessed it — important for video games, particularly first-person shooters. You’ll lose some picture quality, and I wouldn’t leave it on when you’re watching movies, but it can be handy to have on when gaming. For more, check out our guide to TV modes.
These settings may sometimes come with different names, and there are more than we could possibly list here. If you don’t know what a setting does on your TV, search for it online, and you’ll probably find its more “generic” name. There are probably other settings we missed, but these are some of the most common.
Chances are, if you don’t recognise what it does, you should start with it off and calibrate your TV that way — at least to start. Most of these advanced features cause more problems than they solve. From there, you can try turning each individual setting on to see how they affect the picture. As always, do what looks good to you — your picture may be more “accurate” with something turned off, but if you like it on, it’s your TV — go for it!
Further Resources
We’re just scratching the surface here, and every TV is different. So, if you aren’t sure what a setting does, or you’re having a particular annoyance with your set. I highly recommend searching some of the following sites for a more in-depth look:
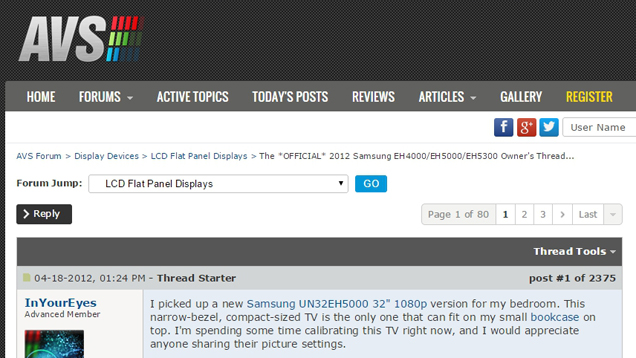
- AVS Forums is one of the top forums for serious home theatre enthusiasts, and you’ll find more information than you ever wanted to know here. The community is very knowledgeable and very helpful, so you’re bound to find an answer on the site — and if it doesn’t already exist, you can ask.
- Rtings is a site dedicated to in-depth, technical reviews of TVs. Not only can you find information on your specific model, but they also have some great explainers in their “Learn” section (which you can access in the left sidebar).
- CNET, while not quite as technical as Rtings, occasionally has some good layman-term explainers for different advanced features (though they don’t always go as in-depth as other sources). If you have little to no experience with TVs and home theatres, this is a good place to start getting your bearings before moving onto more technical stuff.
I’ve spent the last few weeks fiddling with a new TV, and I can say from experience that you can pretty easily get lost in a research hole browsing these sites, so don’t let yourself go too crazy (or you may actually drive yourself crazy). Remember: When in doubt, do what looks good to you, and enjoy your TV!
Comments
One response to “Your TV’s Advanced Picture Settings, Explained”
I use game mode 100% of the time. I hate all the advanced processing in every TV I’ve used it on.