
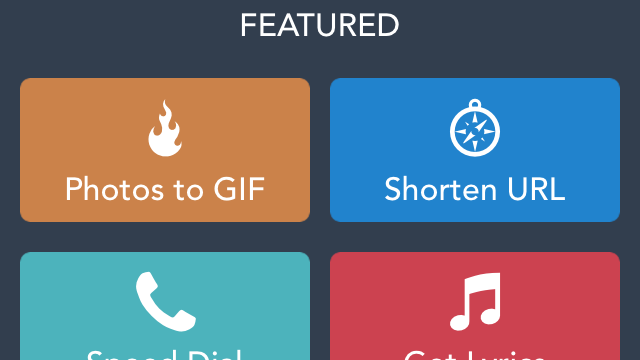
Workflow is a new app for iOS where you can create your own little micro apps that can instantly search for directions home, find the nearest pizza joint, search for lyrics to the currently playing song and more. The best part? Workflow is super easy to use. Let’s dig into how it works and learn how to make your own workflows.
Workflow reminds us a lot of one of the best apps on the Mac, Automator. With Workflow, you’ll get the closest thing we’ve seen to Automator on iOS, and you don’t even need to jailbreak to use it.
What You Can Do with Workflows
As the name suggests, you accomplish tasks by creating “workflows”. These workflows are a series of directions called “actions”, which tell native iOS apps to do specific things. For example, a Workflow action can pull calendar events, extract data from a web page, or grab the contents of the clipboard. It can even ask for an input and change the output accordingly. Workflow links these actions together with the Content Graph, which means you integrate apps that seem unrelated — like Maps with iTunes, or Calendar with Twitter.
Essentially, with a bit of effort, you can make your own tiny little apps and extensions. This sounds super complicated, but Workflows makes the whole process as simple as possible with basic drag-and-drop functionality.
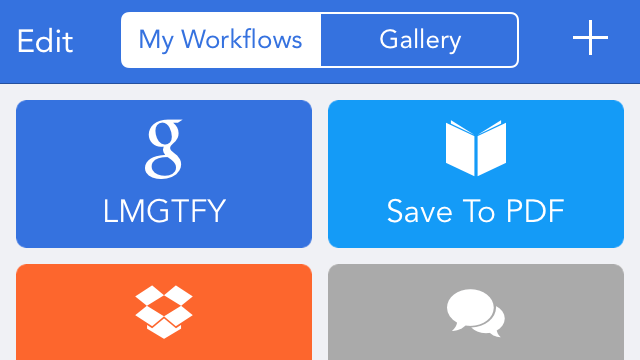
Before you get started messing around with Workflows too much, I recommend opening up the app and tapping on the “Gallery” button. Here, you’ll find some pre-made workflows that can familiarise you with how the app works. Tap on an example, tap the download link, and take a look at the actions inside each one. You can modify these if you want, but it’s nice just to peek under the hood to get a better idea of how these workflows work. Once you’re comfortable with the basics, it’s time to start thinking about making your own workflows.
How Actions Work
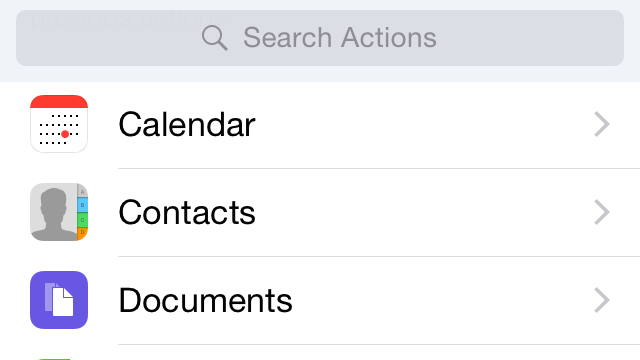
The basis of each workflow is actions. Individual actions are chained together to create a workflow. For example, there’s a “Get Upcoming Calendar Events” action, a “Select Phone Number” action, a “Open in Maps” action, and a “Get Network Name” action. There are nearly 150 different actions built into Workflow. When you create a new workflow, you’ll need to pick which actions go into it. They’re divided into 10 categories:
- Calendar
- Contacts
- Documents
- Maps
- Music
- Photos & Video
- Scripting
- Sharing
- Text
- Web
You also have access to a “Suggested” category that automatically suggests actions based on previous actions.
If you’re familiar with other automating software, like OS X”s Automator or If This Then That, then you’ll understand actions pretty quickly. You start by picking the first action you want to happen in your workflow, say, figure out today’s date. Then you follow that action with others, much like a simple, miniature program. If today’s date is important, then something happens. It’s really as simple as that.
How Workflows Are Executed
Workflows can be executed in three different ways. You can create an icon on the home screen, run it in-app, or a through a share extension. With a home screen icon, you simply need to tap the icon to launch the workflow. The same goes for in-app.
If you decide to do a share extension, you can set up which type of share sheet it appears in. You can choose from:
- Contacts
- Dates
- Email Addresses
- Files
- Images
- Locations
- Maps links
- Media
- PDFs
- Phone numbers
- Rich text
- Text
- URLs
Your workflow will appear as an extension with whichever ones you select. You can pick and choose which ones your workflow will appear in too. For example, you can set up a link sharing workflow that only appears when you’re sharing a URL and not when you’re sharing a phone number. This makes things clean and less cluttered in your share extensions.
Create Your Own Workflows
It’s best to just make a few workflows to understand how they work. So, let’s make a few different ones that use different types of actions to familiarise you with Workflows as a whole. The basic process is pretty simple:
- Tap the “Create Workflow” button under the “My Workflows” tab
- Tap the Actions tab
- Select the action you want to add to the workflow, tap and hold it, then drag it into your workflow
- Do this for each action you want to add
- Tap the play button to test out your workflow
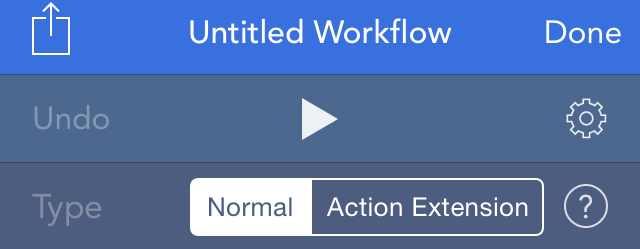
- Tap the gear icon to save your workflow
- Name your workflow, pick its icon, and decide whether it’s a normal extension or action extension
Obviously, there’s a little variation in there depending on what type of workflow you’re making, but that’s the gist. Let’s get to building.
Print to PDF
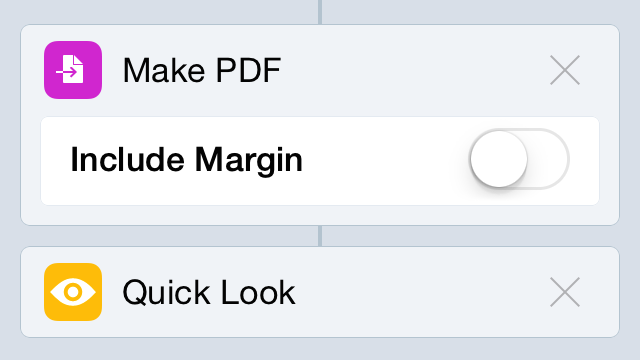
Let’s start simple by adding a “Print to PDF” option to iOS. This will create a PDF file of whatever you’re looking at, whether it’s a URL, a text document, an image or whatever else, then allow you to save the PDF wherever you want.
- Create a new workflow
- Tap the gear icon and name your workflow Save to PDF
- Select an icon and colour and tap “Done”
- Tap the Actions tab at the bottom of the screen
- Search for “PDF” and select the “Make PDF” action
- Tap and hold the “Make PDF” option and drag it into your workflow
- Head back to the Actions tab and search for “Quick Look” this will open up the PDF file you create so you can save it. Drag and drop it into your workflow.
- Tap “Done” to save your workflow.
Now, you just need to test it out. Head over to Safari, tap the share button and select “Run Workflow”. Pick your “Print to PDF” option and run it. You should see the web page you’re looking at converted into a PDF file. Just tap the share button to save it wherever you want.
Find Lyrics for Currently Playing Song
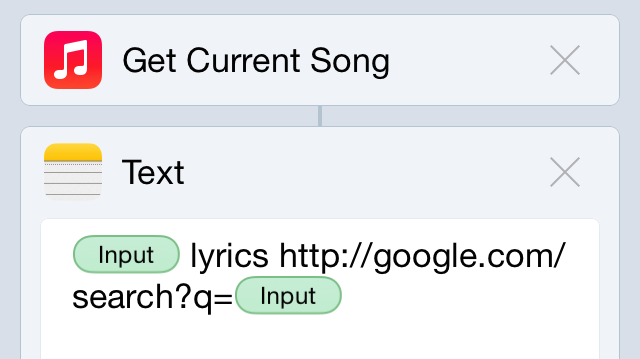
If you’re fan of learning the lyrics to songs, then chances are that one of your most common actions is to search for lyrics to whatever’s playing in your music app. You can make this process super easy with Workflows.
- Create a new workflow called Lyrics Search.
- Add the “Get Current Song” action
- Add the “Text” Action
- In the Text box, select “Input” as an option and then type in “lyrics”
-
Add the “URL” action, using
http://www.google.com/search?q=as the url and then add the input option from the top of the keyboard so it readshttp://www.google.com/search?q=(input) - Add the “Open URL” action
Start up a song and go ahead and test your workflow. It should pull up the lyrics using the song’s title.
Tap to Order Pizza
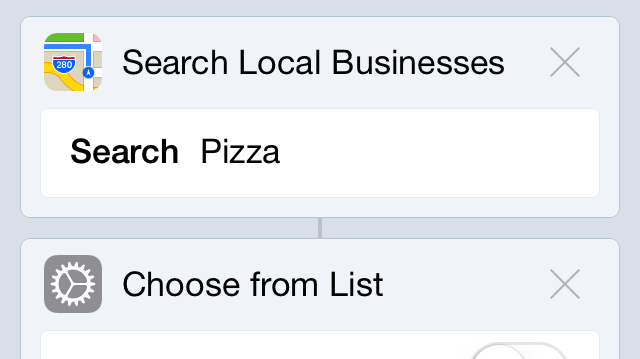
Sometimes, you just want a pizza as fast as humanly possible. Workflow provides a pretty quick way to do it.
- Create a new workflow called Pizza
- Add the “Search Local Business” action and type in “Pizza”
- Add the “Choose from List” action
- Add the “Set Variable” action and type in “Place” This creates a “place” variable that you can use in the next step
- Add the “Get Variable” and type in “Place” This pulls the variable above and grabs the phone number for the pizza place of your choosing
- Add the “Call” action
Hit the test button to run through your workflow. It should search for pizza places near you, let you pick one to order from, and then start a phone call to the place. You can alter these slightly to search for other businesses, such as a cafe or service station, then get directions instead of making a call by simple adding in the “Get Directions” action.
Shrink and Share an Image
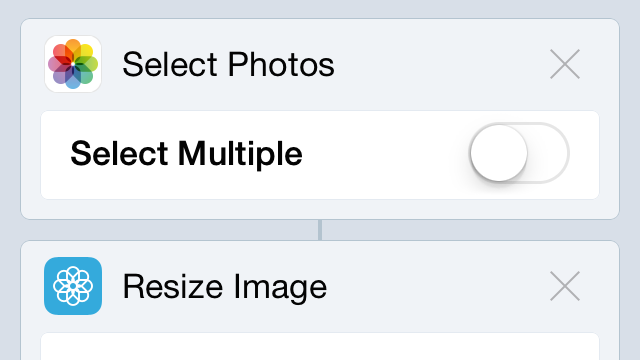
iOS images are pretty big by default, but you can shrink them down for easy sharing using Workflow. This one’s super easy to do:
- Create a new workflow called “Shrink”
- Add the “Select Photos” action
- Add the “Resize Image” action and pick your dimension. If you want to really shrink down an image, chose 640 X 480
- Add the “Quick Look” action
That’s it, with just a tap, you’ll pull up your photo library, pick an image, resize it, then get the option to share it wherever you want.
Do a Site Specific Search on the Site You’re Currently Viewing
Ever find yourself here at Lifehacker and want to search for other articles on the site? A site-specific Google search is easy on the desktop, but it’s kind of a pain on mobile. Here’s how to make a workflow that will search your currently viewed site:
- Create a new workflow called “Site Specific Search”
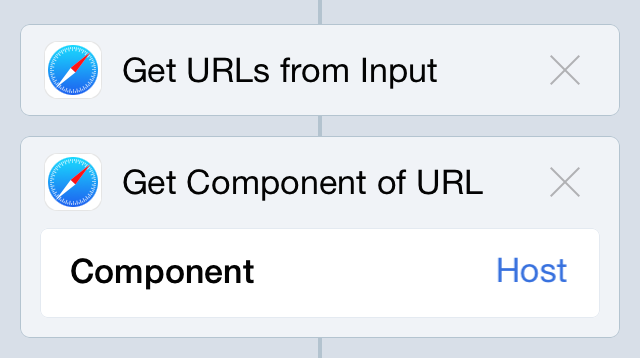
- Add the “Get URLs from Input” action
- Add the Get Component of URL action and select “Host” for the component. This pulls grabs just the host part of the URL and dumps the rest.
- Add the “Set Variable” action and type in “Host.” This adds the URL to your variables.
- Add the “Ask for Input” action. Under Prompt, type in “Search?” and under Input Type choose “Text”
- Add the “Replace Text” action. Leave “Find Text” blank, and add a “+” to “Replace With”
- Add the “Set Variable” action and type in “Search”
-
Add the “Text” action and type in
http://www.google.com/search=?q=site:then tap the “Variable…” option and choose “host” then type in “+” then tap the “Variable…” option and choose “Search”. It should readhttp://www.google.com/search?q=(host)+(search) - Add the “Open URL” action
Go ahead and pop over to Safari to test it. It should pull the URL from the current site, offer you a popup to type your search, then search the site using site specific search.
This is just the start, of course. The appeal of Workflow is the nearly endless possibilities. Once you get the basics down, you can start creating miniature apps that do all kinds of crazy things.
Pictures: Artit Fongung, Piotr Sikora
Comments