You probably know that you can run a desktop operating system in a virtual machine for testing. You can do the same thing for Android, and it’s a great way to test out a phone before you buy it. Here’s how to set it up.
Picture: Microsoft/Wikimedia
Why Virtualise Android?
Your first question is probably: Why would you want to do this? Just like virtualising a desktop OS, there are a few reasons you may want to try it out in a virtual machine. If you’re thinking about buying an Android phone or tablet for the first time, setting up a virtual device is a great way to familiarise yourself with the operating system ahead of time. Developers can use virtual machines to try out ideas, and it also gives regular users the opportunity to try out apps without worrying about affecting an important phone. It can be seen as a test bed where you can try out all of the software you’ve ever wanted to test.
There are various virtualisation tools that you can use to run Android, but by far the most impressive is Genymotion. This free tool is based on VirtualBox (our favourite virtualisation tool for Windows) and it runs specific devices rather than just a generic Android installation. So if you’re thinking of buying a Nexus 7, for instance, you can download a virtual version and run it on your computer ahead of time.
How to Set Up Genymotion
Genymotion is very easy to install and set up. Just follow these steps:
- Visit the Genymotion web site, click the Get Genymotion link, and then download the free version of the software. While you’re here, you can also create a Genymotion account, which you’ll need later on.
- Install Genymotion on your computer. Note that it will interrupt your network access, so make sure you don’t have any big downloads running before you install.
- With the installation complete, launch Genymotion. It will detect that you don’t have any virtual devices set up. Click Yes to create one.
- Click the Connect button, enter your Genymotion username and password, and you’ll see a list of ready-made devices to choose from.
If the Genymotion download seems a little on the large side at 117MB, that’s because it includes a bundled version of VirtualBox. You can download a VirtualBox-free version of Genymotion if you already have it installed, but the full package is a nice touch as it ensures everything you need is available without the need to visit other web sites.
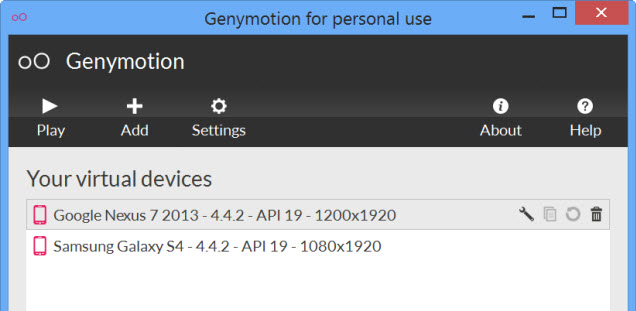
If you check out Genymotion’s list of devices, you’ll see generic phones and tablets, as well as specific models like the Samsung Galaxy S5 and tablets like the Nexus 7. You can browse through the entire list or use the dropdown menu to filter by Android version and device model. To choose a device:
- Pick a device from the list and click Next.
- Enter a meaningful name for the virtual device and click Next.
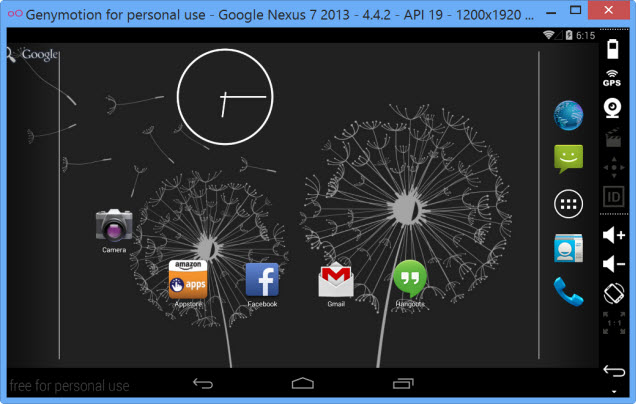
- When the download completes — it is around 200MB — click Finish. Then, just select your chosen device from the list and click Play.
There will be a short delay while the device initialises, and then you’ll see a familiar Android boot screen. A series of buttons to the right of the window provides access to toggles and controls, including the screen rotation option — you don’t have to work in portrait mode the whole time.
Install the Google Play Store and Google Apps
One thing you will probably immediately notice is that Google Play and other Google apps are not included. Thankfully, installing them is easy:
- Grab the ARM Translation Installer and the Google Apps bundle for the version of Android you’re working with: Google Apps for Android 4.4,Google Apps for Android 4.3,Google Apps for Android 4.2, orGoogle Apps for Android 4.1.
- Once downloaded, drag and drop the ARM Translation ZIP file onto the Android window — there’s no need to extract it. Genymotion will offer to flash the virtual device using the archive, so click OK to continue.
- When the flashing process finishes, click OK and then reboot the device.
- Now drag and drop the Google Apps ZIP file onto the virtual device window and click OK to start the file transfer.
- Reboot the device and you’ll then be able to make use of Google Play and other Google apps.
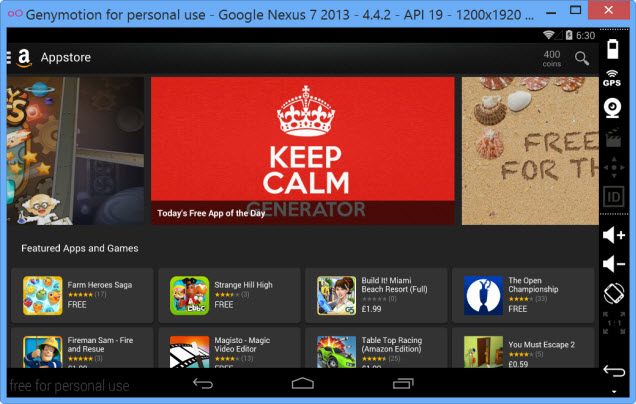
Alternatively, you can install a third-party store, such as the Amazon Appstore. You need to permit the installation of third-party apps to do this. Head to Settings, click the Security heading, and then check the Unknown Sources box. Fire up the built in web browser and download the Amazon Appstore. You can then browse through the available apps and install any that interest you.
There is nothing to stop you from setting up multiple virtual Android machines, so you can either try out different things on each, or run different versions of Android. Whether you’re a seasoned Android user looking for a new way to use the operating system, or you want to try it out for the first time, Genymotion is a great, free option.
Comments
4 responses to “How To Virtualise Android On Your PC So You Can Try Before You Buy”
I have this installed on my Surface Pro 2
When people ask my why I got a Windows tablet I just show them this, and they pretty much stop criticizing immediately
I use software called BlueStacks, which is free while it is in Beta. It has issues with video drivers on some older equipment, but works perfectly in my 3 year old Asus laptop. Having android on my desktop has been great, especially for big screen Clash-of-Clans 🙂
It may be a better choice for simplicity of setup?
Thanks for this article though, if they ever try and charge for it, I’ll leap straight over to genymotion.
Bluestacks generally lags
Tried it, but my VMs just crash all the time or don’t respond to anything. 🙁