The worst part about setting up a new Mac is finding and downloading all your software. It’s time-consuming, boring, and usually feels like a waste of time. Thankfully, with just a little bit of setup, you can automate the whole process with Homebrew and Homebrew Cask so you never have to do it again.
What Is Homebrew?
Homebrew is a command line utility that automates the process of downloading most of the apps you’ll want to install on a new computer. Essentially, you can just type in a single command in Terminal to download and install software instead of searching for it in your browser, downloading it and then running an installer. This includes stuff like Chrome and aText. Once you set Homebrew up, you can save your installation script and get your new Macs set up in seconds. Basically, Homebrew simplifies the process of downloading and compiling software. Typically speaking, it does this by downloading source code from sites like GitHub.
We’ll also use Homebrew Cask, which allows Homebrew to download popular programs at once. Where Homebrew concentrates more on installing developer tools, Homebrew Cask lets you install more common software, such as Chrome or Spotify. You’ll need both Homebrew and Homebrew Cask installed.
Step 1: Install Homebrew and Homebrew Cask
The first thing you’ll need to do is install Homebrew. So, open up Terminal (in Applications > Utilities) and type in this command:
ruby -e "$(curl -fsSL https://raw.github.com/Homebrew/homebrew/go/install)"
Once that finishes up, we’ll install Homebrew Cask and hook it into Homebrew. Type these two commands into Terminal:
brew tap caskroom/cask
brew install caskroom/cask/brew-cask
That’s it! Both Homebrew and Homebrew Cask are now installed.
Step 2: Familiarise Yourself with Cask
Now that Homebrew and Homebrew Cask are installed, it’s time to familiarise yourself with how Homebrew Cask works. Technically, you can skip straight ahead to step three if you want to just create a new system installation script, but it’s good to get your bearings a bit before moving on.
Homebrew Cask has a few basic commands that you’ll want to know. You have four commands you’ll likely use more than others: search, install, uninstall, and cleanup.
Here’s what to type into Terminal to install an app:
brew cask install app name
and to uninstall:
brew cask uninstall app name
Homebrew Cask uses specific names for apps that aren’t always intuitive. So, if you’re not sure of an app’s specific name, you can search for it:
brew cask search app name
And if you want to see every single app available for download with Homebrew Cask, type in:
brew cask search
After you’ve installed a bunch of software you can also have Cask cleanup and delete all those downloaded files you no longer need:
brew cask cleanup
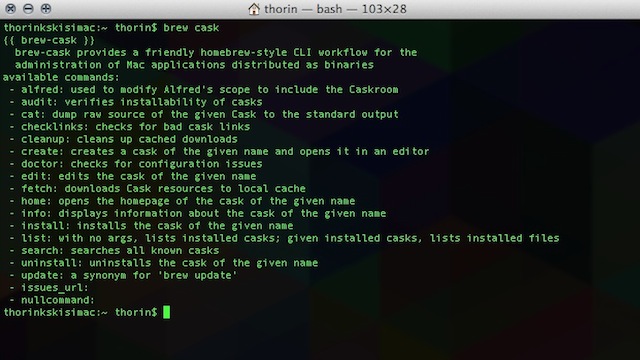
While these four commands are pretty much the only ones you’ll usually use, Homebrew Cask has a ton. You can get a full list of commands by typing in:
brew cask
With that you’ll have a pretty good grasp on what you can and can’t do with Homebrew and Homebrew Cask.
Step 3: Make an Install Script
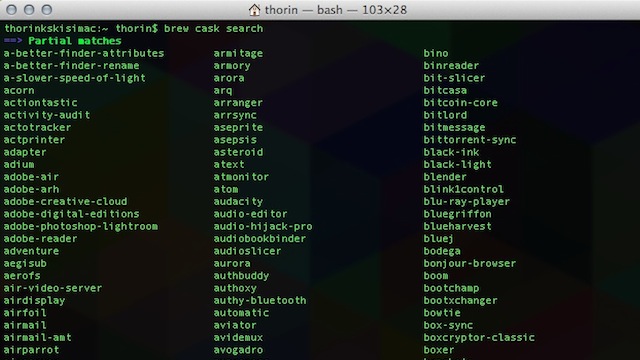
Now, we’re going to make a list of every program we want to include in the install script. For this, we’ll need to make sure apps are available with Homebrew Cask. So, we’ll search for each of them. For example, if you want to include Chrome, you’d type in:
brew cask search chrome
Which will display:
==> Partial matches
chrome-remote-desktop-host  google-chrome  chromecast
Now we know that “google-chrome” is the program name we’ll need. We’ll use that information to make a script using a text editor.
Open your text editor of choice (we like TextMate), and create a new script. First, we need to tell the file that it’s a script, so make the first line: #!/bin/sh. That will be followed by a list of installation commands. Here’s an example that grabs everything from the 2013 Lifehacker Pack for Mac except Wunderlist and the extended pack:
#!/bin/sh
brew cask install quicksilver
brew cask install notational-velocity
brew cask install evernote
brew cask install atext
brew cask install google-chrome
brew cask install sparrow
brew cask install adium
brew cask install skype
brew cask install reeder
brew cask install vlc
brew cask install handbrake
brew cask install plex-media-server
brew cask install picasa
brew cask install spotify
brew cask install dropbox
brew cask install utorrent
brew cask install skitch
brew cask install growlnotify
brew cask install crashplan
brew cask install the-unarchiver
When you’re done, save the file as caskconfig.sh. Considering you’ll want to run this on new computers, it’s a good idea to save it on a cloud storage service like Dropbox or an external drive like a USB stick. Once it’s saved, we need to make it executable. Pop back into Terminal, point it toward the file’s directory, and type in:
chmod a+x caskconfig.sh
Now, on a new system, follow step one to install Homebrew and Homebrew cask. Then, move caskconfig.sh into your home directory, and type this into Terminal to install all your apps:
./caskconfig.sh
That’s it! You just created your own custom installation package that will make installing new apps on a new Mac a cinch.
Comments
2 responses to “How To Make Your Own Bulk App Installer For OS X”
I don’t have a Mac to try this, but I would assume that the HTML in the code samples isn’t meant to be there?
Definitely not! It’s obviously been copy/pasted and the line breaks have come across with it.
a lot of those are available via http://getmacapps.com/ (the mac equilavent of ninite) – obviously this is a much more comprehensive solution
Reporting a broken link. The first step, homebrew installation command is no longer working because the home-brew has changed the address of the github repository. The new command as at June 2017 is:
/usr/bin/ruby -e “$(curl -fsSL https://raw.githubusercontent.com/Homebrew/install/master/install)“
I want to run this script unattended due the large of things being installed. How do I make my script handle the various installs that ask for my admin password ask only once at the very beginning of the script?