While it may not always be the best choice in Windows, there are certain things you can only do from the command line. We’ve talked about a few command line essentials before, such as using tracert to troubleshoot a flaky Internet connection and using recimg to create a custom Windows recovery image. Here are a few more you should probably know about (if you don’t already).
Photo by Dim Dimich (Shutterstock).
We’re using Windows 8.1 for screenshots and details in this article, but most of these tools have been around a long time and are available in previous versions of Windows. If you have any doubt about whether they’re available or if options are different, just open up the command prompt and type the command followed by /?. That will let you know if the command exists and what options you can use with it.
Also, many of these tools require that you run the Command Prompt with administrator privileges. To do that, right-click the Command Prompt icon and choose Run as administrator. Better yet, pin it to your Start menu or taskbar, right-click it and choose Properties, click the Advanced button, and choose Run as administrator. That way, it will run with elevated privileges every time.
[clear]
System File Checker
Windows can usually detect when a system file is missing and replace it for you without any intervention on your part. You typically won’t even be notified when it happens. But even with this ability, system files can become corrupted or the wrong versions of system files can get installed by errant applications. Sometimes, these problems slip by Windows unnoticed.
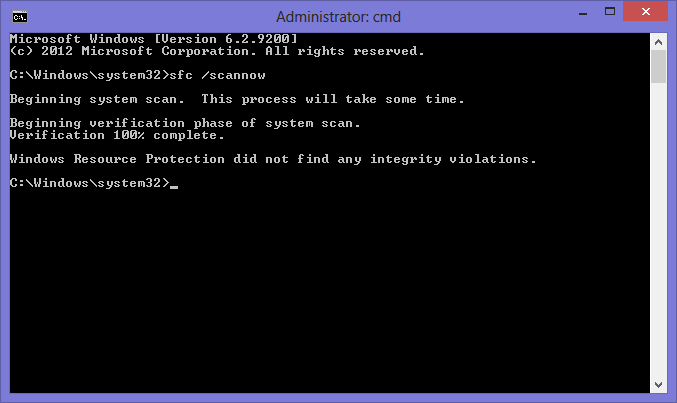
Windows includes the command line tool System File Checker, which scans several thousand basic Windows files, comparing them against the original versions that shipped with Windows or, depending on the files, that have been updated through Windows Updates. If System File Checker finds a mismatch, it replaces the original file. Depending on how you installed Windows, you may or may not need the installation media, but usually you won’t.
To run the tool, just type sfc at the command prompt followed by a space and then any of the following common options:
- /scannow. This performs an immediate scan of your system and will replace files as necessary. You may need to restart Windows when it’s done if it finds problems.
- /scanonce. This performs a scan the next time you restart your system.
- /scanboot. This schedules a scan to be performed every time you restart your system.
- Revert. This returns the System File Checker to its default settings. You can use it to turn off the /scanboot option, for example.
[clear]
Check Disk
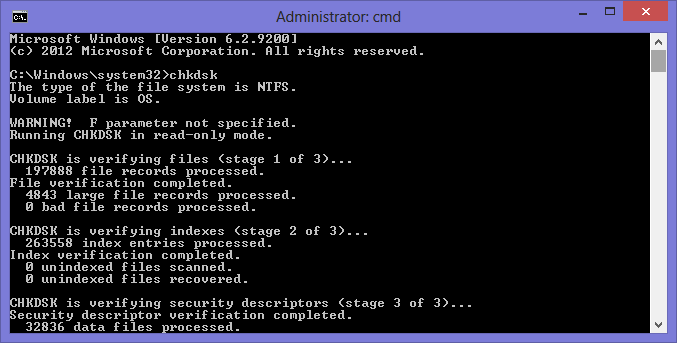
Check Disk attempts to repair file system errors, locate bad sectors, and recover readable information from those bad sectors. If you ever start Windows and it tells you that it’s scanning your hard disks before starting up, that’s Check Disk at work. When Windows detects certain types of errors, it schedules a scan all by itself.
It takes a long time to run, especially if you let it scan the entire hard disk, including free space, so it’s not really the kind of tool you want to run regularly. If you’re concerned about general hard disk health, you should make use of one of the free S.M.A.R.T checkup utilities out there. I’m a fan of Passmark Disk Checkup, personally. It reads various self-monitoring data the hard disk itself collects and gives you a pretty good idea of how your hard disk is doing.
Still, sometimes hard disks are physically fine to keep using, but suffer from the occasional bad sector and corrupted files those bad sectors can cause. Windows tries its best to correct those problems for you, and it does a pretty good job. But if you ever notice that certain programs just refuse to start or you get an error when you try to access particular folders or files, bad sectors on the disk are a possible culprit. Check Disk can find those bad sectors, often recover data from them, and then map those sectors out so Windows doesn’t use them anymore.

chkdsk at the command prompt, followed by a space, and then any of these options:
- Volume. If you want to check a whole drive, just type the drive letter.
- Filename. You can also use chkdsk to check a single file or group of files.
- /F. Run it with this option to have chkdsk go ahead and fix those errors.
- /R. This option forces chkdsk to locate bad sectors and recover information from them. If chkdsk cannot lock the disk (which it usually can’t since you’re actually using Windows), it will prompt you to run the command the next time you restart Windows. This is the option you’ll use for the most thorough scan because running it also implies that you’re running the /F option.
If you run chkdsk with no extra options, it will just perform a scan and give you a report without actually changing anything. So, you’ll need to specify a volume or file name and one of the other options to make any fixes. Here’s a common example. If you want chkdsk to scan your C: drive, locate bad sectors, recover information, and map over those bad sectors, type:
chkdsk C: /R
Note that there is a graphical interface of sorts for Check Disk. Open Windows Explorer, right-click a drive, and choose Properties. On the Tools tab, click the Check button. This opens up a prompt that lets you schedule a scan on the next restart. You’ll be prompted to fix any errors that are found. This interface doesn’t provide any of the advanced options the command line version does and it also doesn’t let you scan individual files.
[clear]

Ipconfig
Ipconfig lets you view and work with TCP/IP information. You can use it to check your computer’s IP address, have it release or renew that IP address if it’s automatically assigned, and even purge the local DNS cache.
To use it, just type ipconfig at the command line. By itself, the command shows you IP addressing information about each of the network adapters on your computer. It may show several different adapters, so you’ll have to do a little scouting to find the one you’re looking for. You’ll typically see a Wireless LAN adaptor (for your wireless connection) and an Ethernet adaptor (for your wired connection), and probably a few tunnel, virtual, or VPN adapters, depending on your setup. The information it shows you includes the IP address, physical (or MAC) address, default gateway, and subnet assigned to the adaptor.
You can also add any of the following options to the ipconfig command by typing ipconfig, followed by a space, and then the option.
- /all. This option shows you all the same information as just running the ipconfig command by itself, as well as a lot of extra information, such as whether the adaptor is automatically assigned an IP address from a DHCP server, when that address was assigned, and when it expires.
- /release. Use this option to release all DHCP-assigned IP addresses. Note that your network will not work after this and typically you’ll need use the /renew command afterwards to regain access.
- /renew. Use this option to release and then immediately try to renew all DHCP-assigned information. This is probably the option you’ll use most, as it forces your computer to reconnect to your router or to your ISP’s servers (depending on your setup). It can be really helpful when troubleshooting connectivity problems.
- /flushdns. This option purges the local DNS cache. DNS is used to translate the more human-readable computer names and web addresses we use (like www.lifehacker.com) into IP addresses. The cache is DNS information stored locally on your computer so your computer doesn’t have to look it up on a DNS server every time. Sometimes, flushing the DNS cache can resolve problems where you have network connectivity, but can’t reach some computers or websites by name.
[clear]
Cipher
The cipher command is mostly for working with encrypted folders and files on NTFS volumes in Windows. Frankly, if you’re using that type of encryption, you have a graphical interface available that does most of what you need, though the command line is good for controlling encryption programmatically or through batch files and scripts.
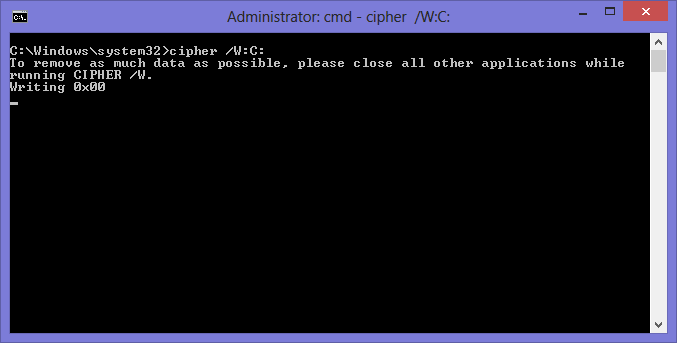
However, cipher does include one option at the command line that you might find useful:
cipher /W:pathname
The /W option removes data on unused portions of a volume, effectively erasing data that may be hanging around on your hard drive after deletion. You can point cipher at an entire volume (like C:) or a specific folder. As you probably already know, when you delete files from Windows, they are not actually erased from the hard drive. Instead, Windows marks that space as available to be written over with new files.
Note that this really applies to traditional hard drives and not SSDs. When you delete files from an SSD, those files are removed immediately.
[clear]
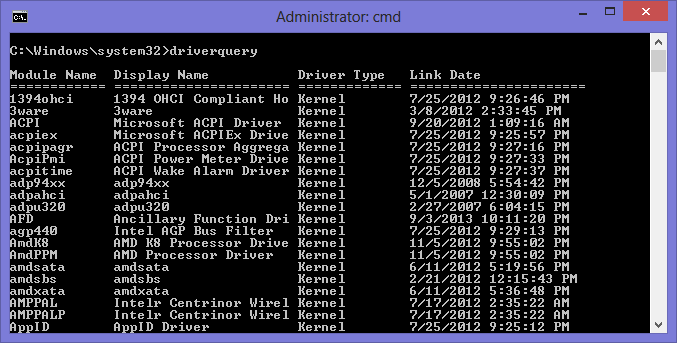
Driverquery
The driverquery command generates a list of all hardware drivers installed in Windows. It’s good for giving you a report about installed drivers that you can save for later reference or for investigating the version number of a currently installed driver so that you can make a better decision should you be thinking of updating.
Typed by itself, driverquery just generates a list of drivers that you can scroll through. As usual, the power comes from the options you can add:
- /s. This option lets you specify the name or IP address of a remote computer so that you investigate the drivers it has installed.
- /si. This option shows you the digital signature information for drivers.
- /fo. This is really the key option you’ll use with driverquery. It lets you specify the format in which information is displayed so that you can more effectively save it as a report. After typing /fo add one of the following options: TABLE (the default view), LIST (which lists each driver with all its information one after the other), and CSV (which shows data as comma separated values).
To save a report, you just need to pipe the information to a file instead of displaying it onscreen. To do that add filename.extension to the end of the command. Here’s an example of perhaps the most useful way to use the command:
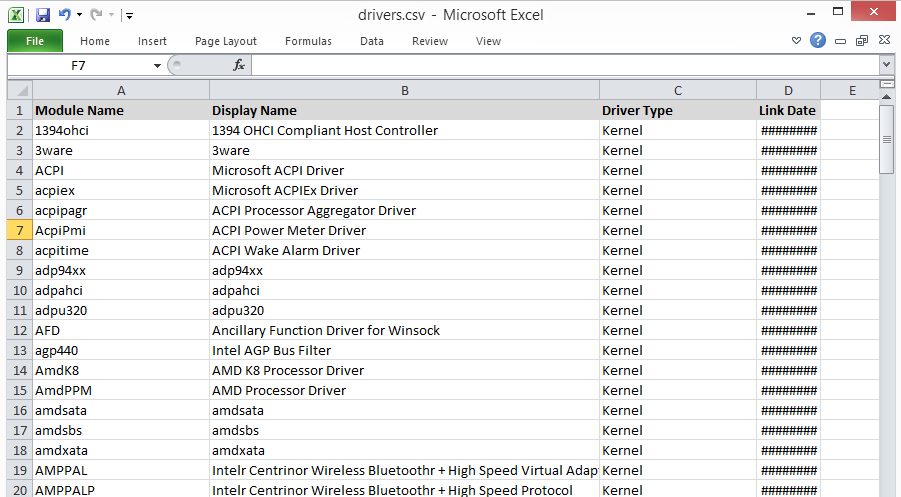
driverquery /fo CSV > drivers.csv
That queries all drivers, formats the result as comma separated values, and then saves them to a file named drivers.csv. You can then import that CSV file into Excel or another spreadsheet program to see a nicely-formatted report of all your installed drivers.
Obviously, there are a lot more commands available to you at the Command Prompt. We didn’t even cover every last option available with the commands in this article, just the stuff that we thought you might find useful. If you want to explore more of what’s available at the Windows command line, you can’t do better than starting right at the source. Microsoft TechNet has a full Command-Line Reference A-Z just waiting for you.
Comments
15 responses to “The Best Tools Hidden In Windows’ Command Line”
I use the ‘shutdown’ command a lot when needing to shutdown or restart systems across the network (such as my fileserver/HTPC).
shutdown -s -t 0
OR
shutdown -r -t 0
I never ever click shutdown/restart from the start menu any more.
The above has just become a habit, with the bonus of letting me setup a quick timed shutdown/reboot without having to think.
I guess I just hate having to lift my fingers off the keyboard…
If you don’t want to lift your fingers off the keyboard it’s actually faster to use the Start Menu.
[Windows key], [Right arrow], [Enter] to shut down.
[Windows key], [Right arrow], [Right arrow], [R] to restart.
That’s for Windows 7. Previous versions have similar shorctuts. Windows 8 doesn’t have the Start Menu, but in 8.1 you can use [Windows key] + [X] to bring up a menu that has the shut down shortcuts.
hello,
I use the command line often as I like to write batch files to do various things.
I call this the NUKE command. So please – I can’t be responsible for any mistakes on your computer 🙂
This command seems to remove directories (and all files) with no questions asked, including sub-directories of that directory. For example say you have this directory, with these sub-directories;
c:\big\
(under the big directory)\pear
(under the big directory)\float\(under the big\float directory)\goal
For this example the command I would use to remove the “big” directory, and its sub-directories (pear & float & goal), plus *all files* contained in these directories is:
RD /S /Q “big”
as long as your current directory is c:\ or root. If you only wanted to remove the “goal” directory (and all files in the goal directory), then I would run the command from the “c:\big\float” directory. I do it this way to try to prevent a mistake on my part.
This seems to be a most powerful command and recently I used it to delete some zero byte files that windows explorer would not remove. cheers
I can second this command. Very useful for removing files that make Windows Explorer act like a spoiled fat kick who’s denied cake.
Or windows 8, since it’s faster than the 6 mouse clicks it takes.
try two on win 8.1 Right click start>hover shutdown> click shutdown
It’s getting old bashing Win 8…..
I’ve been using win8 since its release. I just made 3 new machines, all win7.
Tomorrow, at his request I will upgrade a workmates primary work PC from win8.1 to win7.
Win8 is a business disaster, 8.1 is even more so.
but why?
only for computer illiterate people.
nothing at all wrong with it.
everyone of my 300 users who have been moved from 7 to 8.1 really like it, and haven’t had any issues.
“everyone of my 300 users who have been moved from 7 to 8.1 really like it, and haven’t had any issues.”
This is so obviously a lie that I’m not even sure where to start.
I doubt that any product, anywhere, has ever had a 300 out of 300 reception.
If you’re going to troll on behalf of Microsoft, at least parse your comments for believability.
In answer to the reasonable query, from ricadam. The win8 interface is less efficient than the win7 interface because it uses ribbons, which represents an ongoing abandonment by Microsoft of efficient design based on rational design principles such as Hicks Law and Fitts Law. For about a decade now Microsoft have been increasingly basing their designs on market research, with the result that their interfaces are progressively getting dumber and slower. I assert that interfaces optimised for the dumb and the slow are not conducive to efficient work by skilled professional users.
Despite this, win8 was tolerable for low-efficiency work tasks because it was possible to bypass most of its problems (e.g. Metro, the Multi-screen fails and the pathetic Apps) with appropriate 3rd-party software.
The huge problem came when 8.1 was released as a standard update, obviously virtually untested. The MBR issues and permission changes destroyed raid arrays and crippled backup systems and protection systems. I know very few who got hit by 8.1 without either install issues, driver issues, or file system issues. I honestly wonder what was going on at Microsoft at the time. 8.1 was the most crippling update I can remember.
Yeah, umm, apart from that win8 is fine, believe the marketing.
I don’t know how you do it in 6.
Hover mouse on the right side of the screen click settings (1), Click Power (2) Click Shutdown (3).
Or even ALT + F4 then enter!
mdsched. Memory Diagnostics on reboot.
chkdsk has saved soo many of my flashdrives