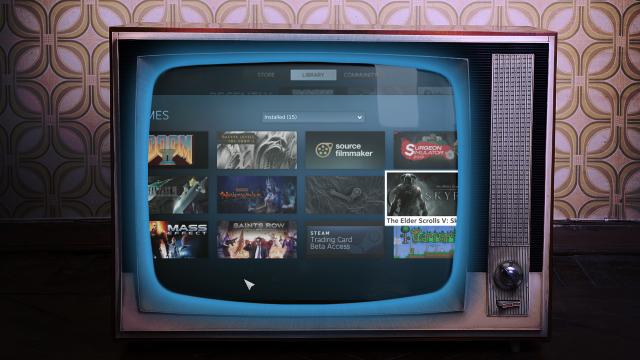
Ever since Valve introduced SteamOS, the PC gaming community has been eager to see what a video game console running Steam would be like. Unfortunately, the beta isn’t quite ready for prime time, but there’s one feature that is: Big Picture Mode.
Big Picture is an alternative interface for the Steam app already running on your PC. But switching between a window and full-screen interface is a huge jump. If you want to get an experience that’s a bit closer to how a real Steam Machine will work, you can do so with just a few tweaks.
Why Big Picture Is Better For Your TV Right Now

SteamOS has been attracting the lion’s share of the headlines lately due to general excitement over the idea that Valve might become a player in the console scene. However, at the moment, the customised Linux variant is really only good for enthusiasts and beta testers. You can install the beta yourself, but what you’ll end up with is a version of Steam that can’t run all of your games and isn’t useful for much else.
Fortunately, Big Picture Mode already exists in your regular Steam installation. When used on a Windows PC, it offers a few distinct advantages over SteamOS:
- All of your games work. Since SteamOS runs on a Linux variant, it can only play games that have been adapted to run on Linux. Suffice to say, this is not a large number of titles. Big Picture Mode suffers no such problems (though Mac users will still find some holes in their library).
- You can do more than just play games. With Big Picture Mode, you retain the option to minimise Steam and fire up everything else you’re able to do with a PC. This includes but is not limited to running media centre software such as XBMC and key-mapping software that can enhance your living room gaming.
- There will be fewer bugs. Steam isn’t without its flaws, but the foundations are strong on a PC. SteamOS, on the other hand, is still working on support for basic features, such as AMD and Intel graphics cards or dual-booting and partitioning.
SteamOS is not without long-term potential potential — we are still waiting for streaming features to be added to the OS, which will allow you to play the games installed on your PC via Wi-Fi on your HTPC, for example. However, in the meantime, you can get everything that SteamOS offers and more without giving up the fun stuff you already love.
Phase 1: Boot Directly Into Big Picture Mode
If you want the full console experience, you can’t be wasting time messing around with Windows. For a dedicated machine in your living room, using a guest account with no other apps installed is the cleanest method. Install Steam on an otherwise unused account and follow these steps:
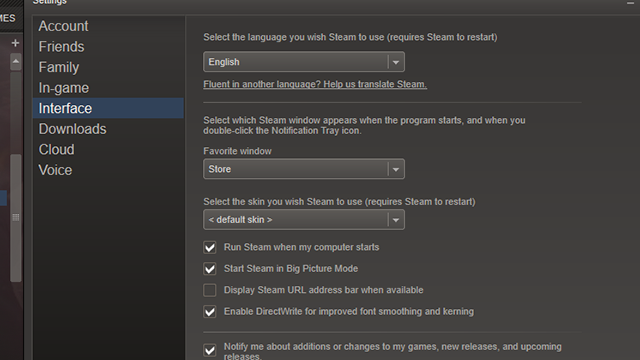
- In Steam, open up Settings. Select “Interface”.
- Check “Run Steam when my computer starts” if it’s not already.
- Check “Start Steam in Big Picture Mode”.
Regardless of how neat you want the transition to be, the above steps will make sure that the first thing you see when you load up the desktop is Big Picture Mode. To take it a step further, there are a few more tweaks you should enable:
Boot directly to the desktop – If you’re on Windows 8.1, Big Picture Mode will only load in the background while you sit on the Start screen. Skip that step like so:
- Right-click the taskbar and select “Properties”.
- Click the Navigation tab.
- Check “When I sign in or close all apps on a screen, go to the Desktop instead of Start.”
Bypass password login – In general, it’s not the best idea to boot directly into your account without requiring a password. However, if you’ve created an account specifically for Steam, you can make your PC log directly into it by following these steps:
- Press Ctrl-R and enter netplwiz.
- In the window that pops up, check “Users must enter a username and password for this computer.”
- Select the name of the account you want to boot into that contains your Steam installation.
- Uncheck “Users must enter a username and password for this computer”.
These two tweaks together will result in Windows automatically starting up and launching Big Picture Mode. Note: if you have any other auto-run apps on this account, one of them could launch after Steam which would require navigating back to Big Picture Mode before you can use it. If you’re controlling your HTPC with a mouse and keyboard, that’s no big deal, but a controller would prove problematic.
For Existing XBMC Users: If your HTPC is as killer as our build, booting into Steam might run counter to the rest of your usage. Not to worry. This add-on has you covered. Once installed, you can launch Steam from under the Programs section in XBMC. This will open up Steam directly in Big Picture Mode. To go back to XBMC, simply exit Steam and the media center app will open right back up. Easy peasy.
Phase 2: Flesh Out Controller Support
Out of the box, many Steam games include controller support. The preferred device is the Xbox 360 controller and we highly recommend it. However, not every title has controller support by default.
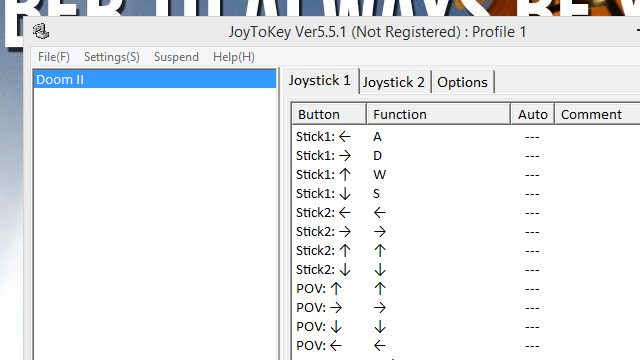
For those games that aren’t supported, you can use an app called JoyToKey to map your controller’s inputs to the corresponding keyboard and mouse inputs you’re used to. Obviously, you’ll need to have regular PC inputs connected for the initial setup, but you should be able to control any game with just a controller once it’s done. Once you’ve installed JoyToKey:
- Create a new profile for each game you want to map. Name it after that game.
- Map each button of your controller to the corresponding key for in-game controls. The list of buttons here will help identify which buttons are associated with which key map. Repeat for each unsupported game you need to map. Note: This step may require some trial and error, so be sure to test your layout before finishing.
- Click Settings and select “Associate profiles with applications”.
- Click “Add” to start a new profile association.
- Enter the game name in the first box.
- Locate the .exe file for the game you want to run and enter its entire file path into the second box.
- In the drop-down box at the bottom, select the profile you created that you want to associate with that game (which should have the same name).
- Click OK.
JoyToKey will run in the background and activate the profiles needed for each individual game as it launches which means, after the initial setup, you shouldn’t need to touch the keyboard or mouse again. If you add a new game that doesn’t have controller support though, you’ll need to bust that hardware out.
JoyToKey is a free program, but the interface is a little clunky. You can also try out Xpadder, which costs $US10 and has a somewhat less obtuse interface. Mac users can also try out previously mentioned Joystick Mapper.
Comments