
A few weeks ago, my worst computer nightmare happened right before my eyes: my water cooling loop exploded, drenching the inside of my computer. Luckily, nothing broke. Here’s how I salvaged all my parts (and how to keep this from happening to you).
Title image remixed from Mirek Kijewski (Shutterstock).
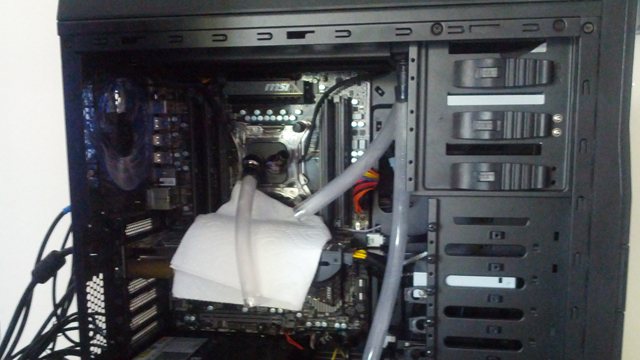
We’ve talked about water cooling before, both in terms of pre-built units and custom loops that you build yourself, and everyone’s first question is: isn’t that dangerous? What happens if it leaks inside your PC? Well, I recently found out. In general, if you follow the instructions and do your job right, you should not have any problems. My leak occurred 100 per cent, because I am an idiot, didn’t practise what I preached, and didn’t secure my tubing. When I stress tested the PC, the tubing popped right off, spewing water all over the inside of my newly upgraded computer like a loose firehose.
If you follow the instructions and don’t cut corners, you should never have this problem. But on the off chance it does, you can probably salvage some — if not all — of your parts. Here’s how.
What to Do When Your System Leaks
We’re going to detail what you should do for a big leak, where the water has gotten everywhere and you have serious cleanup to do. If you have a small leak, you may not have to be as thorough as these instructions say. If you didn’t see the leak happen, it’s always good to be thorough and on the safe side.
- If your computer is running, turn off your PC as fast as possible, using the switch on the power supply. Do not save your work, do not pass Go, do not collect $200. The biggest risk of damage comes while your PC is still on.
- Unplug your computer.
- Open up your case and pat everything dry with paper towels. If you had a big leak, like I did, you’ll probably have a lot of mopping up to do.
- Take apart your computer. That’s right, take everything out of the case, take the RAM and GPU out of their sockets and so on. Take anything wet out of your case.
- Soak up any remaining drops of water. You’ve probably mopped up the big stuff, but it’s likely there’s still water clinging to the inside of your PCI slots, RAM slots, fan headers or whatever else might have gotten wet. This is very important, as these are the parts most likely to get damaged by water — soak up as much as you possibly can.
- Clean up any gunk with some isopropyl alcohol on a cotton swab. I didn’t have to do this since I just used distilled water with no additives (as I highly recommend you do), but if you used any additives or coloured fluid, you’re going to want to do a bit of extra cleanup with some alcohol.
- Lay everything out to dry, preferably in front of a fan, for at least 24 hours. Don’t get impatient. You want to make sure everything’s completely dry before you rebuild your PC.
- Rebuild your PC and see if it works. Cross your fingers.
I went through this exact process and was lucky enough to have 100 per cent of my parts work perfectly fine, even though some of them (the video card in particular) were absolutely drenched with water when the loop burst. A leak isn’t as bad as you may think — as long as you turn things off quickly, you can escape without any lasting damage.
How to Prevent This Catastrophe From Ever Happening to You

I can already hear some of you saying: “See, this is why I avoid water cooling.” To you, I repeat: if you do everything right, it’s really easy to avoid this problem. Just do as I say, not as I do. Most importantly:
- Make sure your fittings are tight before you attach your tubing. Tighten each and every one with a spanner or a pair of pliers — finger tight isn’t necessarily enough! They don’t need to be insanely tight, even a quarter turn with a pair of pliers is probably enough.
- Use hose clamps or compression fittings. Don’t just stick your tubing over the barb and say “yeah, that looks fine”. My loop ran perfectly fine without hose clamps for over a year, but when I set it up a second time, this was 100 per cent my downfall. I’ve now switched to compression fittings which are much more secure.
- Leak test for 24 hours, inside your PC case, before turning your computer on. This wouldn’t have prevented my particular incident, but it’s still important. Don’t get too excited and turn your PC on before you’ve leak tested, and don’t think your system is OK just because you leak tested it outside your case. Things are different once you install everything. Leak test it inside your case for 24 hours before plugging that 24-pin cable back in.
Almost all water cooling issues boil down to user error. Pre-built, closed units have been known to leak, but very rarely — and your warranty should cover damage caused by a leak (look for this kind of warranty when you buy a pre-done unit). With a little care and attention to detail, you should never have a problem.
Comments
2 responses to “What To Do When Your Water Cooling Leaks Inside Your PC”
If you’re using water in your loop, you’ll need to clean every affected component, as they will eventually corrode (this is where most damage occurs). I just wouldn’t use pure water in a cooling loop full stop.
who would use water?
Isnt the idea to use actual coolant???
Actually water is the best fluid to use, Not just normal water though you need to use either Demineralised water or Distilled water.
Normal water will cause your blocks to corrode and algae to grow in the loop while the Demineralised water or Distiller water will not have those issues, Plus Demineralised/Distilled water it less conductive then normal water so if you do get a leak it has less of a chance of causing a short.
Commercially available coolants have stuff added that lowers their thermal conductivity when compared to “water”.
I always use “Water” in my loops because it is cheaper then coolant and provides better heat transfer from the block.
Unless you want a special coloured coolant always use Demineralised water or Distilled water.
At a pinch good quality methylated spirits can be a usable substitute for isopro alcohol, been using this for decades when I haven’t had isopro handy.
And if you’re really feeling brave you can flush the water out of sockets/off the boards/out of the case etc with it as well.