
Building a computer is the best way to get the perfect machine for your needs. We’ve shown you the basic steps before, as well as tips on beefing up your setup, but there are certain things most of us learn after screwing up and wasting a lot of time. Here are a few things you can learn from veterans’ mistakes.
Title video music by RoccoW. Title image remixed from OpenClips, Nemo
Of course, if you’ve built one or two computers before, you might still find some nuggets of knowledge in here you hadn’t discovered on your own, so check out the video above for a quick overview, and check out the tips below for more details. And don’t forget to share your own too!
1. Test Before You Build
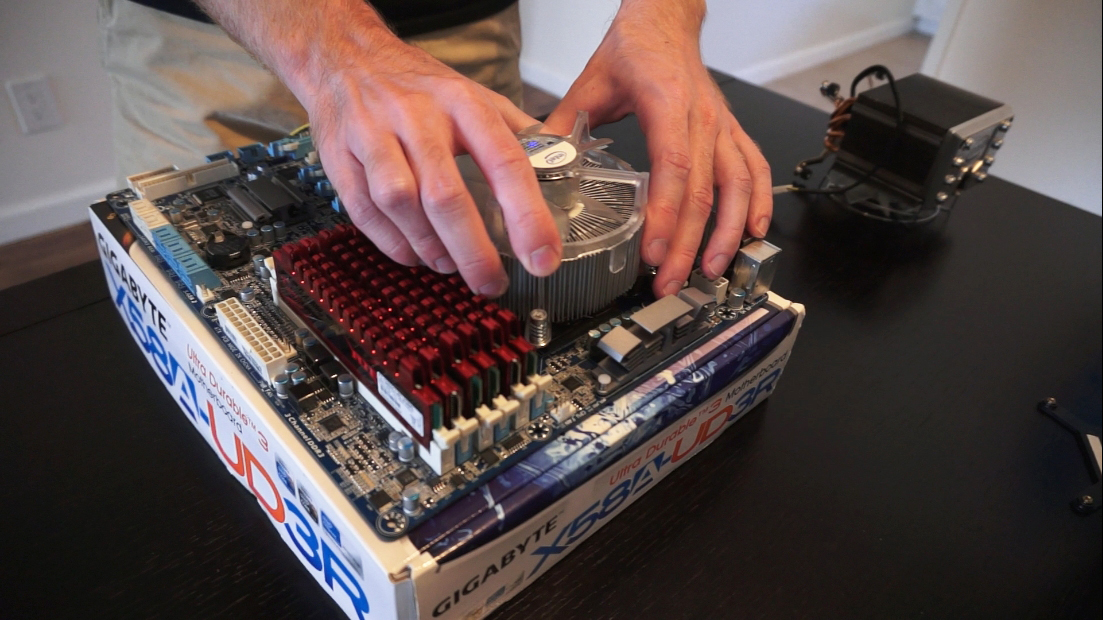
Getting a part that’s dead on arrival is rare, but it does happen — one look at reviews on Newegg will tell you that. The last thing you want to do is spend a day building your computer only to plug it in and have a DOA motherboard. Thankfully, your motherboard’s box makes a perfect test bench: put your motherboard on top of its box, install your CPU, RAM, CPU cooler and video card (if applicable), plug in your power supply’s 24-pin and 8-pin power cables, hook it up to a monitor and fire it up (which you can do using your motherboard’s power button, if it has one or a screwdriver). If you can at least get into the BIOS, you’ll at least know nothing’s dead. From there, just put your mostly built motherboard into your case, screw everything in, and hook up your fans, case headers and other accessories. It won’t add very much time to your build, but it will save you a lot of time if you get a dead component.
2. Don’t Overdo Your Thermal Paste
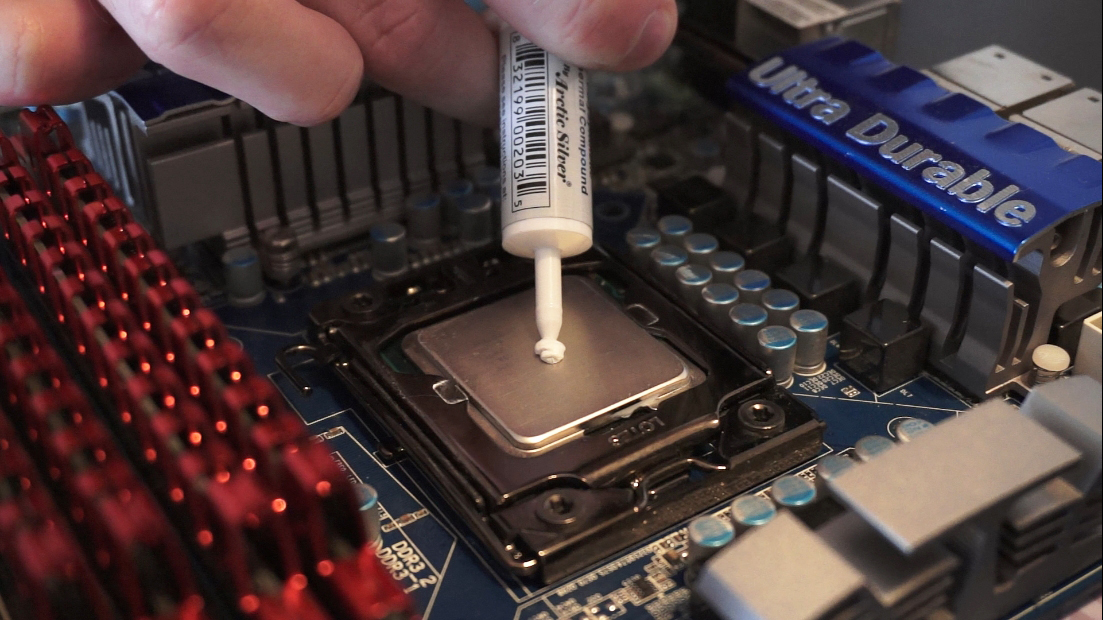
It’s a silly little step, but it’s something people constantly argue about online: what’s the best way to apply thermal paste? I’ve seen people do some pretty crazy things, like put on a giant blob or spread it around with a credit card, when it really couldn’t be simpler. Just put a small, pea-sized dab in the middle, or a thin line about the size of a grain of rice. Then put your heatsink on and start screwing it in. The pressure will spread it out for you. (Note: there are always exceptions to this rule, like very high-viscosity or low-viscosity pastes, but the process really is this simple for the average paste).
If you want, you can head to your thermal paste manufacturer’s website, where they may have a list of which method (pea or rice) is best for your specific brand, but in the end, it shouldn’t make a huge difference unless you’re using really specialised, expensive thermal paste — which, by the way, probably won’t make a huge difference in your temperatures. Just don’t use too much and you’ll be fine. If you want more information, this article at Tom’s Hardware has all you need to know.
3. Plan Before You Build
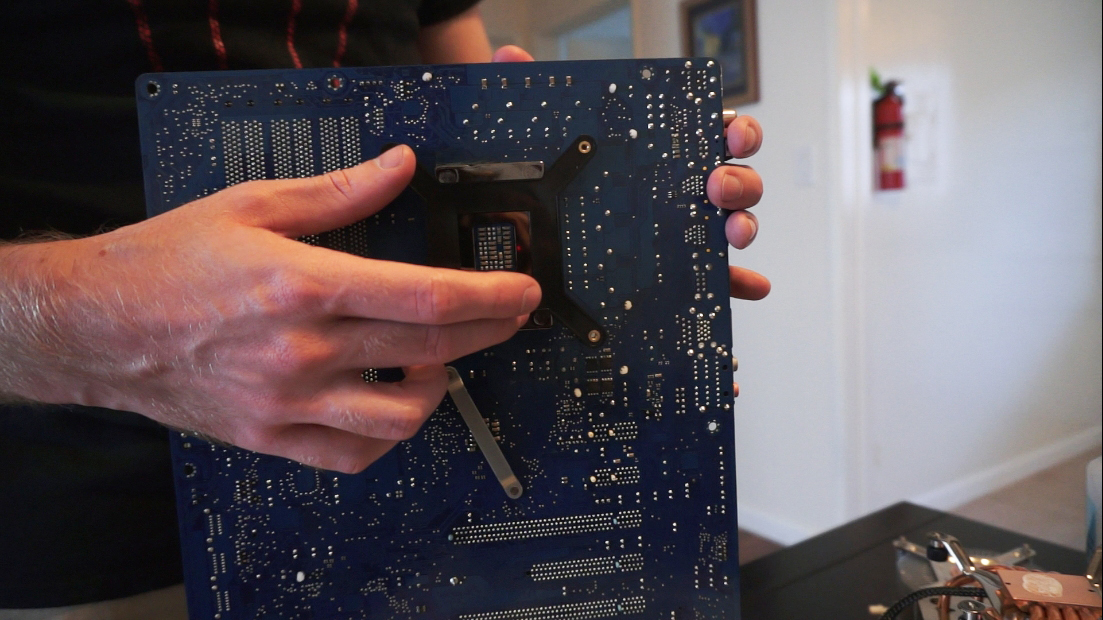
Every build is different, and jumping in too quickly might mean you forget something important and end up having to take it apart and start from scratch. So, take a step back for just a few moments and plan your build out. Does your CPU cooler have a backplate? Attach it to your motherboard before you screw your motherboard into the case. Is your graphics card large? Install your hard drives first, since it will probably block access to them. Does your power supply hinder access to your motherboard? You’ll want to install it afterward, instead of before (though sometimes the reverse is true). It sounds silly, but a little visualisation can make things a lot easier and less time consuming.
4. Create Good Airflow
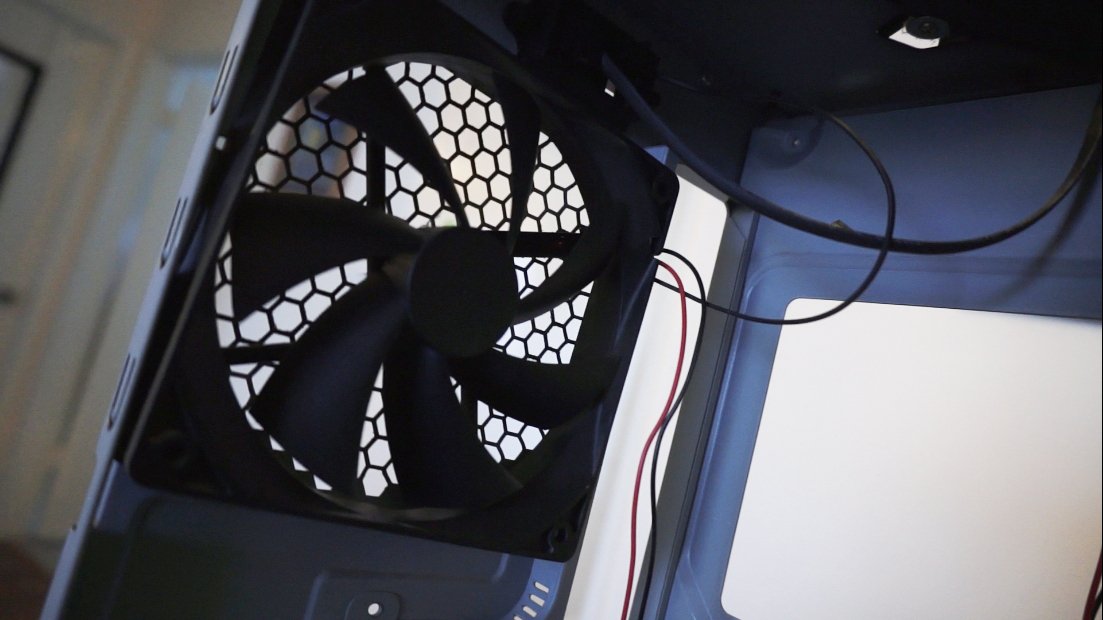
I don’t need to tell you that a hot, dusty computer is bad — but a lot of builders don’t put too much thought into their fans the first time around. Pay attention to which directions your fans are facing (they should have an arrow on the side that tells you which way it blows air), and try to get the air flowing all in one direction — usually in the front of the case, and out the back. You also probably want more intake fans than exhaust fans to create positive air pressure inside your case. If you have more intake pressure, then any extra air will escape through the nooks and crannies of your case, as opposed to entering through those nooks and crannies (and thus bringing in more dust). Positive air pressure coupled with filters on your intake fans means you’ll have much less dust, which means cooler and quieter operation. For more information, check out our complete guide to cooling your computer.
5. Skip the Driver Discs
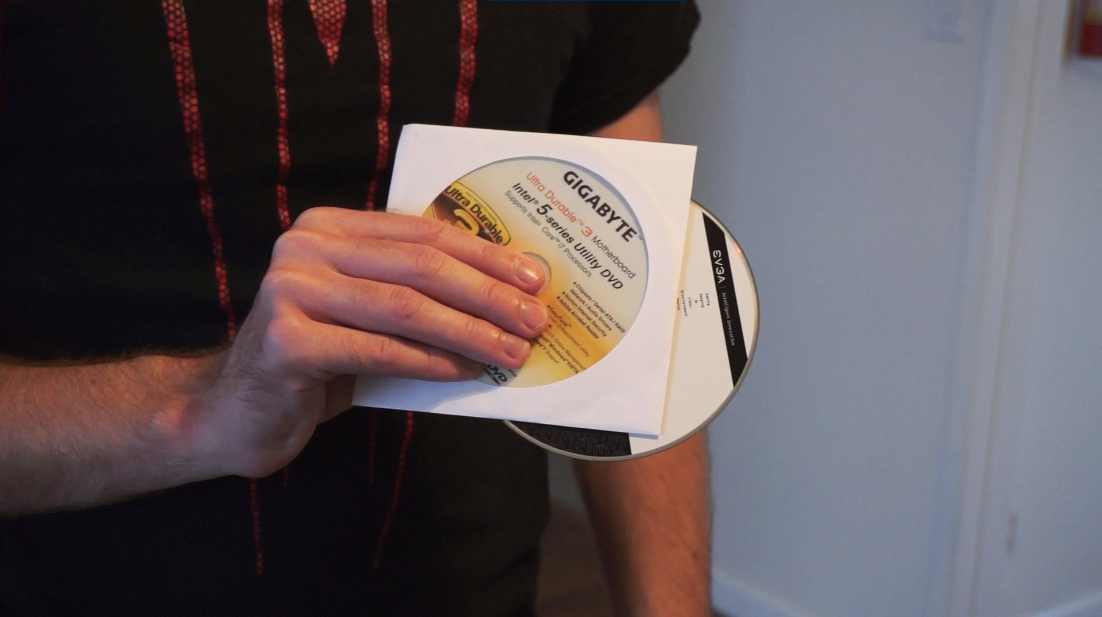
Chances are, your motherboard, video card, and other components came with a CD or DVD filled with drivers and other software. Generally, we recommend skipping these. By the time you build your computer, the drivers are probably outdated, and the discs often come with other software that you probably don’t want. Instead, visit the manufacturer’s web site and download the latest drivers from there.
There is one exception to this rule, and that’s Ethernet or Wi-Fi drivers. If Windows doesn’t have your drivers built-in, you obviously can’t access the internet to download the latest ones, so those discs can help you out. Or, you can use another computer to download the drivers to a flash drive and transfer them over.
6. Save Your Boxes and Bags!
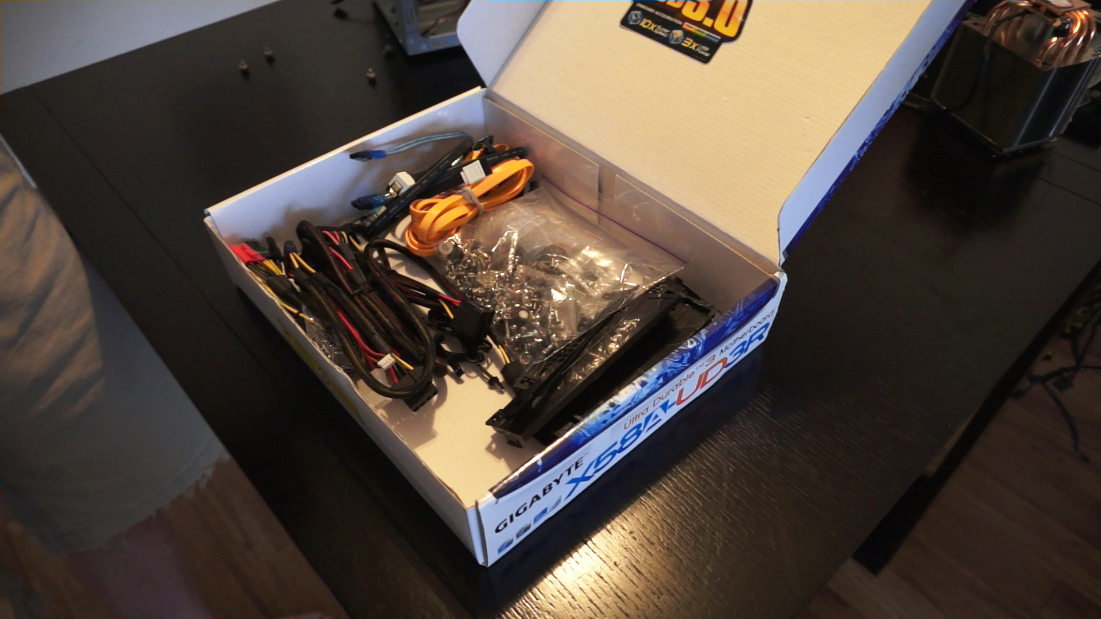
Lastly, when you’re done building, don’t throw out those boxes or anti-static bags! They can come in really handy when selling your parts down the line (because yes, you can sell old computer parts!). Plus, I’ve found that the motherboard box is the perfect place to store all the extra cables, screws, brackets, and other parts that you don’t use. Don’t throw them away, because you’ll probably need them if and when you upgrade down the line.
Obviously, this isn’t an exhaustive list, but these are a few of the handiest tips we’ve learned after years of building. If you’ve got your own, we’d love to hear them — and if you’re a veteran builder, be sure to send this along to your first-time builder friends to save them the trouble of learning the hard way.
Comments
26 responses to “6 Essential Tips For First-Time PC Builders”
Something else to consider: check your component specs
Building a PC from scratch involves making a lot of disparate parts work together. A mistake in matching component specs can cause a lot of problems. For my last build, I spent a lot of time researching motherboards, graphics cards, etc., but I left it to my supplier to recommend appropriate memory given the constantly shifting price.
After assembly, I was plagued with video card driver lockups and blue-screens. After a lot of work with my supplier we discovered that the high-performance memory recommended by them was just a bit too “high-performance”: the motherboard couldn’t cope with the timings under load. Replacing the memory with re-speced modules made all the problems disappear.
5. can be very YMMV.
Depending on the board you get it can actually come with many useful pieces of software. Eg my Asus Rampage IV board came with licensed versions of Daemon Tools as well as WinRAR and a couple of other great utilities.
So don’t always write off the discs.
I’ve sometimes also had to use the disks to get the ethernet working so I can then go online and download the rest.
Or windows8 not supporting your sata3 hardware.
That would suck, haven’t experienced that yet touch wood.
Yeah my marvel in board sata3 isn’t supported and asus don’t do win8 drivers for my board. I found a marvel driver that worked but since going from 8 to 8.1 it no longer works.
Testing before you build is essential, until the dealer refuses to refund because you can’t prove that you didn’t break it yourself, also never buy cheap CPU’s from overseas…. 🙂
Now if I can just figure out how to keep dust out without reducing airflow… 🙂
The only way I know how to keep dust out is to not have any openings… I have 2 sets of dust filters at every opening, and still find dust in my case. I also make sure to vacuum and clean the room frequently to no avail.
Also, if there’s one thing I’ve learnt from building big computers, is plan with the possibility to upgrade, but spend to never upgrade.
I use leggings/stocking what ever you wish to call them. Take the fan off, cover the front with the material, pull it taught as you screw the fan back on. Depending on the material you may need to either tape the edges to the fan so it stays. You could also purchase made for the purpose fan filters that don’t reduce airflow (by any amount that matters), or better still go water cooled and have no intake fans, no moving air will reduce dust.
@jacrench @bumblebee_tuna
We own an old Queenslander type bungalow, and I think it actually attracts dust… 🙂
Also, I find no matter what I use as a filter, it clogs up way too fast, and I end up just ripping the things out. All I can do at this point is constantly clean it out, maybe some kind of pre filter, filter… 🙂
Try keeping the filter on the outside of the case, so you can just hit it with a vaccuum/brush it down whenever you’re cleaning the room (though a lot of case designs make it difficult)
Aside from that: increase the air intake area. the larger it is, the more dust is required before the filters start to get clogged.
And use positive air pressure (more air intake then out). Helps reduce dust.
I know your meant to test as you go. But I have always just put it all together and cross my fingers.
Buy the right size motherboard for your case.
buy the right size case for your needs, then buy the right size mobo so it fits in
How about don’t be a cheap skate?
1. Always use a good quality PSU (e.g. most that are actually 80 plus certified)
2. Use a good quality Motherboard. (e.g. Gigabyte)
3. Negative air pressure will increase the amount of dust coming into the pc where as positive will reduce this. However Positive = more noise
4. If it is a mid-high end system use a closed loop water cooler for the cpu if the case permits.
5. Remember do not be a cheap skate as this will only reduce the lifespan of the computer and associated components.
2. Really?
what is not good quality? MSI?
5. Again…….MSI? Kingston RAM?
The only 3rd party boards I come across are Gigabyte, ASUS, Asrock and MSI, all good quality, with model ranging from budget to enthusiast.
Start with the Motherboard when choosing hardware, this gives you an idea of what hardware it is compatible with and gives you an idea of your total build cost.
I’d start with CPU. Then motherboard with the right socket. Then build around mobo.
CABLE TIES, LOTS OF THEM!
CABLE MANAGEMENT!
1. First and most important! – use an anti-static wrist band or other suitable method to protect your new parts from Static electricity. Don’t handle components by the pins or gold connectors.
There’s nothing worse then damaging your expensive new PC.
2. Research research research. Make sure you know exactly what you need before you go to buy the parts. Think about what you want the PC for and make sure it can do everything you want it to do. Eg if you plan on going to lots of LANs find out how heavy the case is and look for lighter options.
3. Take a list of what you need when you go to get components. Have a couple of alternative brands researched in case they don’t have the exact brand or model you wanted, or in case prices have changed.
4. Try to get the best PSU, MB, CPU you can. It’s better to get a smaller HDD than a slower CPU or Motherboard. You can easily upgrade some components later,
haha people actually use anti static stuff wrist straps….just lol
4 is just sigh
Yes, I do. Static can easily damage your components – and its not always easy to diagnose
I’m not saying don’t use it but it’s not as big an issue when installed in a circuit eg a card. Very big killer at an individual component level through.
3. In today’s market of MSY, Umart, PCCG etc who goes to a shop for them to not had parts? Order and pay online, print confirmation and when it arrives go collect from shop or post office.