Home brewing is a great hobby, but requires a lot of ingredients, specialised equipment and enough knowledge to ensure you don’t make something that tastes like it was fermented in a toilet. Want something a little simpler? You can turn any fruit juice into alcohol with nothing but a cheap plastic airlock and a bag of champagne yeast.
This is an easy weekend project. You can buy the supplies online or at home brewing supply stores. The resulting fruity beverage will be a healthy alcoholic treat that should taste even better than prison wine. Hit the link for the full instructions over at WonderHowTo.
How to Turn Your Favourite Fruit Juice into Cheap Homemade Booze [WonderHowTo]
Comments
7 responses to “Turn Any Fruit Juice Into Homemade Alcohol”
Terrible plan. Terrible. You’ll smell like the greengrocers garbage bin, and people will presume you’re a convict.
Agree. There’s a reason that the main place you will find this being drunk is prisons, even though it may seem like youd end up with a tasty fruit flavoured drink..
Was thinking that it sounded bit like prison wine which I believe is called pruno?
As a homebrewer I dabbled in fermenting juices. Producing a nice drink takes a bit of trial and error (as all brewing does), and you can’t skimp on the yeast. Using a proper brewing yeast (champagne and wine yeasts work best for juices unsurprisingly) makes a big difference.
I’m not inclined to take any risks fermenting my own booze. I imagine this stuff would be pretty impure and taste pretty awful. If you’re this hard-up for liquor you should probably just give the drink away.
That’s actually one of the misconceptions, there isn’t really any major risk. As long as the finished product smells and tastes nice, then it is very unlikely to make you sick (although IANA-Dr). The yeast actually creates a toxic envirnment for almost all pathogens, the worst you will get is something that smells like bandaids and tastes like vinegar.
Most people that end up with rocketfuel do so because they don’t follow a couple of set guidelines.
1.) Try not to add a large amount of extra sugar
2.) Try to keep the temperature stable at around 18-20 degrees C
3.) Use proper yeast from a home-brew store (not bakers yeast)
4.) Clean and sanitise everything that touches the drink before you start
5.) Wait until you think it is done, then wait an extra week
There’s obviosuly a lot more to it, but if you follow these, you’ll likely to make something quite tasty to start with.
I do this and get quite some nice ciders out if it. Often turns to rocket fuel if you arent careful so taste test throughout the process and go for flavour rather then alcohol content 2 days will give you a sweet cider with about 1-2% alcohol content 5 days will give you a mid sweet/dry cider with a content of 4-5% anything more then that you will be sacrificing taste for alcohol content, and i would check on it half a day as it could be ruined very quickly.
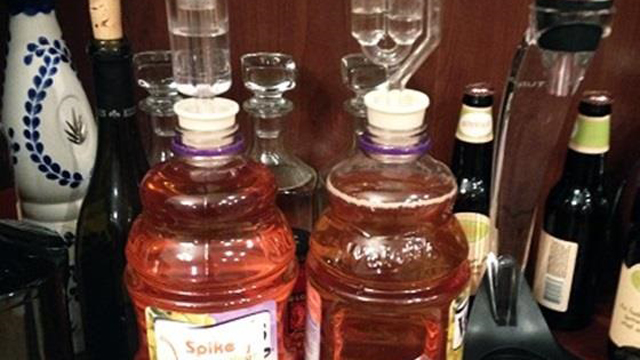
You can use a product called oztops (google it) which is essentually a makeshift pressure release valve built into a cap. They come with instructions and 2 varieties of Yeast which helps you get going.
Ive started to stray away from a basic brew and im now adding honey as it is a sugar that Yeast cant eat which makes it a bit easier to keep it from turning into an Apple Vinegar.
Also they seem to use heaps of Yeast. I wouldnt use that much (only around a teaspoon at most per bottle as it can make add some pretty crappy flavours to the mix.
As a general rule brewing in Summer is easier then brewing in winter as the yeast is only activated for half the day (In winter you will need to use a heat pad which can speed the brewing up to an unmanagable speed)
Also remember to Let it sit for a few days in the fridge before drinking, All the yeast will stop converting sugar to alcohol in the cold temp and will sink to the bottom of the bottle and hopefully turn into a clumpy mess. This will improve the taste of the cider and make it easier to pour (less floaties in the pour!