
I have photos everywhere. I post some to Instagram, others are scattered around my computer and on external hard drives. I have heaps on Flickr, and my friends post photos with me to Facebook. The idea of collecting all of those photos in one place sounds like a chore, but Trovebox makes it easy to import them, save them, back them up, share them out again or point your favourite photo organiser — iPhoto, Picasa, whatever — at the collection. Here’s how.
What You’ll Need
Before we get started, you’ll need a few things to make this work. Here are the basics:
- A Trovebox account. Trovebox grew from the OpenPhoto Project and comes in two flavours: Free accounts, which come with some limitations, and Pro accounts for $US30 per year. We think the Pro account is a good value for what you’re getting here, but we’ll note if something we’re describing requires a Pro account.
- Photos all over the web that you want to organise. Trovebox supports Instagram, Facebook, Flickr (if you’re a Pro user), and photos you have locally on your computer, iOS and Android devices. Support for Picasa and SmugMug are coming soon to Pro users first.
- A Dropbox account. For the purposes of this post, we’ll be using Dropbox, but Trovebox supports Box, Amazon S3, CX.com, Dreamhost DreamObjects or Internet Archive accounts, as well as your own local storage.
- (Optional) An iOS or Android device for mobile use.
- (Optional) An IFTTT account for syncing future photos with Trovebox. Our goal is to collect all of your photos and put them into a single archive. Once we’re done, you’ll probably take new photos and want to share them in different places. We’ll get to this later, but this will help you keep your photos organised going forward.
Step 1: Sign In to Trovebox and Import Your Photos
First, sign up for a Trovebox account. When you sign up, you’ll be prompted to select a username that will also serve as your custom Trovebox URL. People you share photos with will visit yourname.trovebox.com to see photos you’ve shared with them. You also get to choose where you’ll save your Trovebox photos. Select Dropbox for now. You can choose to save your photos at Trovebox directly or with any of the other supported services. If you have a pro account, you can change this anytime you want and move your photos. Free users are stuck with their first choice (unless they upgrade).
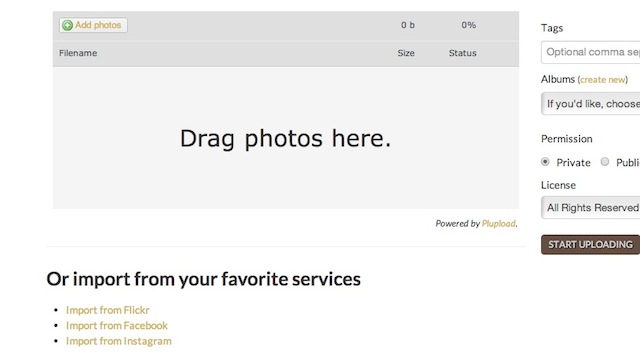
Once you’re signed in, importing your photos is easy. Click “Upload” on the bar across the top of the page. You’ll have the option to drag-and-drop photos from your computer, import from Flickr (pro only), Instagram or Facebook. You can only do one at a time, but you can always return to import more photos.
Select the service you want to import photos from, and you’ll be prompted to log in and connect to that service (via OAuth, so no passwords are stored). For Instagram and Flickr, Trovebox will pull in all of the photos you’ve posted. For Facebook, it will import the photos you’ve posted as well as friends’ photos where you’ve been tagged. Click “Start Importing My Photos” and go grab a drink. The more photos you have, the longer it will take, but you can close the browser window. You’ll get an email when the import is complete. If you selected Dropbox when you signed up, you’ll notice the photos start to appear in your Apps/Trovebox folder. When the import is all finished, repeat the process for any other service you want to pull your photos from. If you have photos on your computer, just drag and drop them into the upload box to upload them as well.
Step Two: Organise, Share and Back Up Your Photos
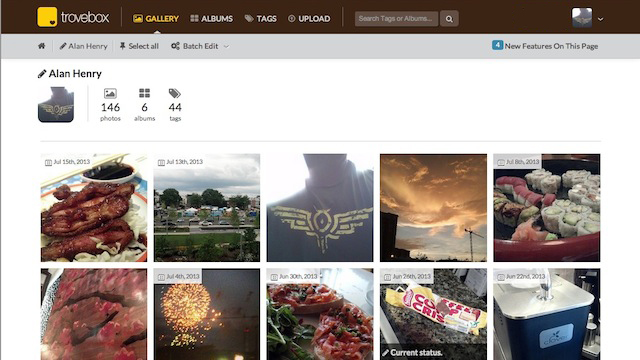
Once your uploads are complete, click “My Site” at the top of the page to go to your gallery. Click “albums” and you should see the albums created when your photos were imported. If you have galleries or photo sets at Facebook or Flickr, the importer should preserve them. From here, you can rearrange them into new galleries if you want, update the titles or descriptions, download them and more. To create a new album, click the plus sign (+) above your profile picture. Then, go back to your photo list. Hover over each photo and click the pushpin to select multiple photos. You can then move them all into that album, update their descriptions or tags together, or perform other batch operations. Hover over any photo and click the title to change it immediately, or the lock to toggle its privacy settings.
You can also share photos from Trovebox on Facebook, Twitter or get code to embed them in your personal website or blog. When you share a photo, it gets a “token” that makes it viewable to the public. You can revoke that token at any time if you’re finished sharing it, all without having to delete Facebook update you posted with it or delete the photo itself.
Finally, if you’ve followed along and have your photos stored in Dropbox, you should now have a local copy of all of your photos, a Trovebox-stored copy and a copy stored at Dropbox. Technically, that’s enough for the 3-2-1 backup strategy, but if you’re also backing up your computer using a service like Crashplan, make sure your Dropbox folder is included in those backups. That way, all of your photos — precious memories and hilarious selfies alike — are backed up in multiple places for safe keeping in case your Dropbox or Facebook account is hacked, your hard drive dies or something else terrible happens.
Step 3: Point Your Favourite Photo Management App at Your New Photo Archive
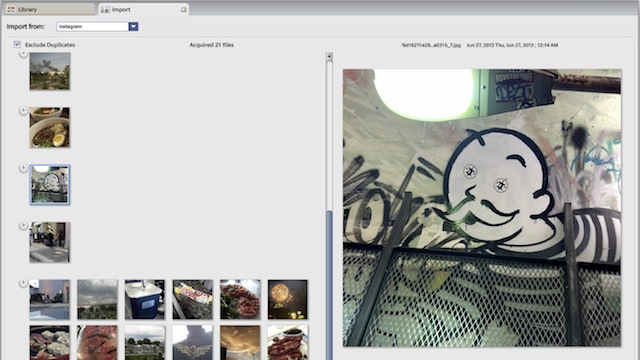
The Trovebox web interface is great, but it’s not as powerful as tools like iPhoto, Picasa (our favourite photo management app for Windows), or Lyn (our favourite for the Mac). With all of your photos in one place now, the next step is to point your favourite photo manager at the archive.
With most photo management tools, all you need to do is open your Dropbox folder (not your Dropbox/Apps/Trovebox folder, we’ll explain why in a moment) inside the app and you’ll be able to manage the photos directly. Some will automatically scan your computer for freshly added photos. If all else fails, in Picasa, you can select “Add New Folder to Picasa” under the File menu. In iPhoto, you can either import the photos to your iPhoto library (File > “Import to Library”) or create an entirely new library (File > “Switch Library”, then “Create New”) using just your Trovebox photos.
Keep in mind that some changes you make to your photos directly, like new filenames or copies, may not sync with Trovebox, since you didn’t make them through Trovebox’s UI. However, edits to the files themselves and their metadata should sync. The important thing is that you’ll have one single place for all of your photos that’s backed up, and one place you can use your favourite photo management tools to keep tabs on them, even if you never use Trovebox again.
Step 4: Use the Mobile Apps to Keep Your Photo Archive Up to Date
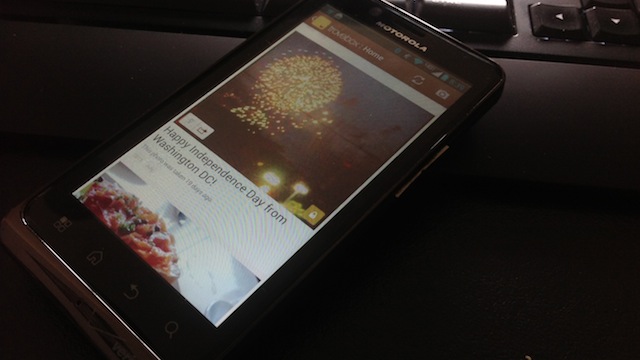
The best thing about putting all of your photos into Trovebox is that you can use its apps to manage them all, no matter where you have them stored. In our case, all of the photos we’ve uploaded and then stored in Dropbox are also available through Trovebox’s web app on any computer, and in the Android app and iPhone app.
The mobile apps can also upload photos you take with or have stored on your phone, which makes it easy to keep your archive updated even if you’re snapping photos on the go and posting to Instagram, for example. The Android app even has auto-upload, so any photos you take are automatically saved to Trovebox. You can also organise and edit your gallery from your phone or tablet.
Step 5: Make Sure Any Future Photos Also Get Saved to Your Photo Archive
Trovebox isn’t perfect. It’s shining feature is that it’s super-easy to pull all of your photos from around the web into one archive. You own your photos forever, and you control who can see them and for how long. However, Trovebox doesn’t have syncing, so it doesn’t know if you snap a new Instagram photo, or post a bunch of new holiday photos to Flickr or Facebook. In order to get those photos into Trovebox — and your central, backed-up photo archive — you’ll have to run the Trovebox importer again, or upload them directly to Trovebox when you take them or pull them off of your camera. You can remind yourself to import or add new photos (just run the importer again, Trovebox will filter out duplicates) every month, for example, but here are some better options:
- Use the Dropbox OpenPhoto app. It’s experimental, but any photo you add to Dropbox will also automatically be uploaded to Trovebox. If you point your photo management tool at Dropbox (instead of specifically at the Trovebox folder) you can leverage Dropbox’s auto-upload in iOS and Trovebox’s auto-upload in Android to make sure all of your photos still make their way into your archive.
- Use IFTTTT to automatically add photos to your archive, bypassing Trovebox completely. Trovebox isn’t required once you have all of your photos neatly organised in one place. It’s a great tool for making sure any old photos out on the web get into your archive, but you may be happier using our guide to getting digital doubles for any photos you and your friends take to make sure any new photos are automatically saved to your archive going forward.
The team at Trovebox note that syncing like this is on the way, but for now you’re better off managing your new photos on your own. Your best bet is to just upload your photos directly to Trovebox and then share them out from there — then you can control the token and your photos stay organised. Making sure your photos get saved in the right place going forward may be tricky, but we think it’s a small price to pay to make sure all of those memories are safely stored, organised and easy to manage.
By now, you should have all of your photos — and some of your friends’ photos — stored neatly in an archive in your Dropbox account that’s being backed up and synced with all of your devices right now. You should also have a few new mobile apps and a new web app to use to keep them organised, and your favourite desktop photo management tool pointed right at all of those photos so you can easily edit them and touch them up before you share them.
Most importantly, all of those memories are now backed up for safe keeping in case something happens. The best part is that it shouldn’t take very long to do this at all — in a flash you’ll go from dozens of pictures everywhere to all of them safe, sound and neatly organised.
Comments
One response to “How To Merge All Your Photos From The Web Into One Cohesive Collection”
Hopefully their servers can keep up with the demand – they seem to be having issues at the moment. Having upgraded to a pro account, I can’t find the option anywhere to change where the photos are stored.
Hopefully it gets better.