When you upgrade to a faster, better router, don’t throw out your old one. You can turn it into a repeater that will carry your Wi-Fi signal to the dark corners of your home.
Wi-Fi routers change rapidly. Until recently, many of us used 802.11g routers for a 54mbps connection. Then 802.11n came along and gave wireless networks a much-needed speed boost, but with some limitations.
Now an even faster standard is becoming common — 802.11ac — and bringing wireless speeds a heck of a lot closer to what we can expect from a standard wired connection.
Because of these changes, chances are you have an old router lying around. This won’t offer the same speeds as your newer model, but you can use it to boost your signal. While you can’t make it magically provide faster transfer rates, it can give you a signal where you couldn’t get one before. We’ll concentrate on the DIY methods in this post, but also suggest a few other options at the end for those of you who need a speedier solution than old hardware can provide.
What You’ll Need
When creating a range-boosting Wi-Fi repeater, what you need will vary. Some routers have repeater functionality built in. Others require custom firmware to get the job done. The router you’re using will determine how many items on this list you need.
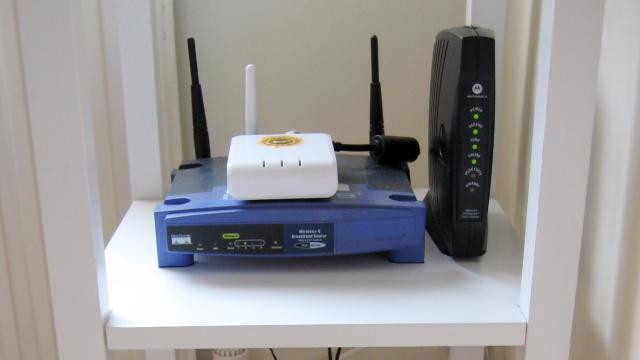
- An old router: “Old” means a router not in use anymore, not one that’s eligible for retirement benefits. In fact, the newer your “old” router is, the better it will work because it will come closer to (or match) the network speeds provided by your new one. You’ll also need the manual (if you don’t have a printed copy, you should be able to download one online from your router manufacturer’s support site).
- Custom firmware: You may or may not actually need custom firmware to create a range-boosting Wi-Fi repeater out of your “old” router. Check your router’s admin page to find out if you can turn it into a repeater already. If not, you’ll want to look at DD-WRT to check if it supports your router. Some prefer OpenWRT and Tomato because DD-WRT’s development has slowed down quite a bit over the past couple of years, but it nevertheless offers the most straightforward option for creating a wireless repeater. We’ll discuss Tomato and OpenWRT in brief later on.
- A paperclip or pen: If all goes well, you won’t need either of these thing, but in some cases, you may need to reset your router. Mistakes can happen when messing around with router settings and if that happens, you can accidentally make your old router’s admin section inaccessible. Have a pen or paperclip handy to hit the reset button so you can quickly recover from any issues.
As you can see, you don’t need much to get started. If your router’s stock firmware already has a Wi-Fi repeating function, move on to the next section. If not, skip it and head to the custom firmware section that follows.
Turn Your Router Into A Repeater With Stock Firmware
Many modern routers offer repeater functionality out of the box. While we can’t provide instructions for every single router on the market, we can give you a basic guide to enabling this feature and setting it up. Before we get started, here’s a list of brands that offer repeater functionality on some routers. To find out if your exact model offers the feature, Google is your friend (just search the model name and ‘repeater’):
- Linksys (official documentation)
- Belkin (official documentation for bridging)
- Apple (official documentation)
Once you’ve verified you’re working with a router that has this functionality built-in, follow these steps:
- Make note of both your new and old router’s MAC addresses. You can often find it on the bottom of your router or in your router’s status section. (It will have this sort of format: 00:00:00:00:00:00.) You’ll need both addresses to create a bridge.
- Plug in and turn on your old router, then connect to its admin page. You can find the URL to this page in your router’s manual. (Most have a URL like http://192.168.1.1.)
- Enter the admin username and password if requested. You’ll find the defaults in the router’s manual, too.
-
Locate the repeater settings on your router’s admin page. Some routers distinguish between repeating a wireless signal — simply extending the one your primary router provides — and wirelessly bridging a network gap — not extending the signal but allowing you to connect computers and other devices via ethernet to the secondary router to gain a connection.
Some manufacturers make things even worse by misappropriating the term “Wireless Bridge Mode” as a method for actually repeating the signal (Apple is in this camp). If you have a Linksys router its admin software clearly distinguishes the two. Other companies may not, so look into their documentation to see if you can bridge the two together and still have the secondary (old) router broadcast an extended Wi-Fi signal.
- You’ll either have a drop-down menu to select your router’s mode or a Wireless Repeater checkbox. Your router should default to AP (access point) mode, so change it to Wireless Repeater or just tick the Wireless Repeater box. (As previously noted, in some cases you’ll need to create a bridge.)
- Upon enabling Wireless Repeater mode, you’ll need to enter the MAC address of your new router that you noted earlier. Do this and click Apply, Save, or whatever your router’s manufacturer named the button that applies your new settings.
- If creating a bridge, you may need to repeat these steps on your new router.
Again, this process may seem convoluted because of how some manufacturers chose to label individual features. To quickly summarise, you only need to enable Wireless Repeater mode, enter the MAC address of the new/primary router, and save your settings to boost your signal. It’s fairly easy once you know where to look.
Turn Your Router Into A Repeater With Custom Firmware
Not all routers support repeating a wireless signal out of the box. As a result, you need to utilise custom firmware. Check DD-WRT’s router database to make sure it supports your router and follow these steps to get the job done:
- Install the DD-WRT custom firmware on your router. For the most part, you just need to find a compatible version on one of the DD-WRT sites and upload it to your router the same way you would with an official firmware update. Some firmware packages require a few extra steps, however, so make sure you read the instructions that come with your specific custom firmware. If you don’t, you risk bricking your router.
- With DD-WRT installed, load up the admin page (probably at http://192.168.1.1 or your router’s default address, as specified in its manual).
- Select Basic Settings (if necessary) and locate the Wireless Mode drop-down menu. Select “Repeater” from the list (or “Repeater Bridge” if you know what you’re doing and plan to repeat the signal and create a network bridge). Change the Wireless Network Name (SSID) to the exact same SSID as your primary router. Click Save.
- The page will reload and you’ll see the Virtual Interfaces section at the bottom. Click the Add button underneath. Enter a new and different SSID (e.g. Router Repeater) — not one already in use — and click Save.
- Visit the Wireless Security sub-tab and you’ll see the two interfaces you just saw in the last tab: the hardware interface and the virtual one you just created. In the physical section, fill out the exact same settings as your primary router. You need to use the same security method, the same password — all of it. Do the exact same thing for the virtual interface.
- Click the Setup tab at the top, then the Basic Setup sub-tab if not selected by default. Scroll down to the Network Setup section. Change your local IP address to something other than the local IP address of your primary router. For example, if your primary router’s local IP address is 192.168.1.1, make your old router’s (the repeater’s) 192.168.2.1 (or something along those lines). Essentally, change that third number to something else that you’ll remember. When finished, hit the Save button at the bottom of the page.
- Click the Security tab and then the Firewall section if not already selected by default. Disable the SPI Firewall and uncheck all the boxes in Block WAN Requests if they don’t get disabled automatically.
- Click Save, then click Apply Settings. Once it finishes rebooting, you can connect to it and enjoy the benefits of a repeated signal.
Setting up a repeater shouldn’t take more than 5-10 minutes if you have all your information read. But what about using something other than DD-WRT? Our friends over at How-To Geek have a guide on creating a repeater with Tomato, but it’s more of a workaround as Tomato doesn’t support this functionality explicitly. OpenWRT seems to have a similar, simpler option but we don’t have a compatible router to test it with. Nevertheless, if you want to give it a try instead of using Tomato or DD-WRT this video demonstrates the process.
When Old Hardware Won’t Do
Sometimes you need faster speeds or your old hardware just doesn’t work very well anymore. In those cases, you can pick up some wireless-repeating tools without breaking the bank. Here are a few options that work well when you need to carry your wireless signal farther but can’t implement a DIY solution:
- TP-Link Wireless N150: About the size of an Airport Express, it provides 802.11n speeds, works in all kinds of modes (including repeater mode), and fits in a shirt pocket.
- ASUS RT-AC66U: If you need 802.11ac speeds and have a long range to cover, this router might even handle the task on its own. If not, you can pick up another and put it into a built-in bridge mode that automatically repeats the signal.
Obviously you’ll save a lot more money if you stick with 802.11n, but if you need to buy new hardware for repeating a signal these options will do the trick. If you need more than just a repeater, check out our Top 10 ways to boost your Wi-Fi signal for additional options.
Comments
4 responses to “How To Extend Your Wi-Fi Network With An Old Router”
So how does the repeater connect to the network then? Over wireless as well? If so, wouldn’t that have the same speed issues as the devices you’re trying to connect with?
You place the repeater closer to the base than the wireless device you want to use at a distance. The repeater still gets a reasonable signal and then extends the range beyond what the base unit was capable of.
You need to place the repeater close enough to have a decent signal, but far enough to extend the wireless network to where you need it to go. I need to use a TP-Link repeater in my 2nd bedroom in a small apartment – because all the walls are solid concrete and the wifi signal drops dramatically trying to get into that room. The repeater keeps the connection going. Don’t expect the same performance as if you were connected directly to the wireless router at the base, because the repeater needs to split the bandwidth to manage the two networks. But there’s no difference in web browsing speed.
Best way is powerline adapters between the APs.
Can you plug the second router into your ethernet network so that it doesn’t connect wirelessly to the first router, and thus allows the wireless signal to be extended beyond the range of the first router?
You can connect a second router to your first, but turn off all DHCP on the secondary – make it a dumb wireless switch. Use the same AP name with different channels (make sure it’s different from the neighbours too). Personally I use static IPs for all connections to ensure there are no conflicts (20+devices not including wireless). There’s plenty of info online about these kind of set ups.
Greetengs from sunny Thailand!
I’m using wireless repeater daily. At first performance was unsatisfactory in any conditions except very light load. Setting that changed it all was RTS/CTS Threshold – set it to lowest (1500 bytes) for both routers. Basically it works like this, as far as I uderstand – if you are using 1 router as repeater you are using 1 wireless frequency to get data from main router and to send it further, so say you downloading something, your bridge received packet, send it further, at the same time main router sends next packet – collision occurs, both packets have to be resend. RTS/CTS (which is Request to Send / Clear to Send) Threshold setting instruct router of the minimum packet size for which to use this tech – setting it to minimum value greatly reduces paccket collision, improving perfomance – in my case from barely usable to normal. And the funny thing is – it’s NOT a 1-st april’s joke 🙂