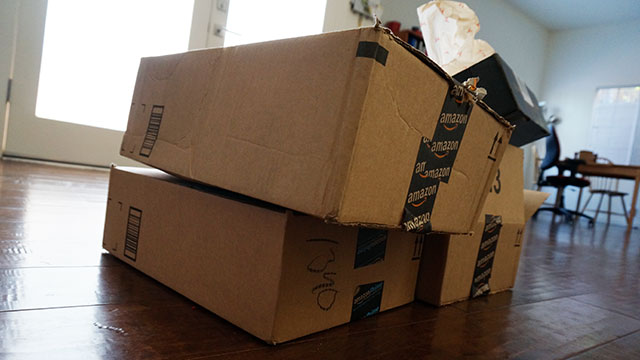
Coffee tables are often one of those overrated pieces of furniture that you think you need more than you actually do. Instead of letting yours waste space in your living room, supercharge it with a retro arcade, gadget-charging ports and more.
I’ve written for Lifehacker for a little over three years now and seen many an arcade coffee table come and go in that time. You can’t watch people build Pac-Man and Donkey Kong into a table every month without thinking “holy f$#% s$%^, I need one of those.” I set out with the goal of integrating a TV screen into an IKEA table, but the process made me realise the awesome projects I’d seen over the years provided a few problems if I planned on casually playing games at the couch.
When you build a television into a coffee table and the controls into a drawer, you end up playing hunched over just to reach the joystick and actually see the TV at an adequate viewing angle. I decided to take a different approach: create the ultimate tech-infused coffee table with a built-in retro arcade and charging ports for my gadgets that I’d actually enjoy using from the comfort of my couch. While the table may not feel as impressive as one with embedded screens and joysticks, it serves its purpose a heck of a lot better. If you want a simpler and more functional approach to the arcade coffee table, read on.
What You’ll Need

In some cases, you’ll need a few specific items for this project, but you can swap out a fair number of parts for others if you like. This project allows you to use whatever table you want, so long as it comes with a few specific components. I’ll make suggestions here, but feel free to change this list to suit your needs.
- Coffee Table: I used an IKEA BOKSEL (it also comes in this larger form) because my local IKEA had a heavy discount at the time, but you may prefer something cheaper and smaller. You can pick up a BESTA storage combination in a variety of flavours for under $200 if you prefer. It’s not technically a coffee table, but it will cost you less, take up less space and work just the same. Whatever you choose, make sure to pick something with a reasonable amount of storage space and at least one drawer.
- 15-inch to 19-inch Television: You need a small screen. You don’t have to stop at 19 inches, but you need to stay within this range if you want a compact set that can stay out of the way. TVs start getting heavy after 19 inches, and you want as little weight as possible when mounting one to a piece of IKEA furniture. You can also use a computer monitor but you’ll need one with HDMI capabilities, and you may lose sound in the process.
- Articulating Arm with VESA Mount: Depending on the screen you choose, you’ll need an articulating arm to match. This means you need to figure out the TV’s weight and its type of VESA mount, then search for a compatible arm. VideoSecu’s Wall Mount only costs $US17 and can handle most TVs under 27 inches and 15kg. It will work with the TVs mentioned above, but double-check if you choose a different set.
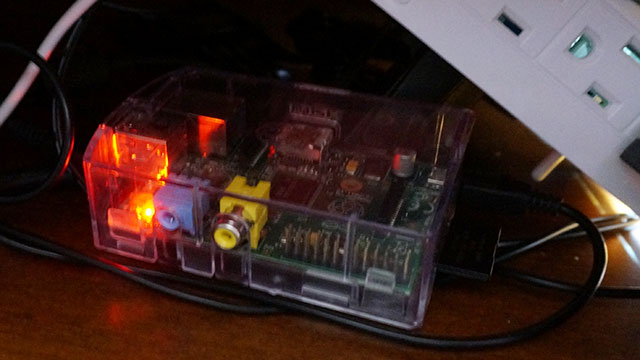
- Raspberry Pi: Your arcade will run on Raspberry Pi hardware, using a easy-to-install custom version of the Raspbian operating system called EmulationStation. You’ll need a Raspberry Pi board, and you may want a case as well (so you don’t have an open board floating around inside your coffee table). You can learn more about the Raspberry Pi and where to buy one in our beginner’s guide.
- SD Card: Your Raspberry Pi requires an SD card of 4GB or more. Most any card will do, but check the Raspberry Pi wiki for a list of compatible options.
- Game Controllers: You need to pick relevant controllers for the kind of games you want to emulate. If you want a classic arcade controller, this Universal Arcade Fighting Stick runs fairly cheap for its type. If you want retro console controllers, you can pick up these Classic SNES USB controllers for only $US8 each. Any standard USB joypad or joystick should work, so go with what you like.
- USB Hub: In order to connect all your game controllers, you’ll need a USB hub. I happen to really like the D-Link 7-Port hub (because it packs a lot of ports in a small space and mounts well wherever you need it), but anything with four ports will work.
- Powerful USB Charger and Power Strip: Your table can’t run on sheer willpower — you need to plug it into a source of electricity. Ideally you want one with USB power that can charge anything from a phone to a tablet (and your Raspberry Pi) that also includes a few standard outlets. I searched for hours and found one great option: the BESTEK 1875W USB Wall Charging Station. You get six outlets and four USB ports that provide at least 1A each for under $US20. Not a bad deal at all.
- Cables: You probably have all the cables you’ll need already, but let’s make sure. You need one microUSB cable to power your Raspberry Pi, an HDMI cable to connect it to the television (the thinner/smaller the better in this case), and an extension cord to run from your coffee table to the nearest power outlet. (Ensure you get the right length for your needs.) As for the three cables you want to use to charge devices, you can pick whatever you have lying around (so long as they stretch at least 2m). If you want to get more versatile cables for charging purposes, so you have all your friends covered regardless of what device they bring over, the Bloobury 3-in-1 cables offer micro USB, Apple 30-pin dock and Lightning cables in one.
- Tools: You’ll need whatever tools your table requires in order to build it, a screwdriver (with Phillips and flat heads), a power drill (with large and small bits), a large craft knife, and either adhesive mounting squares or industrial Velcro (I went with the Velcro).
Yes, this looks like a daunting list, but you probably have good number of the items on it already. If you already have a cheap TV and usable coffee table in your home, you’ll spend almost nothing but your time.
Step 1: Build Your Table
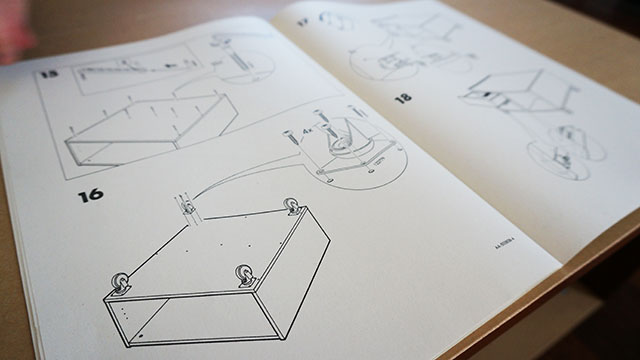
For the most part, you’ll need to build your table according to the instructions that came with it. That said, you can save yourself some trouble later by altering a few parts before you assemble them.
First, find the piece of wood (or particle board, as the case may be) that serves as the back of your table. If using an IKEA BOKSEL like me, that board actually sits in the middle of the table. If using an IKEA BESTA, or a more standard box-like coffee table, just look for the part that fits onto the back. Drill a hole large enough for an HDMI cable and your TV’s power cable to fit through. If you prefer (and have the proper tools), you can just drill a small hole and use it as a starting point to cut out a large one with a thin saw blade. If using IKEA furniture, however, you can use your craft knife sit to widen the space if your drill couldn’t handle it on its own.
Finally, find the part of the table that serves as the bottom and drill a hole large enough to accommodate the width of your grounded extension cord. Where you place this hole will depend on where you intend to store the electronic components of this setup. If using an IKEA BOKSEL or BESTA, you’ll put it on the left side towards the front.
Once you have your two holes made, clean up, assemble your table, and move on to the next step.
Step 2: Mount Your Screen
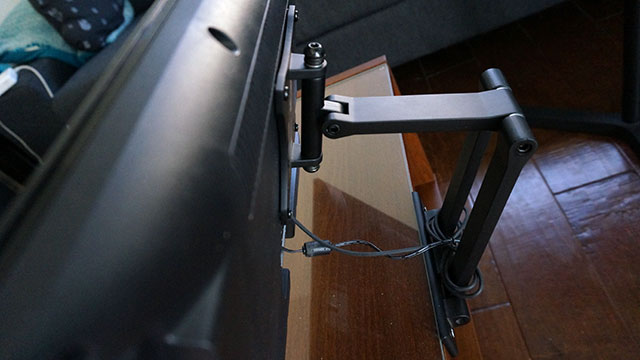
Mounting your screen requires almost no effort. If using an IKEA BOKSEL or BESTA, you want to mount it to the back of the unit so the screen faces forward (see image for reference). If using another type of table, you may prefer to mount it in the front if it doesn’t obstruct any drawers. Either way, pick your position and follow these steps:
- Unscrew the stand from your television and remove it. (You should probably save it for the future, in case you need it.)
- Unscrew the four screws on the back of your television’s VESA mount (if they exist — if not, you can use the screws that came with your articulating arm mount).
- Set the TV aside and mount the arm on the coffee table in accordance with its instruction manual. For the most part, this should should involve nothing more than drilling two screws through holes in the back of the mount and into the table.
- Using the four VESA mount screws you removed (or that came with your articulating arm), attach the back of the television to the arm’s mount. You may want to recruit a friend to help you hold it in place while you get the first two screws in to make sure everything lines up correctly throughout the entire process.
- Use the tool (likely an Alan key) included with the articulating arm to tighten its joints or your television will just ease itself out of your desired position. You need to tighten multiple joints with a good amount of force — especially if you purchased a heavier flat panel — to ensure it stays put.
That’s it! Now you have a television set mounted to your coffee table. The remaining steps will put it to good use.
Step 3: Route Your Cables
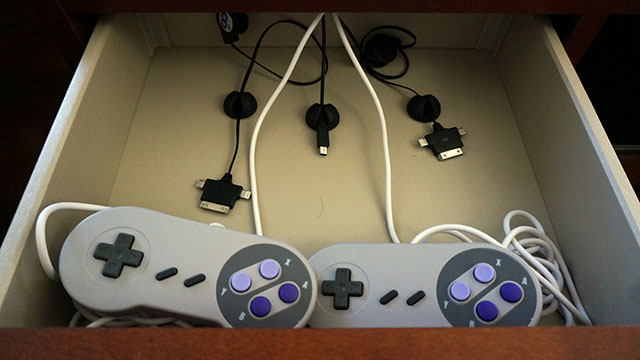
Before you get to the good part, where we set up the arcade, you need to route all your cables and make sure you have power available to everything and anything that the table needs. Follow these steps to get everything in the right place (the front-left compartment on the IKEA BOKSEL and BESTA):
- Route your extension cord through the hole in the bottom of your table’s front side and connect it to the USB charging power strip.
- Connect microUSB cable to one of the 1A ports on the charger. (You’ll connect this to the Raspberry Pi once ready.)
- Plug your television’s power cable into the USB charging power strip and run its power cable through the back of your coffee table and up into the television. Route the HDMI cable the same way, but only plug it into the TV — we’ll plug it into the Raspberry Pi later.
- Connect your three charging cables to the remaining USB ports on the USB charging power strip, then route them through the back of the drawer and leave them inside. This way you’ll have access to charging cables when you open the drawer.
- Mount your USB hub on the front compartment’s inner wall where you store the other electronics. Attach its USB cable and, if necessary, its power cable. Plug the power cable into the USB charging power strip.
- Place your game controllers in the coffee table’s drawer or upper shelf (unless you purchased a big arcade stick, which won’t fit). Pull their cables back behind the drawer/shelf and plug them into the USB hub.
- Stray cables get in the way, so you may want to pin them down in certain places. I used Cable Drops to do this in the drawer and on the back of the coffee table to minimise the mess.
Now you’ve routed all your cables, leaving a few things disconnected. Once you have your Raspberry Pi set up, you’ll connect it to the cables you left hanging.
Step 4: Set Up Your Raspberry Pi
Finally, you need to set up your Raspberry Pi to emulate your retro dreams. If everything goes to plan, this part will take less time than the previous steps. You can follow the simplified steps below or read our complete guide for detailed information.
- Download RetroPie Project image file and flash it to your SD card using Win32DiskImager (Windows) or RPI-sd card builder (OS X). (You can find detailed instructions on SD card flashing in our Raspberry Pi beginner’s guide.)
- Put the SD card in your Raspberry Pi, then put the Raspberry Pi in your coffee table. Connect the HDMI cable first, then the USB cable from your hub, and then the micro-USB cable to power it on. You may also want to connect an ethernet cable now to provide your Raspberry Pi with network access, which you’ll need later.
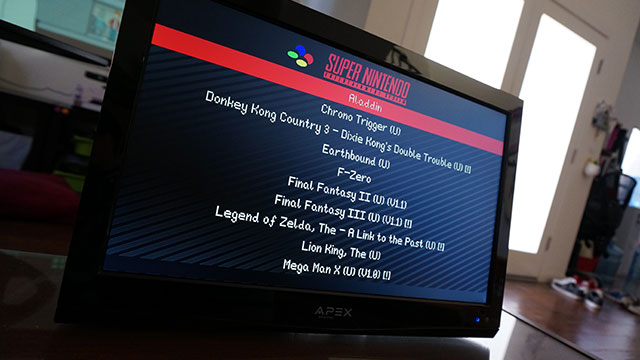
- Follow the on-screen setup instructions to map your controller(s) to functions in EmulationStation.
-
Connect a USB keyboard, press F4 to exit EmulationStation and get to the command line, and then type the following lines:
cd RetroPie/emulators/RetroArch/tools
./retroarch-joyconfig >> ~/RetroPie/configs/all/retroarch.cfg
- When prompted, press the buttons on your controllers to map them to their desired functions. This will allow your controllers to work in the emulators.
-
Type ifconfig to find your IP address and write it down. (It will probably look like
192.168.1.xxxor10.0.1.xxx.) - Open up an SFTP-cable application (like CyberDuck) and connect to your Raspberry Pi. To do this, enter the Raspberry Pi’s IP address for the server, pi for the username, and raspberry for the password.
- Find your way to the /home/pi/RetroPie/roms directory and copy any game ROMs you want to play.
-
Type
sudo rebootto restart the Raspberry Pi. Unplug your keyboard (and the ethernet cable, if you want).
Following those steps will complete the basic setup, but you should definitely read our detailed guide to learn how to customise your Raspberry Pi emulators even further.
Step 5: Play!
Holy crap, you’re done! Now you can play games and charge your gadgets to your heart’s content. You may notice, however, that we didn’t use most of the storage in these tables. That means you don’t have to stop here. You can use the extra drawers and shelves to add even more functionality to your table. Here are a few ideas to get you started:
- Add an old or cheap laptop (like a netbook or Chromebook) to use as a guest computer, always ready when someone comes over.
- Add more charging ports (your USB hub can probably charge a few devices).
- Store commonly used items, like cables and controllers for other systems.
- Store your coffee table books and other reading material.
- Do something truly crazy, like add an aquarium.
Whatever you decide to do with your table, make it functional! Give that space a purpose so you have a piece of furniture that does more than take up space in your living room and hold your drinks.
Comments