Like Marcia Hines, you may have the music in you, but recording and arranging it requires skill and technology. You can have a lot of fun making music, but getting a good recording and arrangement of your song requires some work and knowledge. Last week we learned to record audio. This week we’re going to start using virtual instruments.
Illustration by David Broderick
Note: This is primarily a video lesson and you’ll get a lot more information from watching the video above. The instructions below are useful for reference.
What You’ll Need
If you’ve been participating in this morning school from our first lesson onward, you should have all the equipment you need to get started. If not, read through the first lesson before proceeding. We’re not going to make equipment recommendations here, but you should know what equipment you’re going to need to participate in this lesson:
- Your computer with the DAW software of your choice installed (we’ll be using Cubase)
- A digital MIDI keyboard hooked up over USB or through a MIDI-to-USB interface
- Virtual instruments of your choosing (a piano is a good one to start with)
- About 30-40 minutes of your time
Set Up An Instrument
Before you can play and record with a virtual instrument, you need to set one up. To do so, follow these instructions:
- Open up the Virtual Instruments panel in Cubase (or its equivalent in your DAW software of choice) by going to the Devices menu and choosing Virtual Instruments.
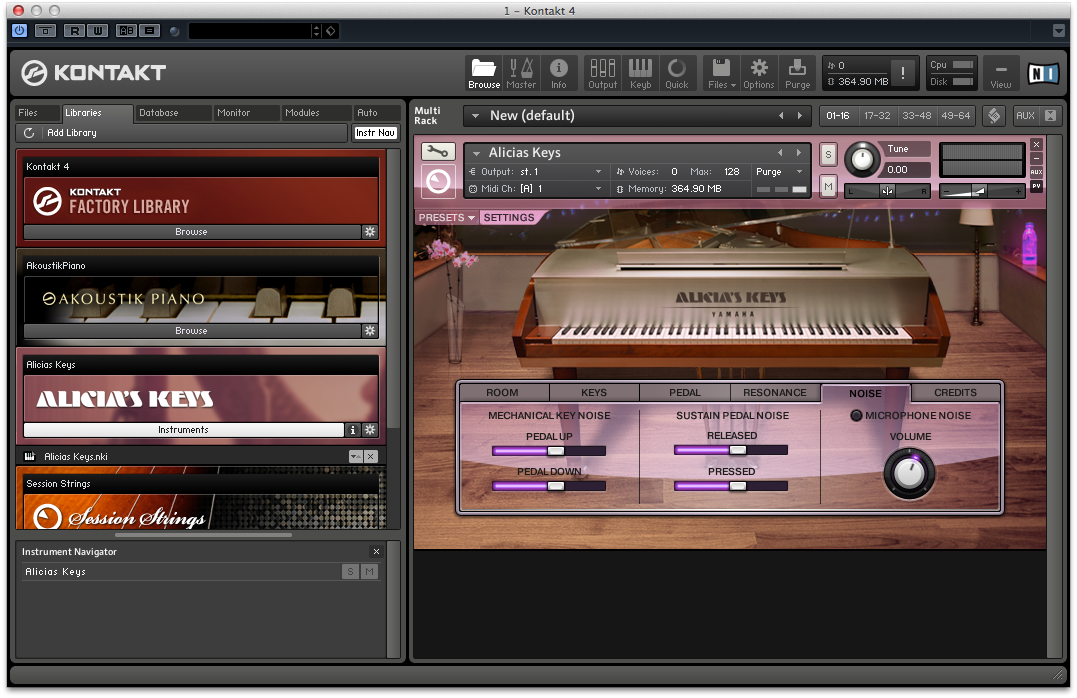
- Click one of the empty spaces to choose from virtual instruments you’ve installed to load it up. (We recommend starting off with a piano for your first instrument because it isn’t complicated.)
- By default, Cubase will ask you if you want to automatically create a MIDI track for this instrument. In many cases you will want to do this, but because we’re learning how to set things up you should decline this time. Instead, go to the Project menu, choose Add Track, and then choose MIDI.
- By default you’ll create just one MIDI track, so unless you want to make multiples you can just press OK and let Cubase make the track.
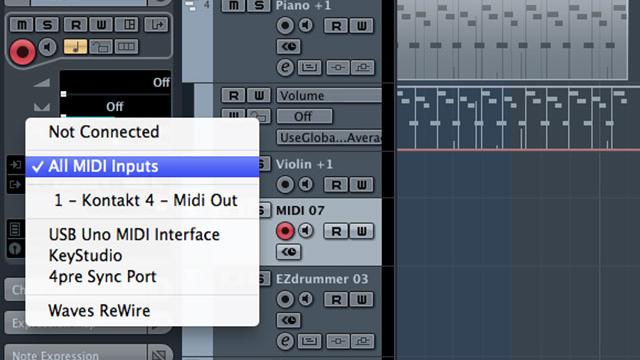
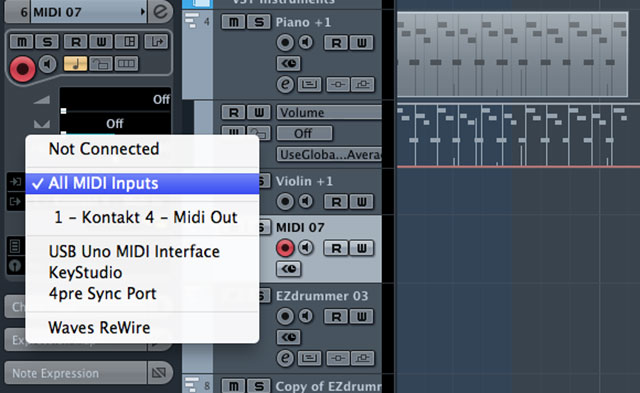
- You’ll see the track pop up in the main window. Click on it if it isn’t already selected and look at the settings to the left. You should be able to set the track’s input and output. By default, the input will be set to “All MIDI Inputs.” This is fine if you’re only using a single MIDI input or only one input at a time. If you and another are playing jointly, you’ll want to set this to a specific input by clicking on it and finding the one you want. As for the output, set it to the instrument you want to use for that track.
- If your output only hosts one instrument, you’re all set. If you’re using a virtual instrument capable of hosting multiple instruments (such as a sampler like Kontakt) you also need to tell the MIDI track which MIDI channel to use. Underneath the output, you’ll see an option to select a channel. Select the channel that corresponds with your desired instrument. (If you go into the instrument’s settings panel you’ll see which one this is.)
- Press the record button on the MIDI track to enable recording and try playing a note on your MIDI keyboard. You should see the MIDI track respond visually on screen and also hear the note played through your speakers. If you don’t hear the note, you may have chosen an instrument that has a limited range. Try a few more on different points on the keyboard to make sure you’re pressing a note that actually has a sampled sound attached to it.
This may seem like a lot of work, but it’s actually very easy to set up a track once you get the hang of it. That said, it can be a little frustrating to follow text-based instructions. With all of these lessons, you’ll learn everything a lot more easily by watching the included video because you’ll be able to see all the settings described in these steps.
Play And Record Your Virtual Instruments
Once you’ve set up your tracks, you can simply hit the record enable button to start playing the instruments you’ve connected to them. You don’t have to do much else to play. Similarly, just press the record button on the transporter panel to start recording anything you play just like you did when recording a microphone in the previous lesson. When recording, it helps to use something called a click track to keep time. Essentially, a click track functions just like a metronome. In Cubase, and many DAWs, you can turn it on and off with a single click in the “CLICK” section of the transport panel.
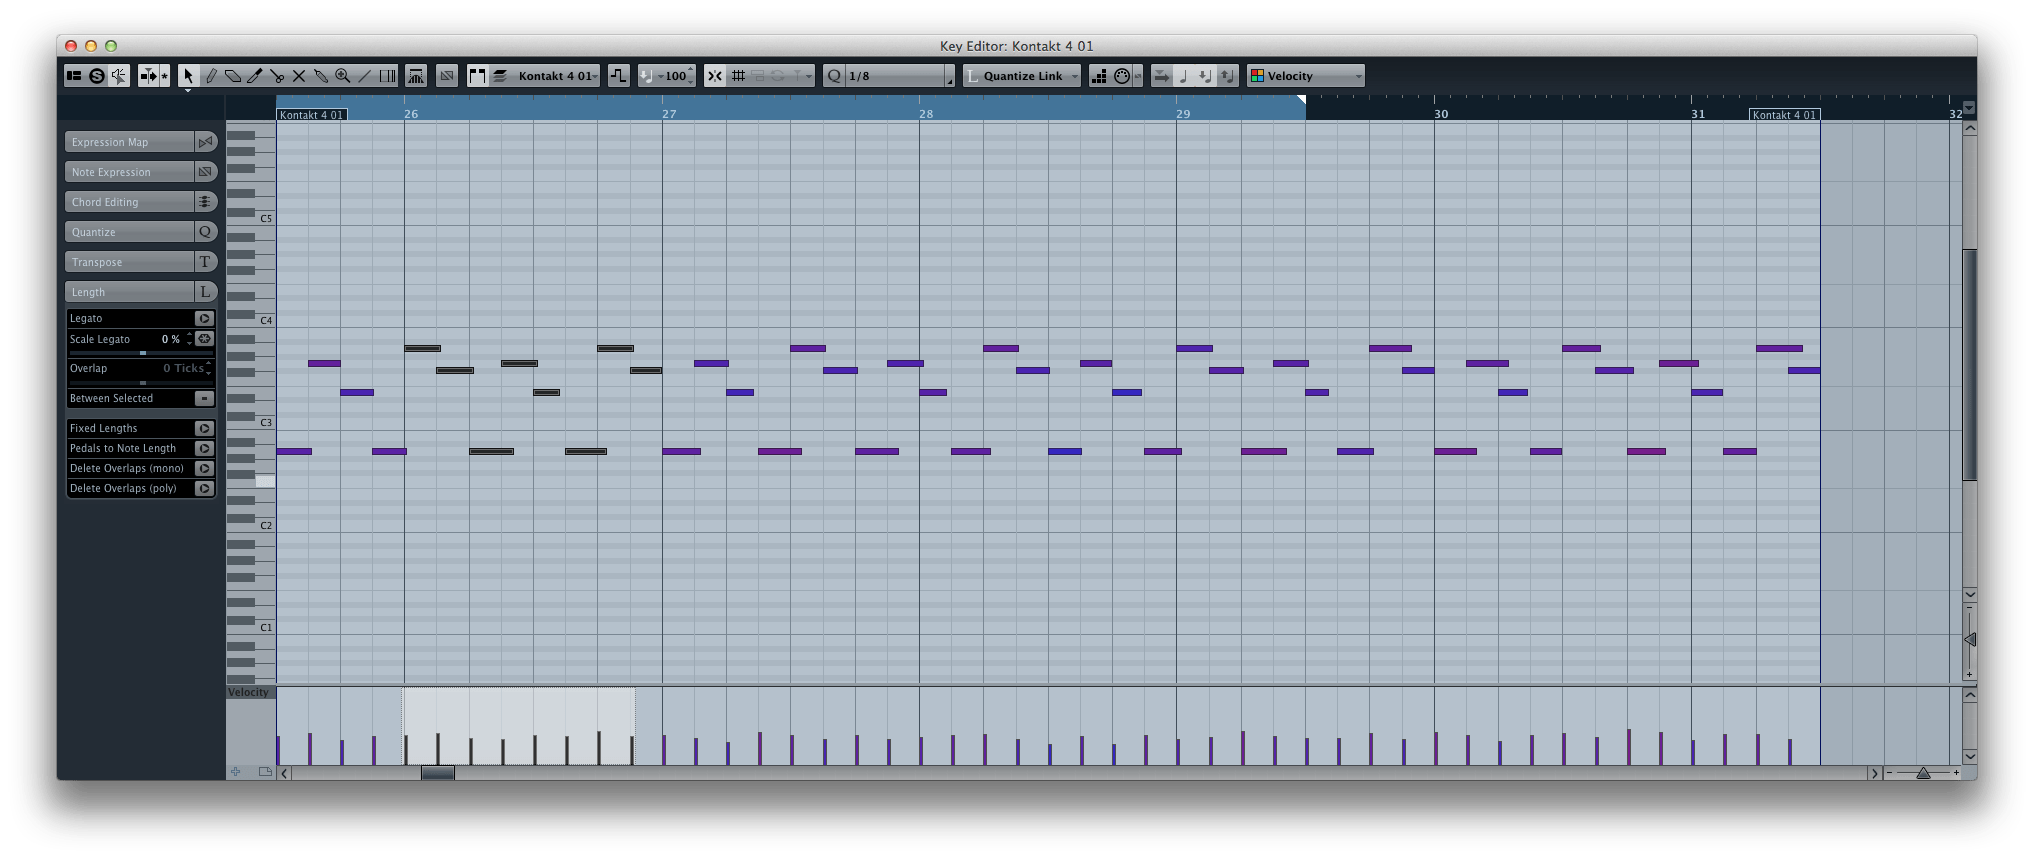
When you’ve finished recording, you may want to edit the MIDI data to fix mistakes and other issues. Just double-click on any recorded track to see the notes and their positions. They appear like an old fashioned piano roll (pictured above) and you can drag the front and back end of each note to adjust when it should be played. You can also use a function called Quantize to automatically correct notes played at the incorrect times. In Cubase, select the notes you want to fix and press the letter Q on your keyboard. It will attempt to fix your timing issues. This can, however, make your music sound robotic so you should avoid quantization whenever possible. That said, it can serve as a helpful tool for correcting mistakes when stiff perfection is what you’re going for. For more information on quantization, check out the video lesson above.
Comments
2 responses to “The Basics Of Music Production: Using Virtual Instruments”
If I know what a musical instrument sounds like, but don’t know what it’s called – how do I find it?
Trial and error and Wikipedia could probably help you, but you’d probably need to at least know what family the instrument belongs to, and/or its country of origin. If you’ve heard it in another music track before you could link it and see if any readers know the instrument (or try on a music forum).