Like any computer, a Mac is prone to serious problems over the course of its life. A wide variety of things can go horribly, horribly wrong. From a complete failure to start, to that terrifying kernel panic screen, here’s how to troubleshoot (and hopefully fix) what’s plaguing your Mac.
For the most part, the problems you run into on a Mac are pretty universal across all versions of OS X, but we’ll stick to the most modern operating systems here: Lion and Mountain Lion (most of these tips should also work with Snow Leopard though). If you’re still covered by Apple’s warranty or AppleCare, the easiest solution is to walk into the Apple Store and have them fix everything for free. If you don’t want to waste time, or you’re not covered anymore, you can do a lot of the troubleshooting yourself.
The Problem: Blue or Grey Screen on Startup
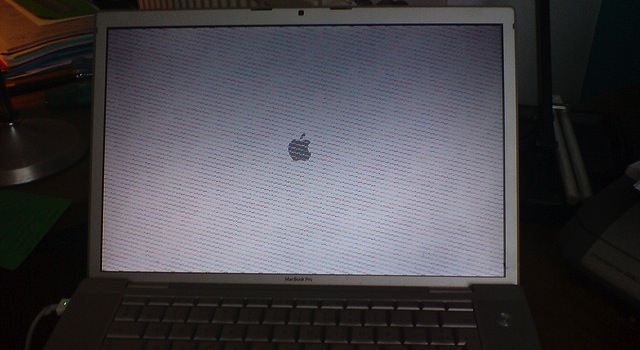
When you turn on your computer and get a grey or blue screen (or it gets stuck at the Apple logo) that never loads OS X, it’s a good cause for concern. This can happen for a number of reasons, so it’s one of the most frustrating things that can happen to a Mac, and troubleshooting it is no easy task. So, let’s break it down into a few steps you can take to figure out what’s going on.
Step 1: Disconnect All Peripherals
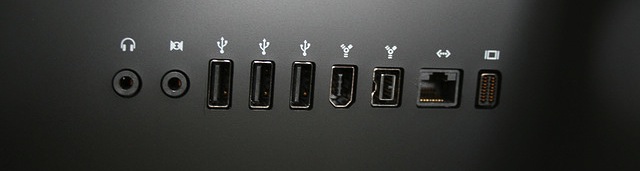
One of the main causes of a grey or blue screen on startup is incompatible hardware connected to the machine. This might be a printer, an external hard drive, or even a USB hub. So disconnect everything except the mouse and keyboard, and restart your computer.
If your Mac starts this way, then it’s an issue with one of those peripherals. You have to trial-and-error your way through to figure out which one, so connect them back into your computer one by one and restart. If one of them causes your computer to hang on the grey screen again, you’ve found your issue.
If you figure out the problematic peripheral, it’s time to do a little research. Head to the manufacturer’s website and see if others are reporting the same problem. You might be able to fix it with a software update or a firmware update to the device.
If no devices are causing problems, and your Mac still won’t boot, then it’s time to dig a little deeper.
Step 2: Perform a Safe Boot
Safe boot makes your Mac boot up with the minimum amount of drivers needed to make it work, and it checks your hard disk in the process (it might take a bit longer to boot up). Start up your computer while holding down the Shift key until the Apple logo passes. If your Mac starts up with the safe boot, go ahead and restart the computer again and see if it boots up normally (as odd as it sounds, this fixes the problem a surprising amount of the time). If not, it’s time to give the hard drive a closer look.
Step 3: Run Disk Utility
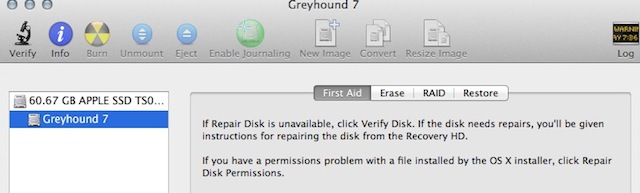
If you still can’t boot up OS X normally, it’s time to run Disk Utility and check out your hard drive:
- Boot up your computer while holding down Command+R (if you’re running Snow Leopard or earlier, find your OS installation disc, put it in the drive and reboot your computer holding down C). This will boot you into a diagnostic mode.
- Select the Disk Utility Option.
- Select your hard drive and click “Verify”. Wait for Disk Utility to finish running.
- If problems pop up, click “Repair Disk”.
- If nothing pops up, click “Repair Permissions” and wait for Disk Utility to scan your hard drive again.
- If Disk Utility finds and repairs some problems, go ahead and reboot.
In a lot of cases, running Disk Utility will catch problems with startup issues. Sometimes, a single file with the wrong permissions can cause the whole system to collapse, or if something’s not in the right place, it won’t boot. If this doesn’t work, you have a lot more problems to look into.
Further Resources
If the above solutions don’t work, it’s time to dig a lot deeper into your system. Your problem could range from a bad hard drive to a faulty logic board. Here are a few more steps that should help you single out the problem:
- When Good Macs Go Bad: Steps to Take When Your Mac Won’t Start Up [Macworld]
- Mac OS X: grey screen appears during startup [Apple]
- How to Fix Common Max Startup Problems [Cult of Mac]
The Problem: Persistent Beach Ball

Ah yes, the spinning beach ball that refuses to go away. Sometimes it’s a small, application-specific problem that’s easy to solve, but other times it’s part of a much bigger mess. If your Mac is tossing up the spinning beach ball consistently, it’s time to figure out the exact cause.
Step One: Check Activity Monitor
Your Mac will usually get a spinning beach ball when it’s somehow overloaded. More often than not, this just lasts a few seconds and goes away, in which case you can ignore it. If it doesn’t, the best way to figure out what’s going on is to launch Activity Monitor and pinpoint which program is causing the problem.
- If you need to, force quit any programs that are potentially causing the beach ball (Command+Option+Esc).
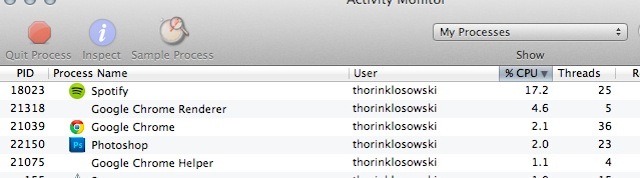
- Launch Activity Monitor (Applications > Utilities).
- Now go about your daily usage. If the beach ball comes up, switch over to Activity Monitor and see which app is taking up the biggest CPU load (oftentimes this will spike at 100%).
If it’s a powerful piece of software like Photoshop that’s causing problems, then it’s a good chance you need more RAM in your computer. RAM can help with multi-tasking issues, and if the beach ball comes up when you’re running a few programs at once additional RAM will help (this is very easy to install yourself). If not, and it’s something lightweight like a file syncing service like Dropbox or an instant messenger client like Adium, then it’s probably a problem with the software itself. Try quitting the app and seeing if the problem persists. If the beach ball doesn’t return, then you have your problem. Check the developer’s web site to see if they’ve issued an update, run Software Update (Apple Logo > Software Update), or get in touch with the developer if no update is available.
Another possible problem is that your hard disk is getting close to full.
Step Two: Reclaim Hard Drive Space

When your hard disk is full it can cause spinning beach ball problems. For a lot of us, this just means cleaning up two folders: your trash and your downloads folder:
- Right-click the trash can icon and select “Empty Trash.” If you have a lot of stuff in there or you haven’t done this recently you might get enough space to save your file.
- Now head to your downloads folder (Users > Your Name > Downloads). Go through and delete any files you no longer need.
In a lot of cases, doing the above two steps can free up enough space to continue working. That said, you might still need to free up even more space. To make this process easy, we like Disk Inventory X. With Disk Inventory X, you can look at your hard drive and find the biggest space hogs quickly so you can delete them and move on. It takes a little time, but if you follow our guide you’ll have your hard drive cleared out in no time. Of course, it might also be time to just upgrade the size of your hard drive.
Further Resources
A few other oddball things can cause the spinning beach ball. If none of the above work, here are a few more resources that will help you troubleshoot the problem.
The Problem: Kernel Panics
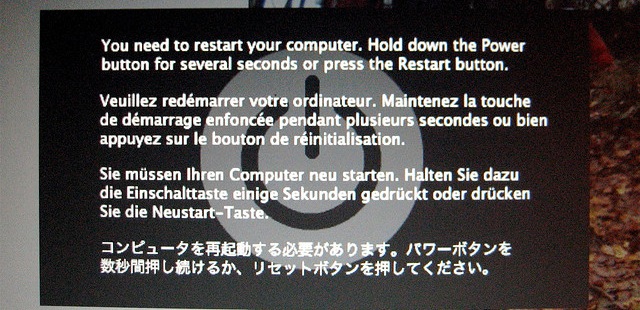
If you’ve ever experienced the black and grey kernel panic screen above, then you know how scary and completely unhelpful it is. When one application has a problem, you get the spinning beach ball mentioned in a previous section, but when multiple programs fail — or the operating system itself — you get a kernel panic. Thankfully, it’s not (usually) as big of a problem as it seems.
Step 1: Reboot and See If It Happens Again
In most cases, a kernel panic will force you to reboot you computer. Let this happen, and if you load right back into OS X, continue working on your computer as usual. In a lot of cases, the issue resolves itself, and you can move along. If not, or if it happens only when you use specific programs, it’s time to figure out what’s going on.
Step 2: Update All Your Software

Running Software Update can often fix kernel panic problems, because, more often than not, it’s a software issue. Click the Apple icon in the top left corner and select “Software Update”. Let it look for and install new software to see if it fixes the problem.
If the kernel panic happens when you’re starting up and you can’t load OS X, then you’ll need to try starting up in safe mode. Reboot the computer and hold down the Shift key until the Apple logo appears. After a little while, you’ll load up safe mode, a stripped down version of OS X. Here, you can still run Software Update the same way as you usually would.
It’s also worth visiting the developer’s website to see if other people are having a problem with a recent update or release. If it’s one specific app that always causes the kernel panic, it’s best to not use it until an update is issued.
Step 3: Check Your Login Items
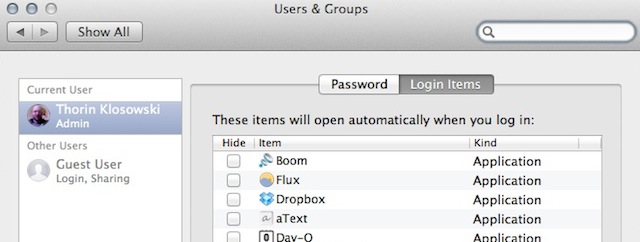
If no software needs updating and you can’t get your computer to start without a kernel panic, then it might be an issue with one of the programs you have loading up automatically on startup. That means its time to clear out your login items. While you’re still in safe mode, you can remove any apps that start automatically:
- Open up your System Preferences (Applications > System Preferences).
- Select “Users and Groups” and select your user ID.
- Select the “Login Items” tab.
- Select each of the applications you have and click the minus sign to remove them from the list.
- Reboot and see if you can start without a kernel panic. If so, one of those apps is causing the problem. Try loading up each to see which one causes it again.
Further Resources
If the kernel panics keep happening and no specific app seems to cause it, you might have a bigger problem. Things start to get really tricky if you’re getting kernel panics and you can’t isolate the issue with any of the above methods, so here are a few guides we’ve found helpful for pinpointing the problem with more advanced measures.
- OS X: Kernel Panics [Apple]
- How to Troubleshoot a Kernel Panic [Macworld]
- Cnet’s Kernel Panic Page (covers a lot of common software-specific issues) [Cnet]
Problem: Your Display Isn’t Working or Is Distorted
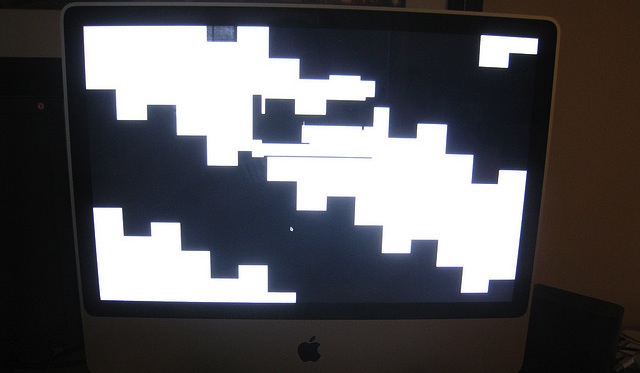
This one hit me recently on an iMac. Out of nowhere, the screen turned a crazed green and yellow, and then the computer shut down. After several attempts to reboot (and trying just about everything listed above) it eventually refused to turn on. In my case, my graphics card was toast and I had to get it replaced, but that’s not always the problem. Here are a few things you can do to troubleshoot and figure out exactly why your video card or display is freaking out.
Step 1: Reset the PRAM/VRAM and SMC
This doesn’t always do that much good, but it’s the easiest thing to do and only takes a few seconds. Turn on your Mac and hold down Command+Option+P+R until the computer reboots. This resets the PRAM/VRAM, which is where things like startup disk selection, screen resolution and speaker volume are stored. Sometimes this can correct display issues, and, if so, continue using your Mac as you did.
The other option is to reset the SMC (System Management Controller). This controls everything on your computer ranging from the power to the fans. Every Mac has a slightly different process for doing this, so head to Apple’s official SMC Reset page, find your model and follow the instructions (this usually involves unplugging the power cord on a desktop or removing the battery on a laptop). Once you reset the SMC, a lot of your settings are restored to factory defaults, and your display problems may get solved.
Step 2: Boot Into Safe Mode

The next step to figure out what’s going on with your graphics card or display is to boot into safe mode to see if the problems persist. Power on your Mac and hold down the Shift key until you get past the Apple logo. This boots into a stripped-down version of OS X.
Here, you can see if the display problems are persisting. This might be screen glitches, pixelated graphics or large black squares everywhere. If they are, it’s probably a hardware issue and you should move on to the next step. If not, it’s likely a software problem, and you have a few different options for troubleshooting:
- Restart the computer again in normal boot mode to see if the problem resolves itself (this does actually happen).
- If not, go back into Safe Mode and check for software updates (Apple logo > Software Updates). If you get an update for your graphics card or logic board, install it.
- Double-check your display options by going into System Preferences (Applications > System Preferences). Choose “Displays” and make sure the resolution and refresh rate are correct.
- If you’ve recently installed a software update that possibly caused the issue, it’s also worth checking out Apple’s recently released updates and downloading and installing the most recent combo update again. Sometimes a simple re-install can fix strange issues that might have cropped up with display drivers.
If none of those work, it’s time to run the Apple Hardware test to see if it’s a hardware issue.
Step 3: Run Apple Hardware Test
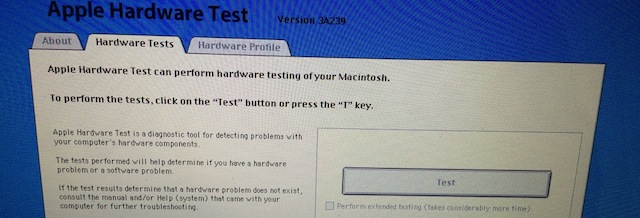
A lesser known feature of Macs is the Apple Hardware Test. Like the name suggests, this is a way to test for hardware failures on your computer. It’s not foolproof, but it might help you troubleshoot your issue moving forward.
- Reboot your Mac and hold down the “D” key until the Apple Hardware Test starts (if you’re on Snow Leopard or earlier you need to put in the install disc first).
- Select your language, and then select the “Basic test” option. Let it do its thing. If an error occurs, the Apple Hardware Test should tell you which piece of hardware is failing and you’ve found your problem. If not, select the “Perform Extended Testing” option. This might take an hour or two to complete.
While a hardware failure is never fun, hopefully the Apple Hardware test will actually show it so you can get the faulty hardware replaced. If it is a hardware problem, you can check out iFixit’s Mac Repair Guides to see if you can fix it yourself.
Further Resources
If none of the above tricks work, you can try a few other things:
- How to Troubleshoot a Faulty Display Outlet on OS X [Cnet]
- Troubleshooting issues with video on external or internal displays [Apple]
As with any computer troubleshooting, sometimes you’ll need to go through all kinds of tests and experiments to figure out what the heck is going on. If you’re lucky, the above tips will get your Mac in working order in no time.
Pictures: Hendrick Dacquin, Jamie McCall, Paul Donway, mroach
Comments
4 responses to “How To Troubleshoot The Four Most Common ‘Oh S**t’ Mac Problems”
That last issue. Seems like you neglected that users probably can’t perform most of those troubleshooting steps because they can’t actually see anything on the screen. It is worth plugging an external screen into the Mac. If it’s playing up on that, you know it’s the GPU, and not the LCD. Easy as that.
[Insert generic windows troll comment here]
I’m getting beach balls. I really want to put in a ssd on my imac, but it just seems difficult from looking at youtube videos
You forgot the biggest “Oh S**t’ Mac Problem” of them all. Getting home from the shop and realising how much you just spent 😉
Seriously though… great post. I’ve come across a couple of these on my iMac and knowing what to try would have been very handy. Mac’s are PC’s too, they are all just Personal Computers and prone to all the same glitches and issues, despite what Apple would have everyone believe.
That’s for sure.
My hardest problem with OS X? Finding decent A/V software. Had to settle for Sophos in the end as all the other variants (even Kaspersky) clearly showed they were not taking the Apple platform seriously.